-
Notifications
You must be signed in to change notification settings - Fork 183
Public Events Calendar Management
This page is a guide on how any NIST staff member working on OSCAL can add a public event to our calendar.
- You must be a member of the [email protected] alias. If you are not, please reach out to project managers.
- You must have the current Outlook client installed in your NIST macOS or Windows computer and configured for your account. (NOTE: The Outlook Web Access (OWA) client will automatically add a Microsoft Teams invite and this is undesired in almost all cases for our public events. Do not use it.)
- Open Outlook on your NIST macOS or Windows computer.
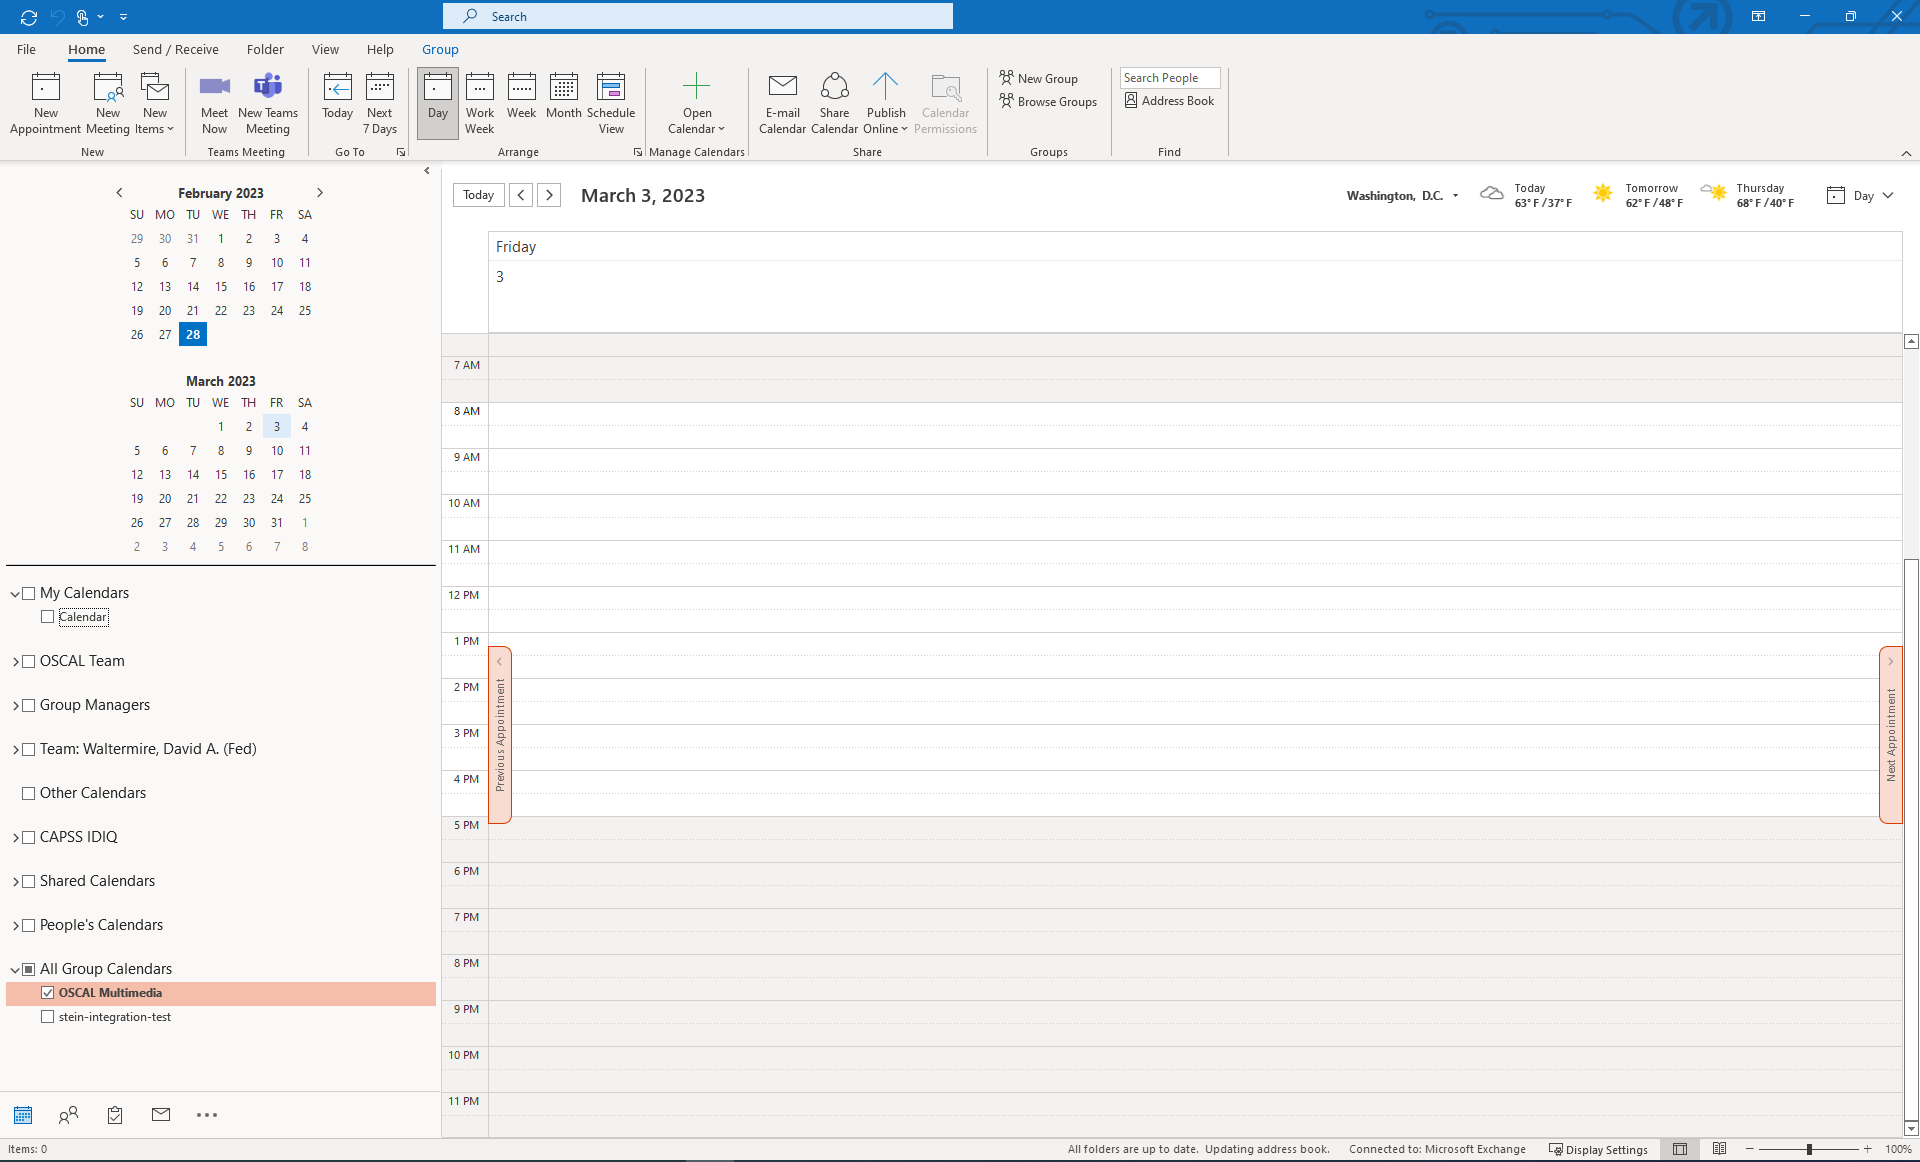
- Click the My Calendars group, select the Add Calendar sub-menu, and select the From Address Book option.
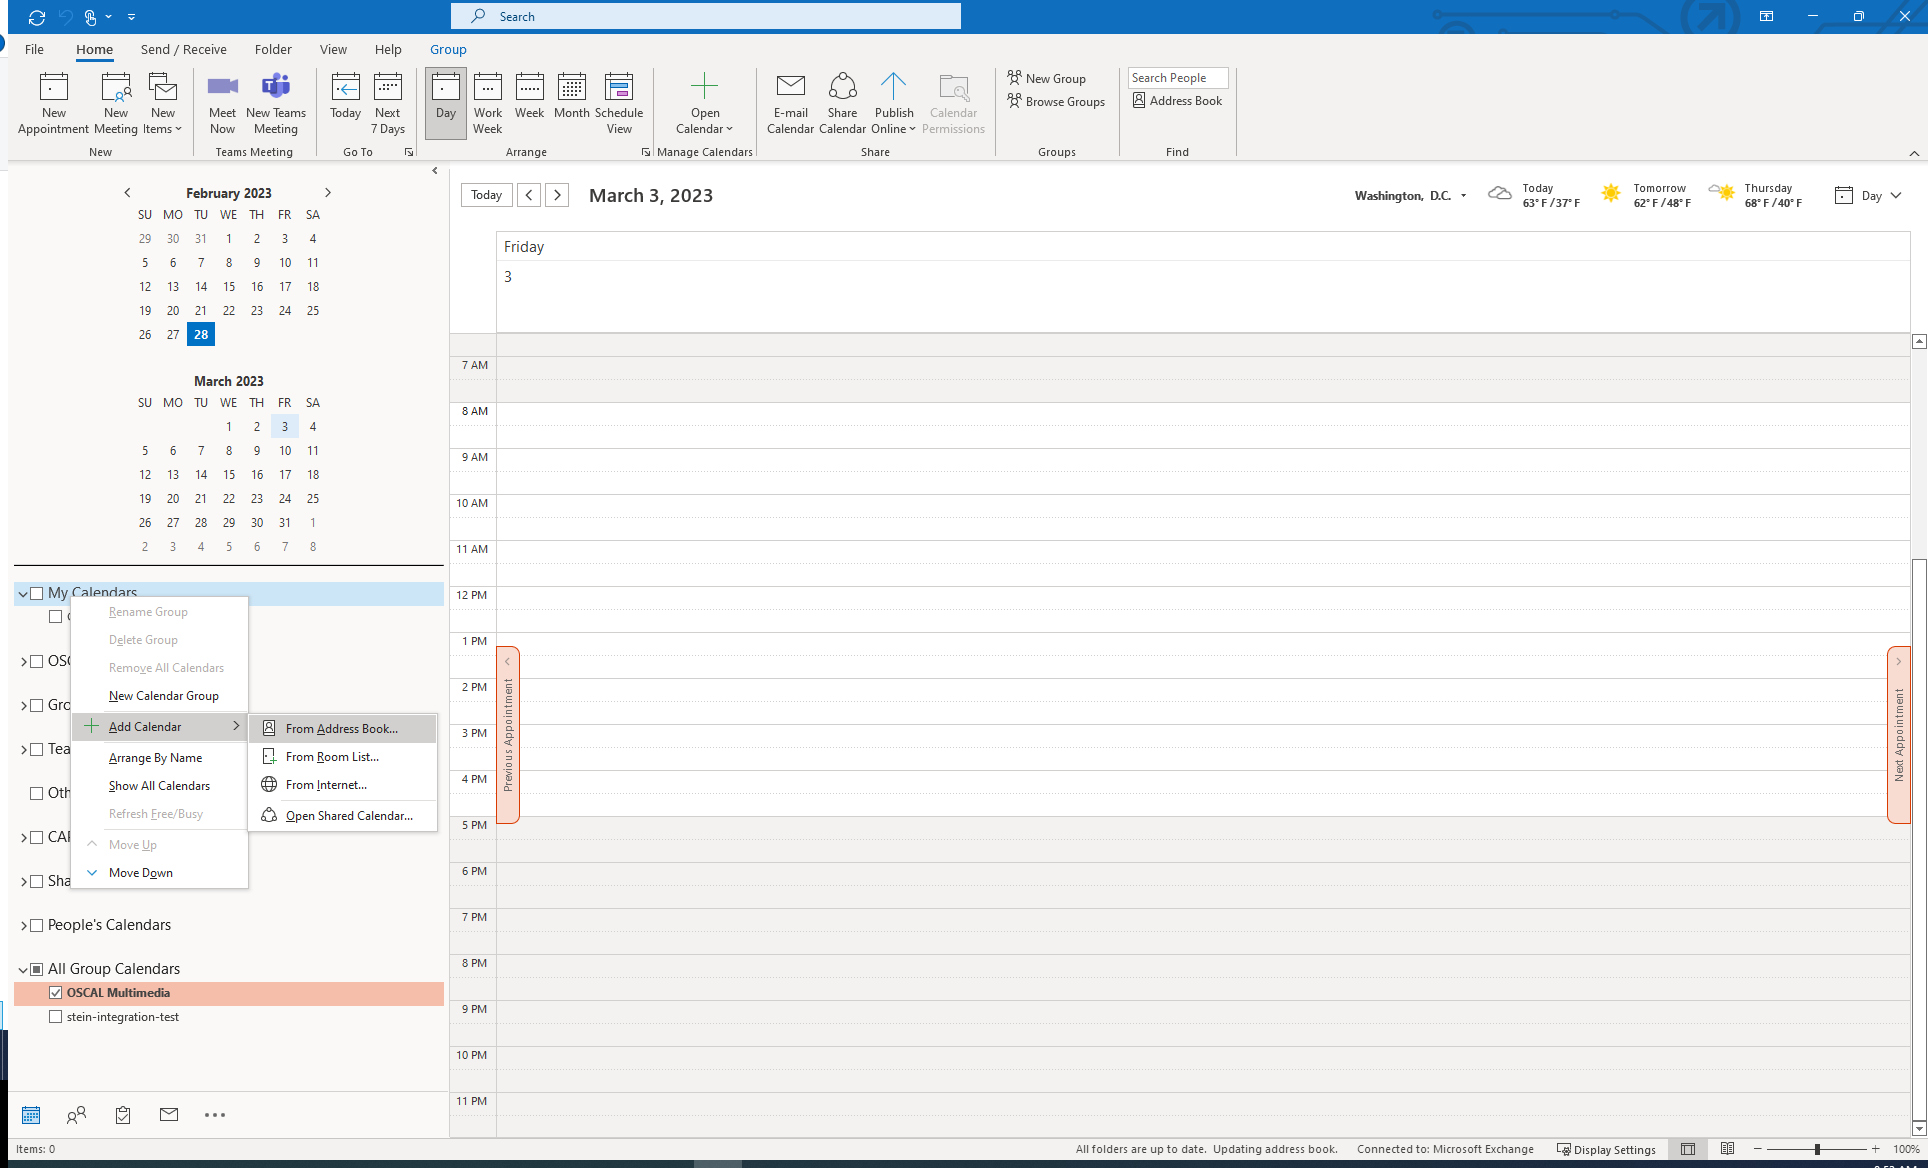
- Type
oscalevtin the search, select the All Columns radio button to query all fields, and click the Enter key on your keyboard to search for this shared calendar, and click the OK button to add it.
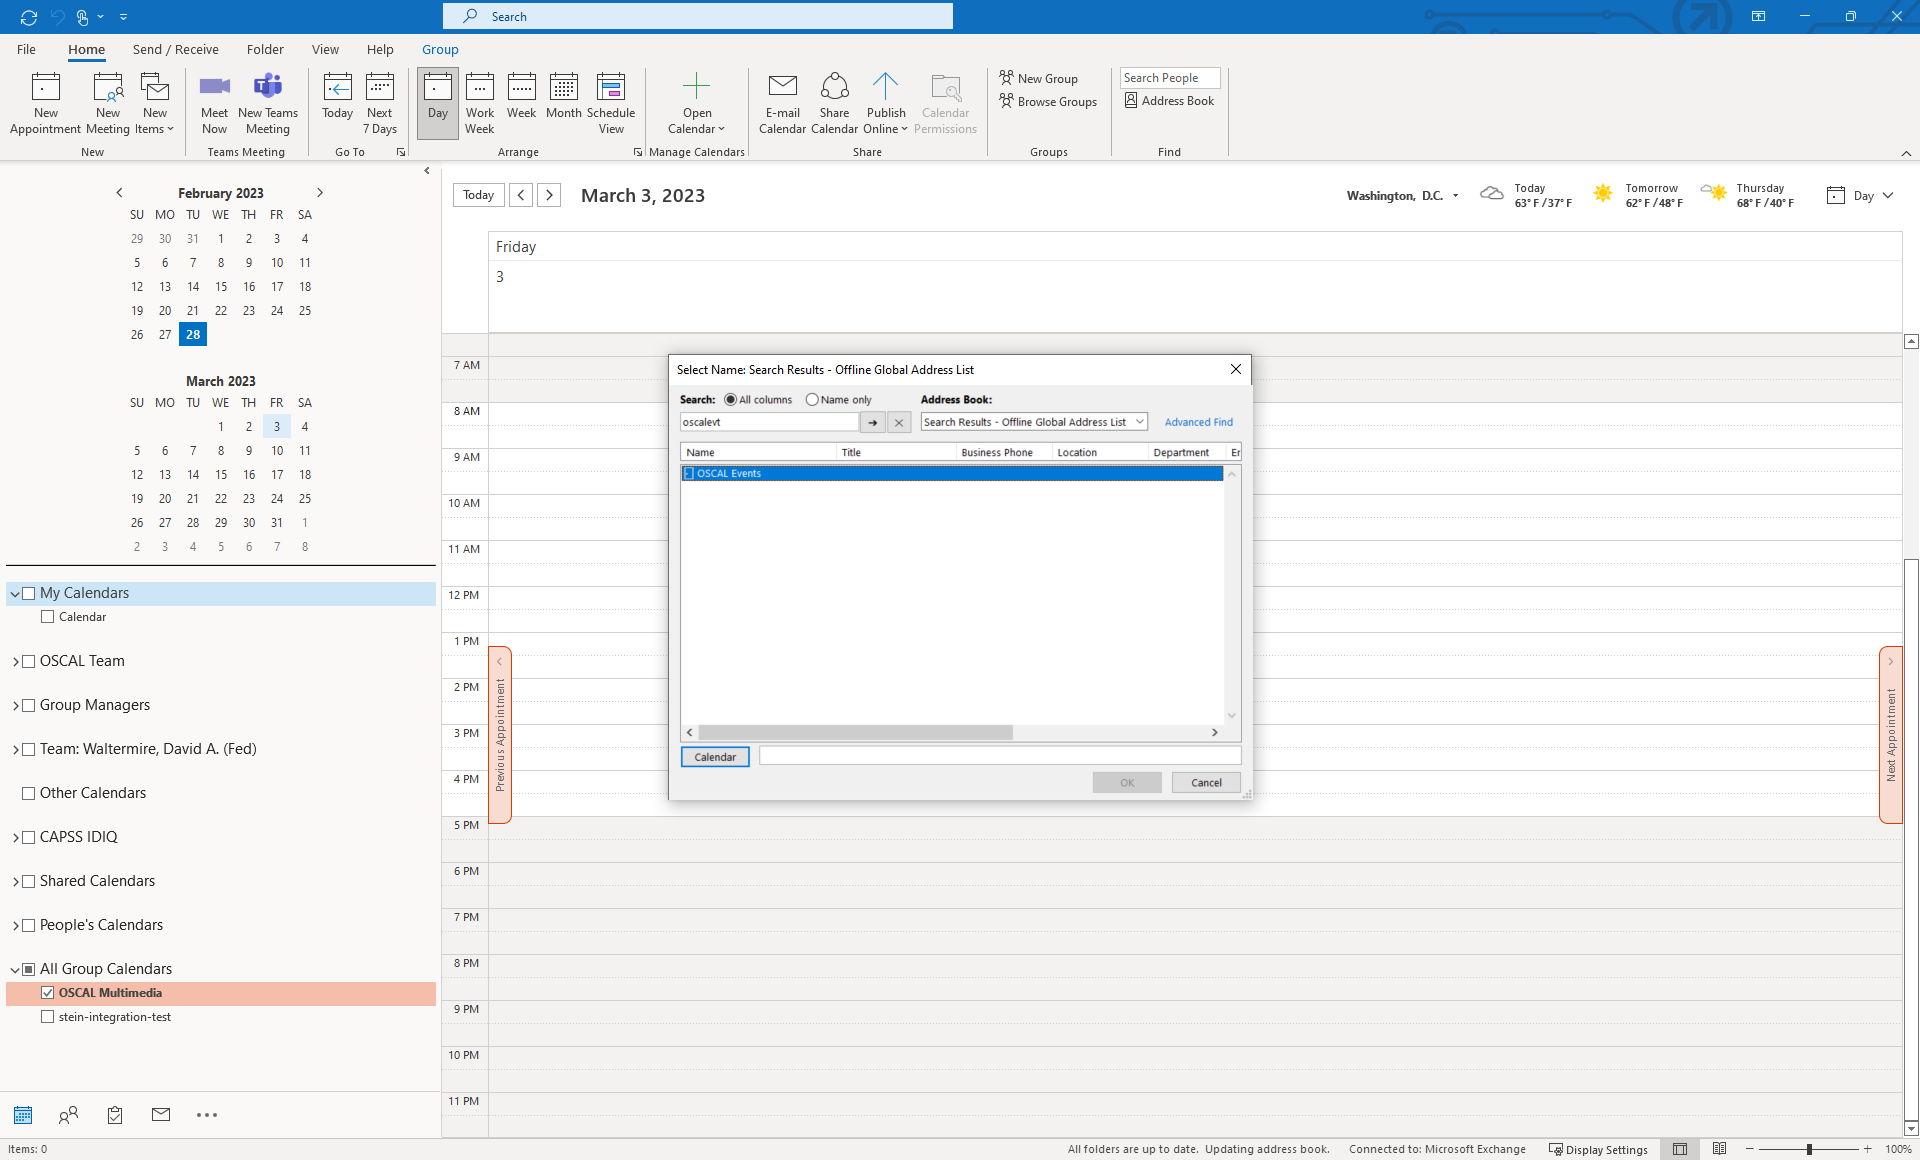
- Open the Outlook application on your NIST macOS or Windows computer.

- Deselect all calendars except the OSCAL calendar.
-
Select the desired time for event or events in the series.
-
Double-click to create the event.
-
In the event creation window, add a name for the event.
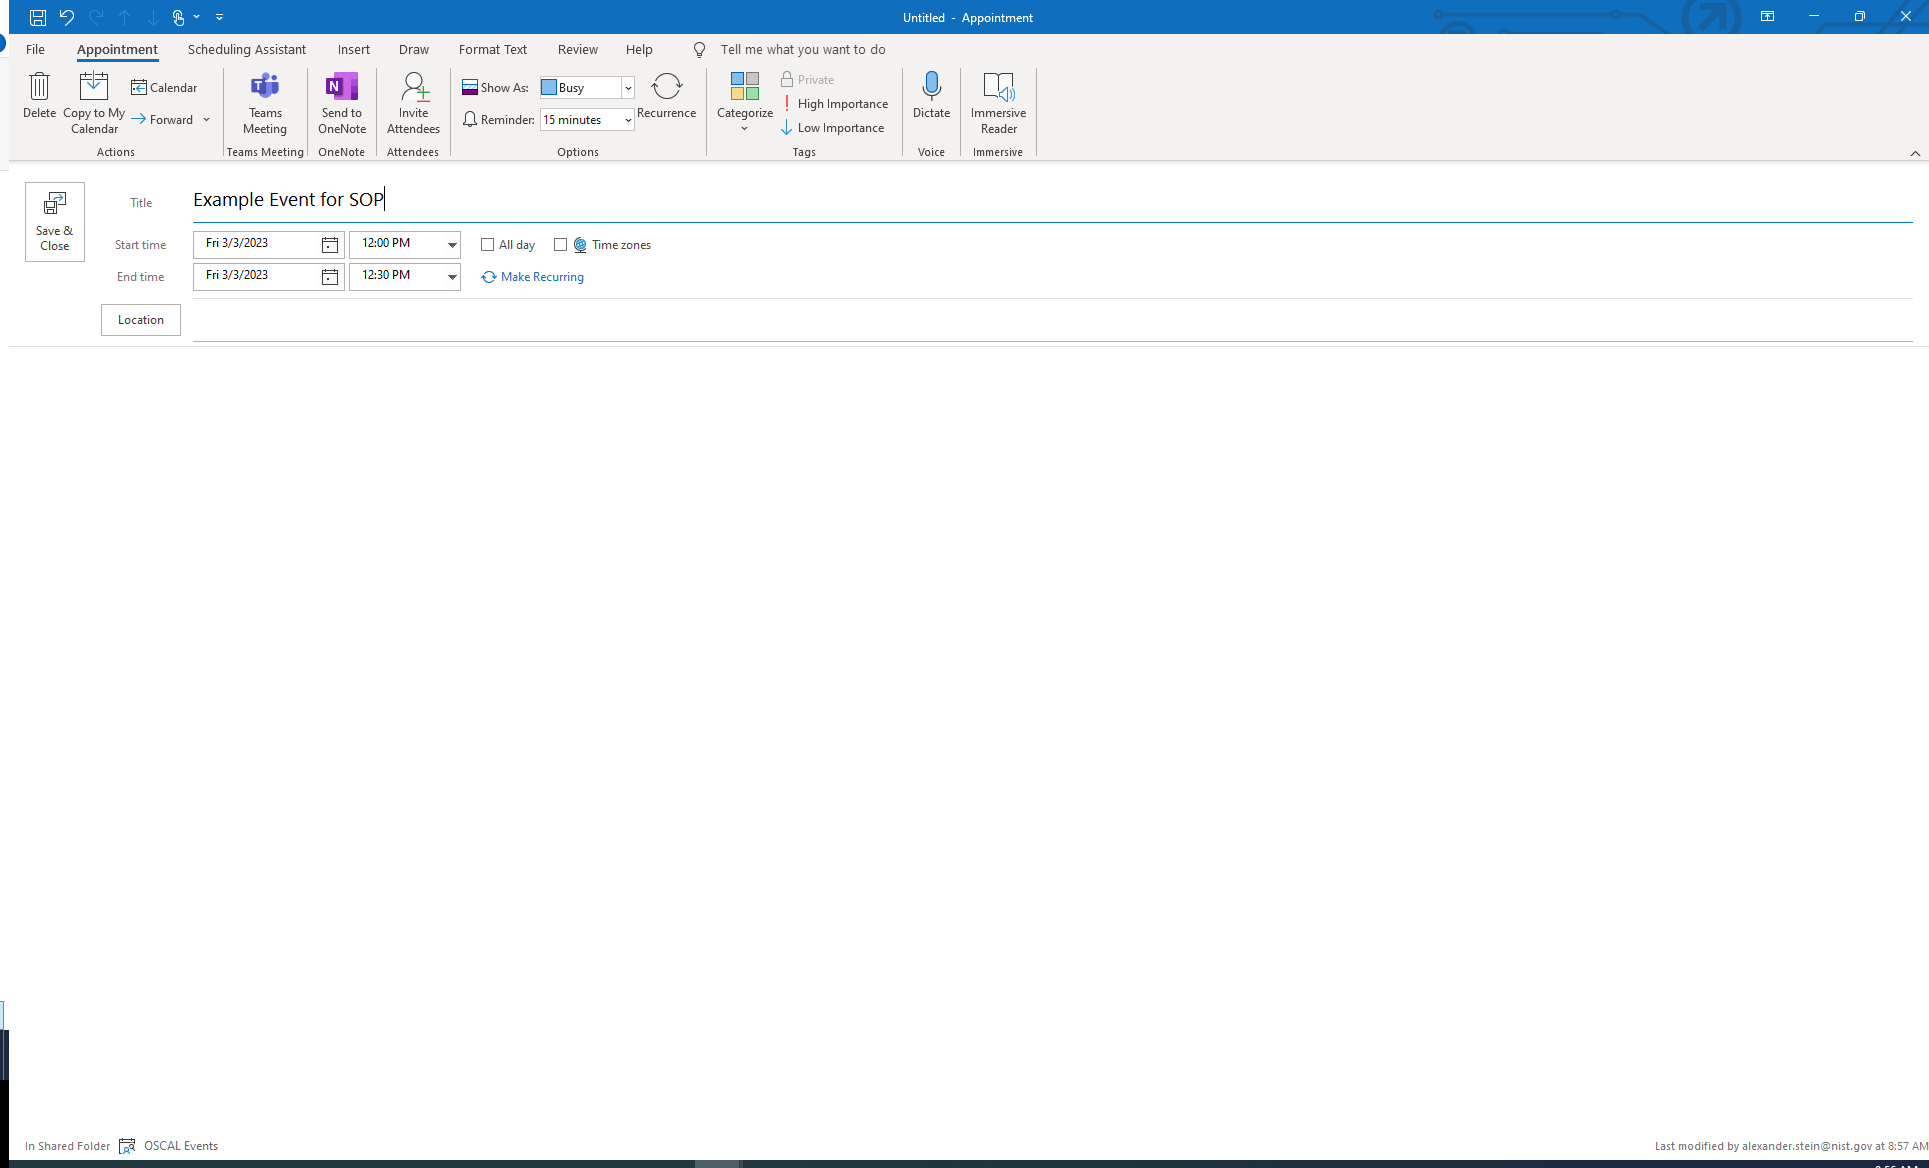
-
Click the Invite Attendees button.
-
Add the team alias ([email protected]) and the relevant mailing list for community awareness ([email protected]).
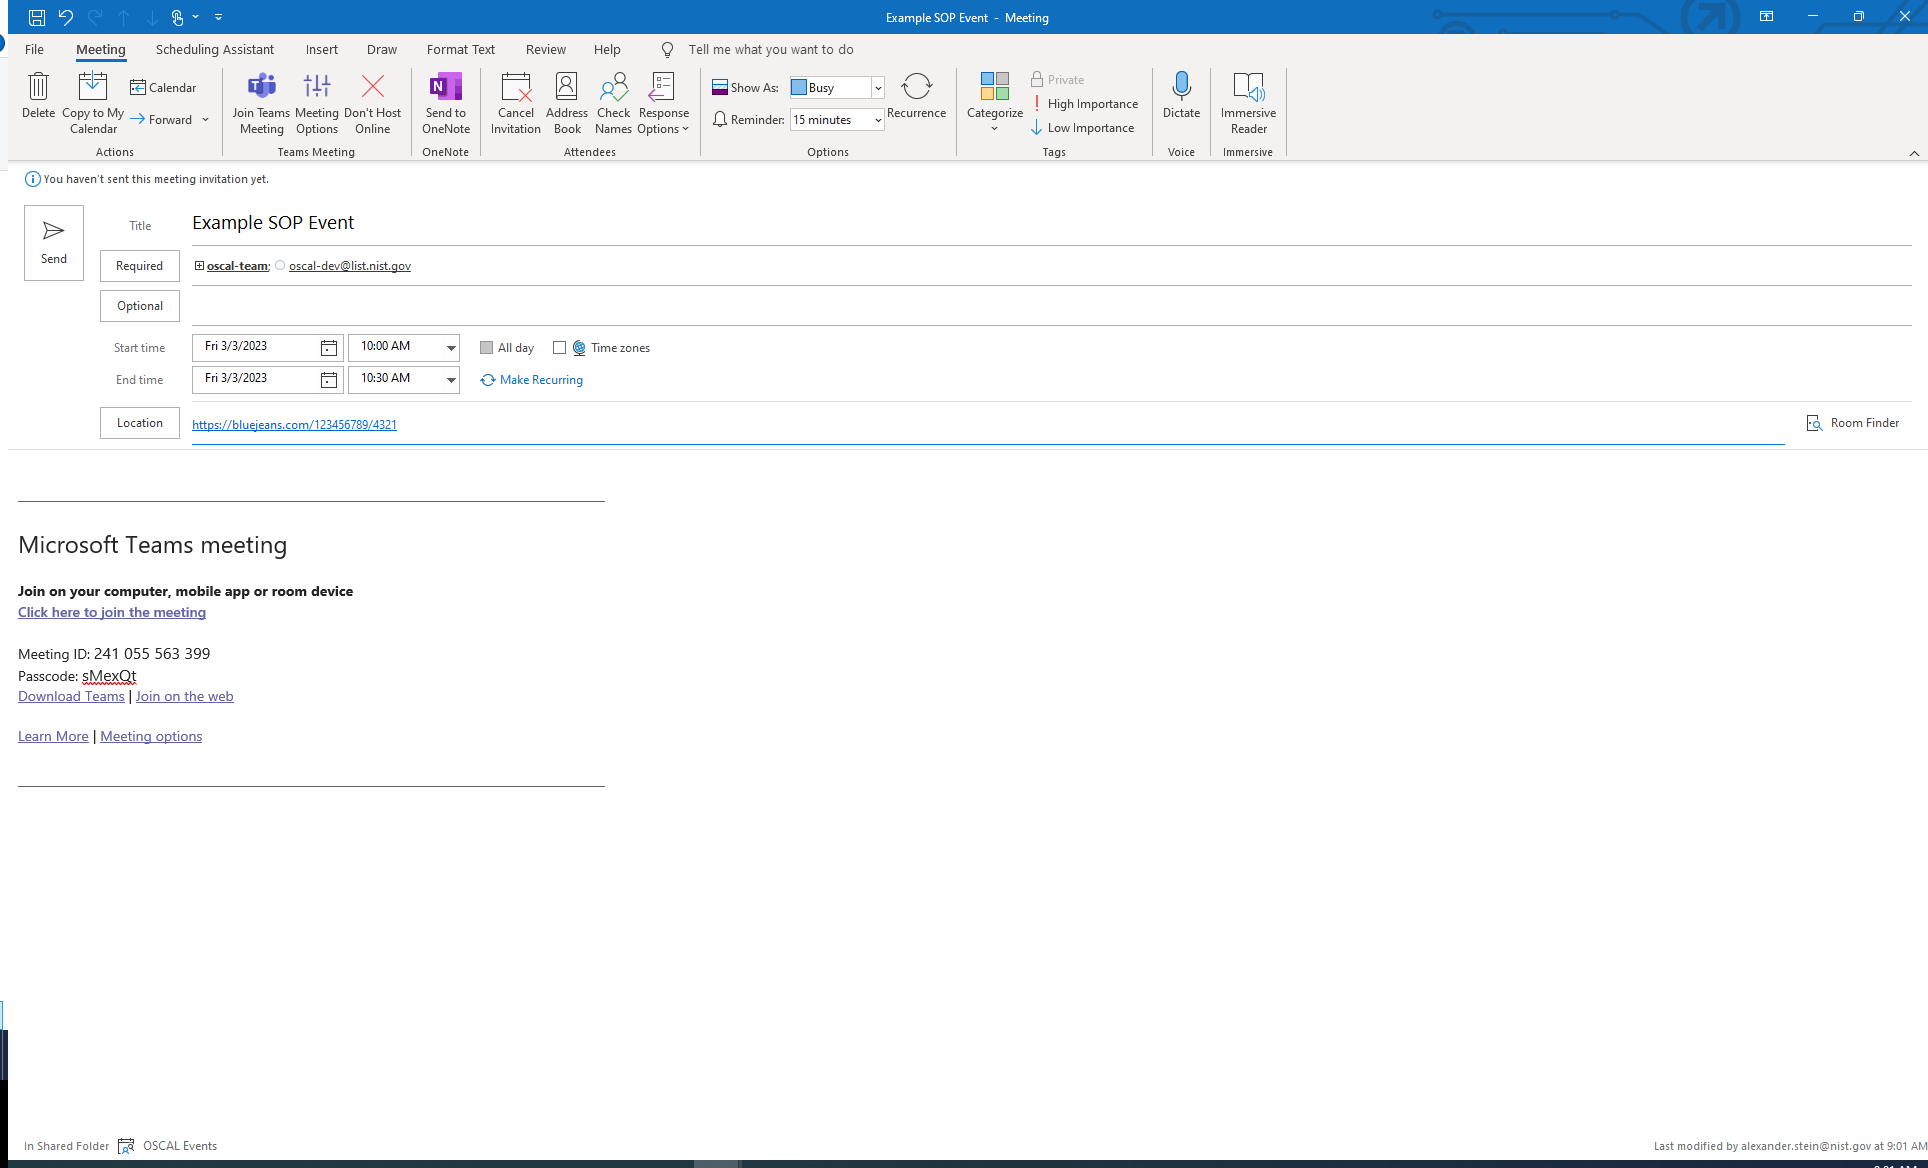
- Most importantly, click Don't Host Online to remove the auto-generated Teams meeting. You will observe the body of the invite message, there is no Teams meeting information anymore. Confirm this before proceeding.
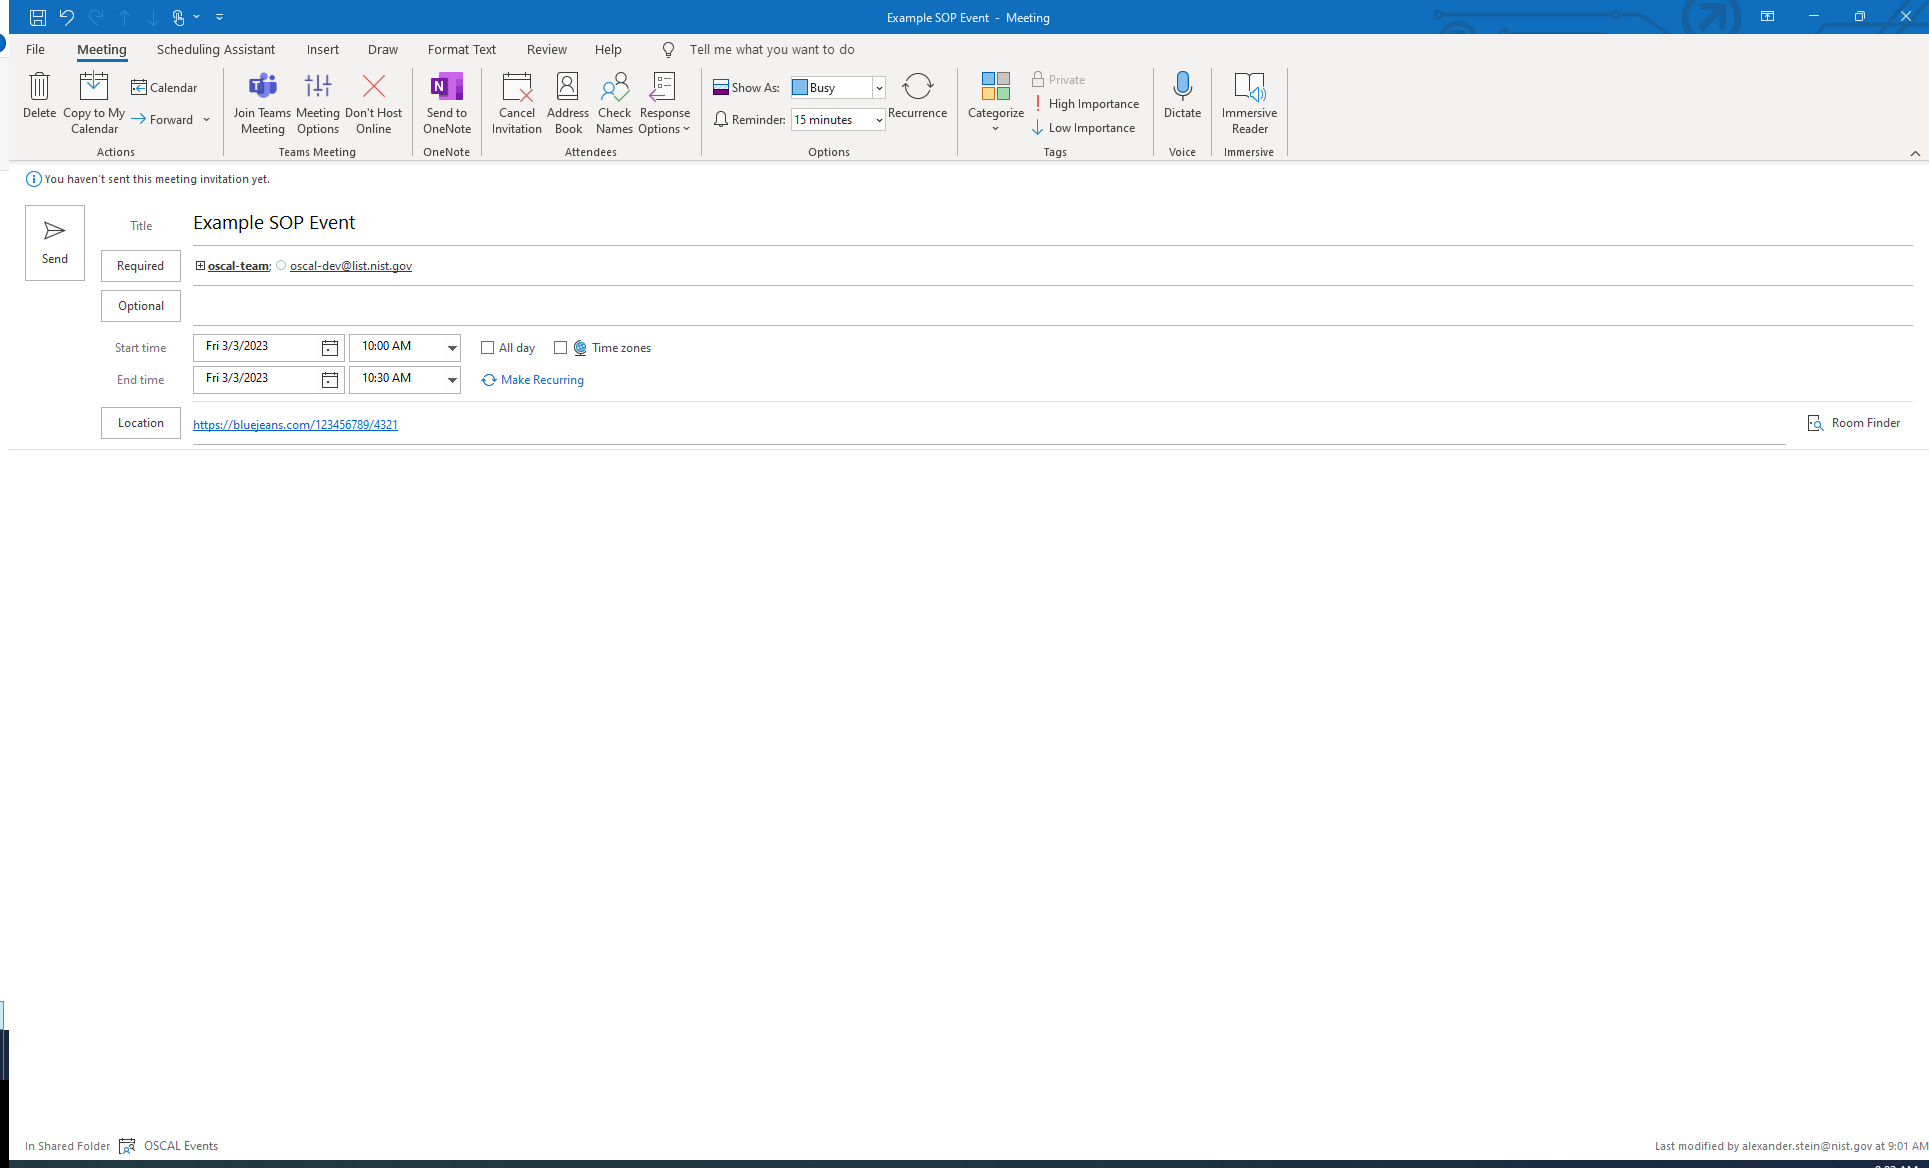
-
Add the URL for BlueJeans or the event management platform of choice.
-
Click the Send button to distribute the notice to relevant staff and community members.
NOTE: This information exists for the benefit of NIST staff. Although the community may reference or inquire about content, this material is not explicitly intended for community support. The community may create issues to report bugs or request enhancements related to this documentation, but there is no support guarantees for this material. All issues will be considered on a case by case basis.
- Contributing to OSCAL Development
- Issue Completeness Review
- OSCAL Patch (Hot Fix) Release Checklist
- OSCAL Release Branching
- Public Events Calendar Management
- Link Check Report Procedure
- Dependency Pull Request Procedure
- Issue Triage and Backlog Refinement
- NIST SP 800-53 OSCAL Content Data Governance
- Workflow for Prototyping a New OSCAL Model
- Backlog Review Process for OSCAL-related Repositories