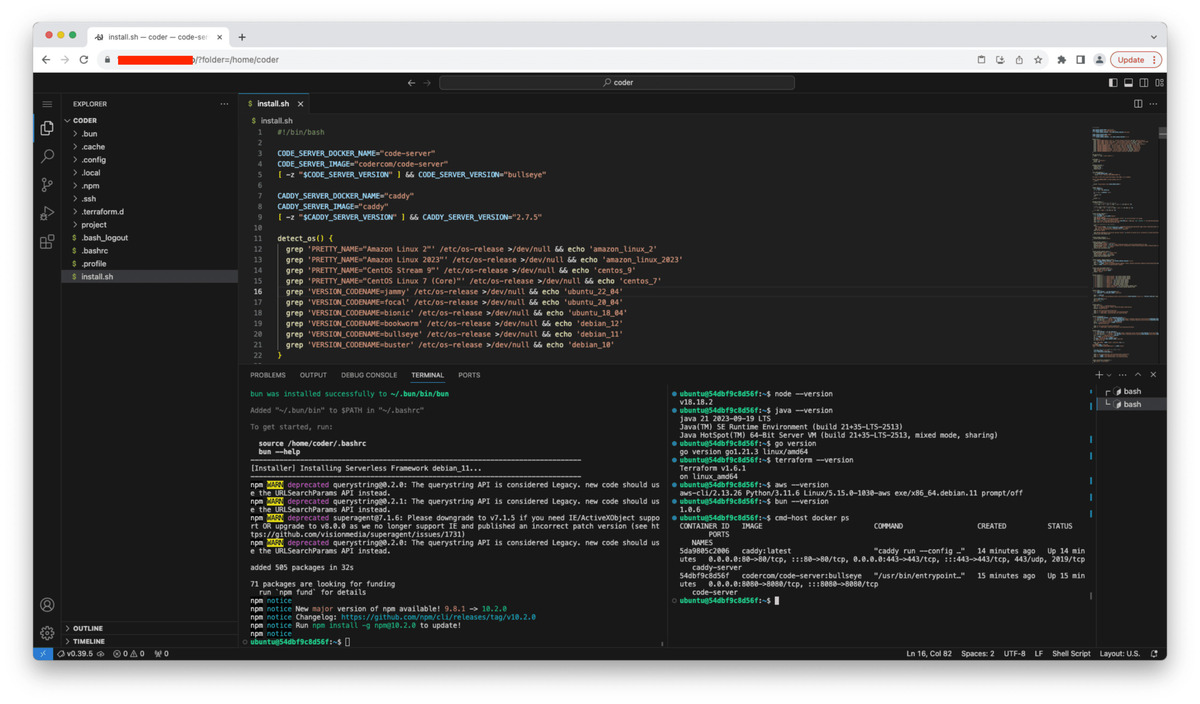
Turn your fresh cloud VM into fully functional VS Code for the web with HTTPS enabled. You can work from any device as long as it supports a modern web browser.
Before running the installation commands make sure to allow inbound connections on port 80 (HTTP) and 443 (HTTPS) via your cloud virtual firewal configuration and your OS level firewall.
export CODE_DOMAIN_NAME=vscode.example.com
export CODE_PASSWORD=MyVeryLongPassword123
The CODE_PASSWORD environment variable is optional. If you omit it, a random password will be generated.
curl -s -L https://raw.githubusercontent.com/rioastamal/installer-vscode-for-web/main/install.sh | bash -s -- --coreCommand above will automatically install and configure following software packages to turn your cloud VM into Cloud IDE:
Once the installation is complete you can access your VS Code via HTTPS URL, e.g: https://vscode.example.com. To view the password, you can check home/vscode/.config/code-server/config.yaml on host machine.
cat /home/vscode/.config/code-server/config.yaml- Supported Linux distributions
- Development packages
- Domain name for testing
- How to change the password?
- Login with Google and GitHub
- Roadmap
- Changelog
- Contributing
- License
Supported Linux distributions:
- AlmaLinux 9
- Amazon Linux 2023
- CentOS Stream 9
- CentOS Stream 8
- Debian 12
- Debian 11
- Debian 10
- RHEL 9
- RockyLinux 9
- Ubuntu 24.04 LTS
- Ubuntu 22.04 LTS
- Ubuntu 20.04 LTS
The list of supported Linux distributions can be expanded by emulating the OS version via the EMULATE_OS_VERSION environment variable. You should set this environment variable before running the installation script.
- AlmaLinux 8 (use
export EMULATE_OS_VERSION=centos_8) - RockyLinux 8 (use
export EMULATE_OS_VERSION=centos_8)
The installer provides with optional, ready to use development packages for modern application development.
| Package | CLI option |
|---|---|
| All packages | --dev-utils |
| AWS CLI v2 | --awscli |
| Bun (Javascript/TypeScript runtime) | --bunjs |
| Docker | --docker |
| Git | Automatically installed |
| Go | --go |
| Java (JDK) | --jdk |
| nvm | --nvm |
| Node (via nvm) | Installed via --nvm |
| Terraform | --terraform |
| Serverless Framework | --sls |
| Miniconda | --miniconda |
All your development activities on VS Code should take place inside the /home/vscode directory.
To install development packages above on your VS Code terminal, run the installer command with the --dev-utils option.
Note: If you're emulating OS version, don't forget to set
EMULATE_OS_VERSIONbefore running the command.
curl -s -L https://raw.githubusercontent.com/rioastamal/installer-vscode-for-web/main/install.sh | bash -s -- --dev-utilsIf you prefer to install only one of these packages, such as Java, run command below:
curl -s -L https://raw.githubusercontent.com/rioastamal/installer-vscode-for-web/main/install.sh | bash -s -- --jdkMake sure to run these commands to apply all the changes to the current shell without having to log out:
source $HOME/.bashrc
newgrp dockerIf you do not have domain name for testing, you can use free DNS service mapping like nip.io which can map your VM's public IP address into domain name.
As an example, if your VM's public IP is 1.2.3.4 you can use following to map domain 1.2.3.4.nip.io to your public IP.
export CODE_DOMAIN_NAME="$( curl -s https://api.ipify.org ).nip.io"
curl -s -L https://raw.githubusercontent.com/rioastamal/installer-vscode-for-web/main/install.sh | bash -s -- --core
Now your VS Code should be available at https://1.2.3.4.nip.io.
Important: I recommend using your own domain name for real-world use cases. Use free DNS mapping services like these for testing purposes only.
To change your VS Code password, edit a config file located at /home/vscode/.config/code-server/config.yaml.
bind-addr: 127.0.0.1:8080
auth: password
password: YOUR_NEW_PASSWORD_HERE
cert: false
Save the file and restart the code-server.
sudo systemctl restart code-server@vscode
As of v1.2, the installer supports OAuth2 login via Google and GitHub. To activate:
-
Create OAuth applications on Google and GitHub:
- Setting up OAuth 2.0 on Google
- Authorized JavaScript origins:
https://DOMAIN_NAME - Authorized redirect URIs:
https://DOMAIN_NAME/__/oauth2/google/authorization-code-callback
- Authorized JavaScript origins:
- Creating OAuth app on GitHub
- Homepage URL:
https://DOMAIN_NAME - Authorization callback URL:
https://DOMAIN_NAME/__/oauth2/github/authorization-code-callback
- Homepage URL:
- Setting up OAuth 2.0 on Google
-
Modify OAuth settings in
/home/caddy/.config/caddy/Caddyfile.env:sudo -u caddy vim /home/caddy/.config/caddy/Caddyfile.env
-
Configure Google login:
sudo -u caddy vim /home/caddy/.config/caddy/oauth2/users/google.conf
Add authorized email addresses:
transform user { match realm google # Replace the email with yours match email [email protected] [email protected] action add role authp/user } -
Configure GitHub login:
sudo -u caddy vim /home/caddy/.config/caddy/oauth2/users/github.conf
Add authorized GitHub usernames:
transform user { match realm github # Replace with your GitHub username match sub github.com/johndoe action add role authp/user } -
Update Caddy configuration:
sudo -u caddy ln -fs /home/caddy/.config/caddy/Caddyfile.oauth2 /home/caddy/.config/caddy/Caddyfile -
Disable code-server password authentication:
sudo -u vscode vim /home/vscode/.config/code-server/config.yaml
Change the
authand remove thepassword.bind-addr: 127.0.0.1:8080 cert: false auth: none password: -
Restart services
sudo systemctl restart caddy
sudo systemctl restart code-server@vscode
To log out from OAuth2 session, visit: https://DOMAIN_NAME/__/logout
Roadmap for future version:
-
GitHub authentication to access VS Code - Access local USB device from the VM
- Support for both HTTP and HTTPS now available; previously, only HTTPS was supported.
Use CADDY_DISABLE_HTTPS=yes before running the installer.
- Implemented OAuth2 login with Google and GitHub
- Removed install_pip
- Added Miniconda as a new developer tool
- Updated various developer tool packages to their latest versions
- Replaced Caddy binary with one from github.com/rioastamal/caddy-plus-security
- Added support for Ubuntu 24.04
- Bug fix: Failed to detect OS version
- Bug fix: Unable to install code-server when $HOME variable is not present
- Ability to emulate OS version via
EMULATE_OS_VERSION - A dedicated user
vscode, is used for running VS Code. - Remove docker dependencies for running code-server and Caddy. VS Code terminal now run natively on host machine.
- Remove Amazon Linux 2, CentOS 7, and Ubuntu 18.04 from the list of supported Linux distributions due to GLIBC version compatibility issues.
- Initial public release
Fork this repo and send me a PR.
This project is licensed under MIT License.

