The best colorful flat theme for your favorite editor and terminal emulator.
- Color Palette
- Editors
- Terminal Emulators
- Others
- Contributing
- About
- Go to Atom -> Preferences...
- Then select the Install tab
- Switch to the Themes
- Type Lucario in the search box
See Lucario in atom.io page
(Available for IntellijIDEA, Pycharm, Webstorm, PHPStorm and RubyMine)
- Download Intellij/Lucario.jar
- Go to File -> Import Settings.
- In the Import File Location dialog box select your downloaded Intellij/Lucario.jar file.
- In the Select Components to Import dialog box select only Editor Colors as settings to be imported, and click OK.
If you are using Package Control, you can easily install Lucario via Package Control: Install Package. The package theme is named "Lucario Color Scheme" in the packages list.
- Download Lucario.tmTheme
- Open Sublime text and click on Preferences -> Browse Packages
- Select your downloaded Lucario.tmTheme there
You should be able to select lucario theme by browsing Preferences -> Color Scheme -> Lucario
There are two implementations of Lucario for VS Code. The first one by Ikuyadeu (issues tracked here):
The second one by victor-gp (issues tracked here):
To install one of them: launch VS Code Quick Open (Ctrl+P), paste the corresponding command and press enter.
ext install Ikuyadeu.lucario
  OR
ext install victor-gp.lucario-theme- Download colors/lucario.vim
- Move the file to the
~/.vim/colors/directory - Add the following lines to your vimrc file:
syntax enable
set number
colorscheme lucario
OS X Hint: vim /usr/share/vim/vimrc
- Download xcode/Lucario.dvtcolortheme
- Move the file to your Xcode FontAndColorThemes directory
- Reopen your Xcode and click on Xcode -> preferences
- Open Fonts & Colors tab and select lucario as your theme
Hint: run this command to move the Lucario.dvtcolortheme file to your Xcode FontAndColorThemes directory:
$ mv Lucario.dvtcolortheme ~/Library/Developer/Xcode/UserData/FontAndColorThemes/- Download rio/lucario.toml
- Create a folder called
themesinside Rio configuration folder path. - Move
lucario.tomlfile to insidethemesfolder. - Change your Rio configuration main file to use the theme you want.
[style]
theme = "lucario"
Since it is not possible to add color themes to GNOME Terminal, the provided script will create a new Profile which uses custom colors.
- Download gnome-terminal/lucario.sh
- Run the script from within GNOME Terminal (
./lucario.sh) - Right-click in the Terminal and select Profiles -> Lucario
- In the main menu select Edit -> Preferences
- Go to the Profiles tab and in the dropdown list for the default profile select Lucario
The script was created with terminal.sexy.
- Download iterm/Lucario.itermcolors
- Open Settings in iTerm
- Go to Profiles -> Colors tab
- Click Load Presets... to import and select the
Lucario.itermcolorsfile
- Download terminal/Lucario.terminal
- Open Settings in Terminal
- Click "Gear" icon
- Click Import and select the
Lucario.terminalfile - Click Default
- Make sure that Termux:Styling add-on is installed.
- Download termux/lucario.colors
- Replace the
lucario.colorswith~/.termux/colors.properties. - Rename
lucario.colorstocolors.properties. - Restart Termux to apply.
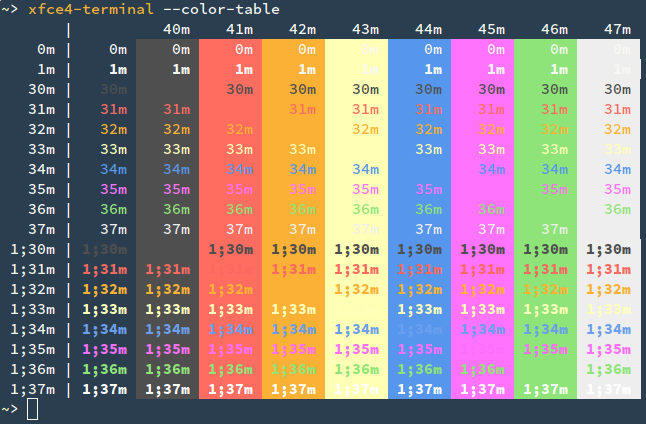
- Save xfce4-terminal/lucario.theme to
$HOME/.local/share/xfce4/terminal/colorschemes/(You might need to create this folder first.) - In Xfce Terminal open Preferences, go to the Colors tab and under Presets select Lucario.
- Download xterm/.Xresources
- Either move the
.Xresourcesfile to your home directory or add the contents to your existing~/.Xresources - Run
xrdb -merge ~/.Xresources - (optional) Add
xrdb -merge ~/.Xresourcesto your init scripts (e.g..xinitrc)
- Open
settings.jsonfrom Windows Terminal. - Find the
"schemes"array within it. - Now, copy the JSON object present in lucario.json to
"schemes"array insettings.jsonfile. - Apply the color scheme by setting
"colorScheme": "Lucario"to your profile.
The most up-to-date versions of Alacritty use the TOML format for configuration. For configuration with YAML (in previous versions) follow the additional steps.
TOML
- Copy and paste alacritty/lucario.toml into your alacritty config at
$HOME/.config/alacritty/lucario.toml - Import the configuration in your alacritty.toml file
import = [
    "~/.config/alacritty/lucario.toml"
]
YAML
- Copy and paste alacritty/alacritty.yml into your alacritty config at
$HOME/.config/alacritty/alacritty.yml
- Download mintty/lucario
- Create the directory
~/.mintty/themesin case it does not exist
Note
The physical directory pointed by ~ depends on your environment: C:\Users\<username> on Git Bash, C:\cygwin64\home\<username> on Cygwin, or C:\msys64\home\<username> on MSYS2.
- Place the downloaded
lucarioon the directory~/.mintty/themes - Append a new line containing
ThemeFile=lucarioto the file~/.minttyrc - Restart Mintty to apply
- Download CSS/lucario.css
- Move the CSS/lucario.css file to your web directory
- Include the stylesheet in your HTML by including the line
<link rel="stylesheet" type="text/css" href="lucario.css">
- The default stylesheet with highlight code blocks is rendered with the class highlight.
- Use
git clone https://github.com/raphamorim/lucario.git - Copy the pygments/lucario.py file to pygments style directory, usually /usr/local/lib/python/X.X/site-packages/pygments/styles/
- Run the following to use the formatter on the command line,
pygmentize -S lucario
Want to use Lucario Color Scheme for your favorite editor, but it doesn't exist? So how about creating one? It's very simple! \o/
- Fork it!
- Create your feature branch:
git checkout -b my-new-feature - Commit your changes:
git commit -m 'Add some feature' - Push to the branch:
git push origin my-new-feature - Submit a pull request :)
Credits: Project inspired by @zenorocha's Dracula Theme.
License: MIT © Raphael Amorim.


