NEW VERSION - PLEASE LOOK AT THE VERY END
ALL Files below refer to the COMMIT f047934
This device is intended to help you use a very simple GRBL-based Arduino Shield controlled by a Raspberry Pi/Nvidia Jetson to automatically image a multiwell plate to with a UC2-based microscope. Curious to see what this looks like? Scroll to the very bottom of the page.
The microscope is compact enough to fit in cell incubators and the Opentrons OT2 pipetting robot. Of course, this microscope can also be used in other environments. By varying the orientiation and selection of the cube modules it is possible to realize widefield fluorescence, but also bright field microscopy. The overall price is in the range of 1000€.
Features:
- Move multi-well plate in XY
- NEMA11-based z-focusing stage which relies on CNC linear rails
- Fast scanning
- Whole setup <1000€ in parts for a fluorescence microscope
- All 3D printed + off-the-shelf components
- Minimum of tools required
- Use GRBL as the motion protocol
- Use the openflexure microscope server as the control software
- In-Action
- [Inside the Opentrons](#Inside the Opentrons)
- [Bill of material](#Bill of material)
- [Get Involved](#Get Involved)
- Software
- Hardware
- Bill of materials
- Results
You can directly control the microscope from the opentrons Jupyter notebook. We have collected some notebooks showing its control in the folder ./JUPYTER. This way it becomes very simple to plan experiments which involve both, pipetting and imaging.
Using a laser excitation and a white-light Led mounted in one of the place of the pipetting arm it is possible to realize fluorescence and brightfield microscopy for large-scale high throughput imaging.
Using the Opentrons Jupyter Notebook integration together with the REST-API based Openflexure Microscope Pylcient, one can easily created complicated pipetting workflows that require an imaging step in between. The below experiment shows an automated workflow where yeast cells were seeded at varying concentrations and different reagents where added sequentially. In between the microscope automatically performs whole well plate scans.
Warning: This is still under strong development. We derived the software to control the GRBL-based XYZt stage from the Openflexure microscope project by Bowman et al. Instead of using a Raspberry Pi camera, we use an Nvidia Jetson Nano singleboard computer and run a customized version of the OFM server that can control the GRBL board and the monochrome CMOS camera.
A detailed set of instructions for installing the Openflexure Server (OFM Server) can be found in a dedicated README_SOFTWARE.md (it is under construction..). In case you want a preinstalled image, please contact us!
Below we describe how the XY Stage can be build and assembled in order to replicate the whole system as shown in the rendering above one needs additional parts that can be found in the original openUC2 repository. The most important modules you will need are the following:
- Allied Vision Camera (ALVIUM)
- Dichroic Beamsplitter
- 45° Silver Protected Mirror
- Z-STage using NEMA motor
- Laser Module for fluorescence
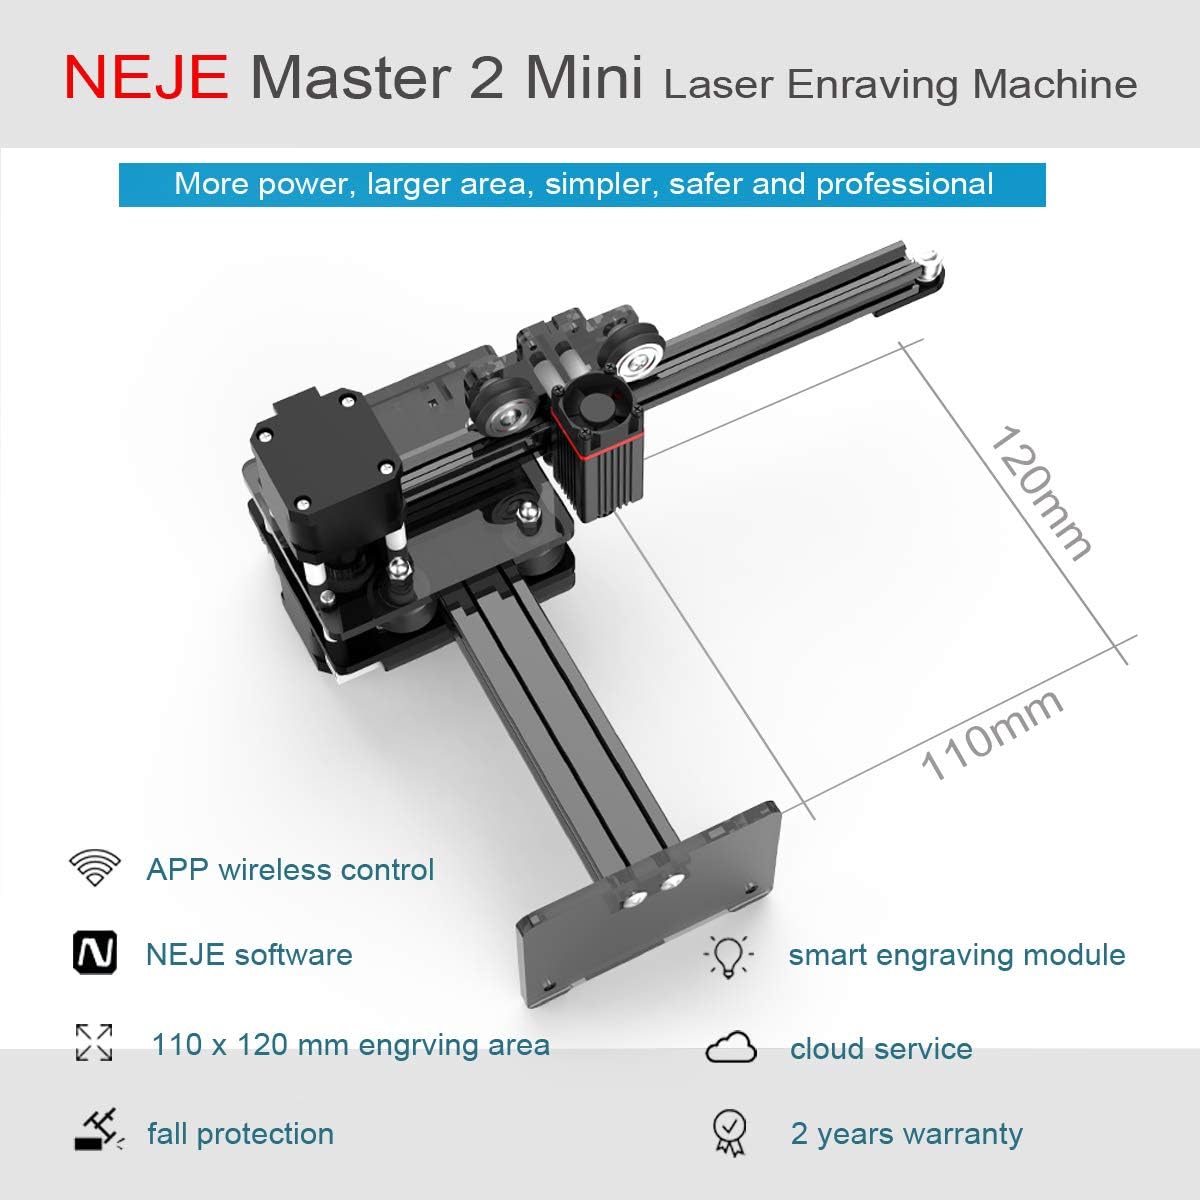
For scanning a full multi-well plate we decided to rely on a commercially available laser engraving system from Nejetools.com. The Neje Master Mini 2 costs around 100-160€ and is available in many countries. The design has been replicated by many other brands and can be found for even lower prices at Aliexpress/Alibaba or alike. The overall mechanical design looks like this:
We use the device as is and simply swap the 450nm laser with a customized sample-plate holder which ensures proper plate leveling. The working range is sufficiently large to scan the whole plate. For the integration of this device into the UC2 standard, one only requires 5 additional 3D printed parts which direclty adapt to the 3D printed cubes + baseplates (v3 -> so you need either the injection moulded parts or need to add the 5 screws for proper fitting).
The plate can easily adapt all kinds of samples
Theoretically one can directly be used using the internal 32Bit processing board using the customized python wrapper. Nevertheless, we found its functionality rather limited, and decided to use an additional CNC controler board to explore the full functionalities including the Z-stage control, Laser and LED control.
If everything is connected properly, the device can for example also be used as a proper plate shaker inside the Opentrons:
Below you will find all components necessary to build this device. An updated version in form of an excel sheet can be founde here.
All design files for Autodesk Inventor 2019 Student Edition can be found in the folder INVENTOR.
All these files need be printed. We used a Prusa i3 MK3 using PLA Prusamant (Galaxy Black) at layer height 0.3 mm and infill 80%. For all parts that can bend (e.g. sample holder) use PETG Prusament at 100% infill.
| Type | Details | Price | Link |
|---|---|---|---|
| 2x Level Arm for height adjusting the wellplate | Plate holder | 0.04 € | Assembly_CUBE_XY_Stage_neje_laser_v3_TMP_Holder_MTP.stl |
| 2x Plateadapter for Neje to Uc2 Baseplate | Adapt the stage to the puzzle-like baseplate | 4 € | Assembly_CUBE_XY_Stage_neje_laser_v3_30_Adapter_neje_to_cube_bd_v3_1.stl |
| 1x Multiwell plate holder | is mounted in place of the laser | 4 € | Assembly_CUBE_XY_Stage_neje_laser_v3_30_MTP_wellplate_to_sample_adapter.stl |
| 1x Adapter for multi-well plate | Holds the multiwell plate assembly in place where usually the laser sits | 4 € | Assembly_CUBE_XY_Stage_neje_laser_v3_Neje_Support_Slider_Y.stl |
This is used in the current version of the setup
| Type | Details | Price | Link |
|---|---|---|---|
| NEJE MASTER 2 MINI | Laserengraver for XY scanning | 100-160 € | Neje |
| MKS DLC CNC (NEMA Motors) | Controller Electronics for NEMA motors and Laser | 25 € | Roboter-Baukasten |
| M3, M4 Screws | Screw Set | 12 € | Ebay |
| yourDroid Netzteil 12V 3A 5,5x2,1mm DC-Stecker | Power Supply 12V | 6,45 € | Roboter-Baukasten |
| 3x A4988 Schrittmotorentreiber RBS10232 | Stepper Driver | 0,99 € | Roboter-Baukasten |
| Spring | Diameter: 5mm, 15mm long | 0,99 € | Roboter-Baukasten |
1. These are the parts needed for the multi-well plate adapter: The spring-loaded leve larm mechanism ensures a tilt-free loading of a plate. The plate is only hold by 3 points, where one is fixed and the other two can be transalted linearly using a screw-nut mechanism
2. Insert the long M3 screws in the wholes and add the spring to it
3. Add the levelarm to the screw and insert the M3 nut in order to pull it while rotating the screw
4. Turn the screw until the lower end of the level-arm is roughly in-line with the orange frame
5. Add the M3 screw and washer to have the 3rd point for the well-plate mount
6. Now you can already insert the well plate and level it
6. The multi-well plate holder can easily be mounted in place where you usually find the laser of the Neje mini (or similar) laser engraver. Just use some M4 screws to squeeze the frame and the adaptor together
Since 3D printers are not really reliable in terms of accuracy and the stage is rather not really flat, I added springs to each corner of the base which holds the well plate. Similar to 3D printer plate leveling, you need to adjust the hight of the plate in the first run manually. This is necessary since the focus range so far is only ~1 mm I would say. I need to improve this ;-)
We are working on an extension which will replace this very soon!
Some results will show up here
- Low-cost stage scanner: PLoS One
- MicroscoPi: Biorxiv
- Incubot: HardwareX
- Opentrons Website
- OpenFlexure Microscope Website
- openUC2 Github
This project is open so that anyone can get involved. You don't even have to learn CAD designing or programming. Find ways you can contribute in CONTRIBUTING
This project is open-source and is released under the CERN open hardware license. Our aim is to make the kits commercially available. We encourage everyone who is using our Toolbox to share their results and ideas, so that the Toolbox keeps improving. It should serve as a easy-to-use and easy-to-access general purpose building block solution for the area of STEAM education. All the design files are generally for free, but we would like to hear from you how is it going.
You're free to fork the project and enhance it. If you have any suggestions to improve it or add any additional functions make a pull-request or file an issue.
Please find the type of licenses here
REMARK: All files have been designed using Autodesk Inventor 2019 (EDUCATION)
If you find this project useful, please like this repository, follow us on Twitter and cite the webpage! :-)
The documentation will be updated soon.
The new assembly is based on a similar Laser engraver:
At aliexpress look for Twotrees TT-2.5 TT-5.5 Laser Engraving Machine 7.5W 20W 3D Printer DIY Kits Wood Router/Cutter/Laser Goggles With Laser Module or follow this link: https://www.aliexpress.com/item/4000033085016.html?spm=a2g0s.9042311.0.0.785a4c4dxIXhFu
Application_UC2_Hi2_Uppsala_v3_00_Alvium_Step_USB90_S-Mount_ClosedHousing_2019-Mar-28_32.stl
Application_UC2_Hi2_Uppsala_v3_00_BallMagnets_5mm_single_53.stl
Application_UC2_Hi2_Uppsala_v3_00_BallMagnets_5mm_single_54.stl
Application_UC2_Hi2_Uppsala_v3_00_BallMagnets_5mm_single_55.stl
Application_UC2_Hi2_Uppsala_v3_00_BallMagnets_5mm_single_137.stl
Application_UC2_Hi2_Uppsala_v3_00_BallMagnets_5mm_single_138.stl
Application_UC2_Hi2_Uppsala_v3_00_BallMagnets_5mm_single_139.stl
Application_UC2_Hi2_Uppsala_v3_00_bearing_ball_2mm_74.stl
Application_UC2_Hi2_Uppsala_v3_00_bearing_ball_2mm_75.stl
Application_UC2_Hi2_Uppsala_v3_00_bearing_ball_2mm_76.stl
Application_UC2_Hi2_Uppsala_v3_00_Chroma_Dichroic_25x,3x1_116.stl
Application_UC2_Hi2_Uppsala_v3_00_Comar_Filter_25Dia_117.stl
Application_UC2_Hi2_Uppsala_v3_00_Comar_Filter_25Dia_118.stl
Application_UC2_Hi2_Uppsala_v3_00_Comar_Filter_25Dia_121.stl
Application_UC2_Hi2_Uppsala_v3_00_Laser_532nm_200mw_40.stl
Application_UC2_Hi2_Uppsala_v3_00_MGN12H, LINEAR GUIDE BLOCK_68.stl
Application_UC2_Hi2_Uppsala_v3_00_Microscope_Objective_Lens10x_144.stl
Application_UC2_Hi2_Uppsala_v3_00_Motorcoupling_5mm_M3_65.stl
Application_UC2_Hi2_Uppsala_v3_00_MTP_96-welplate_10.stl
Application_UC2_Hi2_Uppsala_v3_00_NEMA11_77.stl
Application_UC2_Hi2_Uppsala_v3_00_NEMA17_2.stl
Application_UC2_Hi2_Uppsala_v3_00_NEMA17_11.stl
Application_UC2_Hi2_Uppsala_v3_00_NEMA17_24.stl
Application_UC2_Hi2_Uppsala_v3_00_Spacer_13mm_29.stl
Application_UC2_Hi2_Uppsala_v3_00_Thorlabs_Cage_CP33_M_125.stl
Application_UC2_Hi2_Uppsala_v3_00_Thorlabs_PF10-03-P01-Step_59.stl
Application_UC2_Hi2_Uppsala_v3_00_Thorlabs_PF10-03-P01-Step_63.stl
Application_UC2_Hi2_Uppsala_v3_00_Thorlabs_PF10-03-P01-Step_143.stl
Application_UC2_Hi2_Uppsala_v3_00_Thorlabs_Rod_6mm_8.stl
Application_UC2_Hi2_Uppsala_v3_00_Thorlabs_Rod_6mm_12.stl
Application_UC2_Hi2_Uppsala_v3_00_VSlot_20mm_200mm_16.stl
Application_UC2_Hi2_Uppsala_v3_00_VSlot_20mm_200mm_18.stl
Application_UC2_Hi2_Uppsala_v3_00_VSlot_20mm_250mm_17.stl
Application_UC2_Hi2_Uppsala_v3_00_VSlot_20mm_250mm_19.stl
Application_UC2_Hi2_Uppsala_v3_00_VSlot_20mm_250mm_28.stl
Application_UC2_Hi2_Uppsala_v3_00_VSlot_90degree_bracket_22.stl
Application_UC2_Hi2_Uppsala_v3_10_Base_puzzle_v3_83.stl
Application_UC2_Hi2_Uppsala_v3_10_Base_puzzle_v3_84.stl
Application_UC2_Hi2_Uppsala_v3_10_Base_puzzle_v3_85.stl
Application_UC2_Hi2_Uppsala_v3_10_Base_puzzle_v3_86.stl
Application_UC2_Hi2_Uppsala_v3_10_Base_puzzle_v3_87.stl
Application_UC2_Hi2_Uppsala_v3_10_Base_puzzle_v3_88.stl
Application_UC2_Hi2_Uppsala_v3_10_Base_puzzle_v3_89.stl
Application_UC2_Hi2_Uppsala_v3_10_Base_puzzle_v3_90.stl
Application_UC2_Hi2_Uppsala_v3_10_Base_puzzle_v3_91.stl
Application_UC2_Hi2_Uppsala_v3_10_Base_puzzle_v3_92.stl
Application_UC2_Hi2_Uppsala_v3_10_Base_puzzle_v3_93.stl
Application_UC2_Hi2_Uppsala_v3_10_Base_puzzle_v3_94.stl
Application_UC2_Hi2_Uppsala_v3_10_Base_puzzle_v3_95.stl
Application_UC2_Hi2_Uppsala_v3_10_Base_puzzle_v3_96.stl
Application_UC2_Hi2_Uppsala_v3_10_Base_puzzle_v3_97.stl
Application_UC2_Hi2_Uppsala_v3_10_Base_puzzle_v3_98.stl
Application_UC2_Hi2_Uppsala_v3_10_Base_puzzle_v3_99.stl
Application_UC2_Hi2_Uppsala_v3_10_Base_puzzle_v3_100.stl
Application_UC2_Hi2_Uppsala_v3_10_Base_puzzle_v3_101.stl
Application_UC2_Hi2_Uppsala_v3_10_Base_puzzle_v3_102.stl
Application_UC2_Hi2_Uppsala_v3_10_Base_puzzle_v3_103.stl
Application_UC2_Hi2_Uppsala_v3_10_Base_puzzle_v3_104.stl
Application_UC2_Hi2_Uppsala_v3_10_Base_puzzle_v3_105.stl
Application_UC2_Hi2_Uppsala_v3_10_Base_puzzle_v3_106.stl
Application_UC2_Hi2_Uppsala_v3_10_Cube_1x1_IM_30.stl
Application_UC2_Hi2_Uppsala_v3_10_Cube_1x1_IM_31.stl
Application_UC2_Hi2_Uppsala_v3_10_Cube_1x1_IM_34.stl
Application_UC2_Hi2_Uppsala_v3_10_Cube_1x1_IM_35.stl
Application_UC2_Hi2_Uppsala_v3_10_Cube_1x1_IM_38.stl
Application_UC2_Hi2_Uppsala_v3_10_Cube_1x1_IM_39.stl
Application_UC2_Hi2_Uppsala_v3_10_Cube_1x1_IM_43.stl
Application_UC2_Hi2_Uppsala_v3_10_Cube_1x1_IM_44.stl
Application_UC2_Hi2_Uppsala_v3_10_Cube_1x1_IM_60.stl
Application_UC2_Hi2_Uppsala_v3_10_Cube_1x1_IM_61.stl
Application_UC2_Hi2_Uppsala_v3_10_Cube_1x1_IM_78.stl
Application_UC2_Hi2_Uppsala_v3_10_Cube_1x1_IM_79.stl
Application_UC2_Hi2_Uppsala_v3_10_Cube_1x1_IM_80.stl
Application_UC2_Hi2_Uppsala_v3_10_Cube_1x1_IM_81.stl
Application_UC2_Hi2_Uppsala_v3_10_Cube_1x1_IM_107.stl
Application_UC2_Hi2_Uppsala_v3_10_Cube_1x1_IM_108.stl
Application_UC2_Hi2_Uppsala_v3_10_Cube_1x1_IM_109.stl
Application_UC2_Hi2_Uppsala_v3_10_Cube_1x1_IM_110.stl
Application_UC2_Hi2_Uppsala_v3_10_Cube_1x1_IM_111.stl
Application_UC2_Hi2_Uppsala_v3_10_Cube_1x1_IM_112.stl
Application_UC2_Hi2_Uppsala_v3_10_Cube_1x1_IM_113.stl
Application_UC2_Hi2_Uppsala_v3_10_Cube_1x1_IM_114.stl
Application_UC2_Hi2_Uppsala_v3_10_Cube_1x1_IM_123.stl
Application_UC2_Hi2_Uppsala_v3_10_Cube_1x1_IM_124.stl
Application_UC2_Hi2_Uppsala_v3_10_Cube_1x1_IM_127.stl
Application_UC2_Hi2_Uppsala_v3_10_Cube_1x1_IM_128.stl
Application_UC2_Hi2_Uppsala_v3_20_Cube_insert_AlliedVision_Alvium_v3_33.stl
Application_UC2_Hi2_Uppsala_v3_20_Cube_insert_AlliedVision_Alvium_v3_41.stl
Application_UC2_Hi2_Uppsala_v3_20_Cube_Insert_Beamsplittercube_Base_25x35_v3_115.stl
Application_UC2_Hi2_Uppsala_v3_20_Cube_Insert_Beamsplittercube_Dichroicmirror_Retainplate_25_36_122.stl
Application_UC2_Hi2_Uppsala_v3_20_Cube_Insert_Beamsplittercube_Retainring_25mm_119.stl
Application_UC2_Hi2_Uppsala_v3_20_Cube_Insert_Beamsplittercube_Retainring_25mm_120.stl
Application_UC2_Hi2_Uppsala_v3_20_Cube_Insert_Kinematic_Mirrormount_45_base_part1_45.stl
Application_UC2_Hi2_Uppsala_v3_20_Cube_Insert_Kinematic_Mirrormount_45_base_part1_129.stl
Application_UC2_Hi2_Uppsala_v3_20_Cube_Insert_Kinematic_Mirrormount_45_base_part2_46.stl
Application_UC2_Hi2_Uppsala_v3_20_Cube_Insert_Kinematic_Mirrormount_45_base_part2_130.stl
Application_UC2_Hi2_Uppsala_v3_20_Cube_Insert_Kinematic_Mirrormount_45_Thorlabsadapter_56.stl
Application_UC2_Hi2_Uppsala_v3_20_Cube_Insert_Kinematic_Mirrormount_45_Thorlabsadapter_140.stl
Application_UC2_Hi2_Uppsala_v3_20_Cube_insert_Laser_Block_adjustable_v3_42.stl
Application_UC2_Hi2_Uppsala_v3_20_Cube_Insert_Lens_165mm_36.stl
Application_UC2_Hi2_Uppsala_v3_20_Cube_Insert_Lens_165mm_clamp_37.stl
Application_UC2_Hi2_Uppsala_v3_20_Cube_Insert_Mirror_Holder_Thorlabs_v3_62.stl
Application_UC2_Hi2_Uppsala_v3_20_Insert_Thorlabs_holder_v3_126.stl
Application_UC2_Hi2_Uppsala_v3_30_Adapter_M3_nut_47.stl
Application_UC2_Hi2_Uppsala_v3_30_Adapter_M3_nut_48.stl
Application_UC2_Hi2_Uppsala_v3_30_Adapter_M3_nut_49.stl
Application_UC2_Hi2_Uppsala_v3_30_Adapter_M3_nut_131.stl
Application_UC2_Hi2_Uppsala_v3_30_Adapter_M3_nut_132.stl
Application_UC2_Hi2_Uppsala_v3_30_Adapter_M3_nut_133.stl
Application_UC2_Hi2_Uppsala_v3_30_Cube_Z_Focus_Drylin_NEMA_slide_part1_70.stl
Application_UC2_Hi2_Uppsala_v3_30_Cube_Z_Focus_MGN_NEMA_adapter_RMS_67.stl
Application_UC2_Hi2_Uppsala_v3_30_Cube_Z_Focus_MGN_NEMA_base_v3_64.stl
Application_UC2_Hi2_Uppsala_v3_30_Cube_Z_Focus_MGN_NEMA_counterplate_82.stl
Application_UC2_Hi2_Uppsala_v3_30_Cube_Z_Focus_MGN_NEMA_Motoradapter_28BYJ_v3_72.stl
Application_UC2_Hi2_Uppsala_v3_30_Cube_Z_Focus_MGN_NEMA_Motoradapter_NEMA11_v3_71.stl
Application_UC2_Hi2_Uppsala_v3_30_Cube_Z_Focus_MGN_NEMA_Motorsupport_73.stl
Application_UC2_Hi2_Uppsala_v3_30_Cube_Z_Focus_MGN_NEMA_rail_69.stl
Application_UC2_Hi2_Uppsala_v3_30_Cube_Z_Focus_MGN12_NEMA_slide_part2_66.stl
Application_UC2_Hi2_Uppsala_v3_DIN 912 - M3 x 0,5 x 12 x 10,75_50.stl
Application_UC2_Hi2_Uppsala_v3_DIN 912 - M3 x 0,5 x 12 x 10,75_51.stl
Application_UC2_Hi2_Uppsala_v3_DIN 912 - M3 x 0,5 x 12 x 10,75_52.stl
Application_UC2_Hi2_Uppsala_v3_DIN 912 - M3 x 0,5 x 12 x 10,75_57.stl
Application_UC2_Hi2_Uppsala_v3_DIN 912 - M3 x 0,5 x 12 x 10,75_58.stl
Application_UC2_Hi2_Uppsala_v3_DIN 912 - M3 x 0,5 x 12 x 10,75_134.stl
Application_UC2_Hi2_Uppsala_v3_DIN 912 - M3 x 0,5 x 12 x 10,75_135.stl
Application_UC2_Hi2_Uppsala_v3_DIN 912 - M3 x 0,5 x 12 x 10,75_136.stl
Application_UC2_Hi2_Uppsala_v3_DIN 912 - M3 x 0,5 x 12 x 10,75_141.stl
Application_UC2_Hi2_Uppsala_v3_DIN 912 - M3 x 0,5 x 12 x 10,75_142.stl
Application_UC2_Hi2_Uppsala_v3_Neje_Base_Slide_y_stop_9.stl
Application_UC2_Hi2_Uppsala_v3_Neje_puzzle_adapterplate_v3_20.stl
Application_UC2_Hi2_Uppsala_v3_Neje_puzzle_adapterplate_v3_21.stl
Application_UC2_Hi2_Uppsala_v3_Neje_Rolls_3.stl
Application_UC2_Hi2_Uppsala_v3_Neje_Rolls_4.stl
Application_UC2_Hi2_Uppsala_v3_Neje_Rolls_5.stl
Application_UC2_Hi2_Uppsala_v3_Neje_Rolls_13.stl
Application_UC2_Hi2_Uppsala_v3_Neje_Rolls_14.stl
Application_UC2_Hi2_Uppsala_v3_Neje_Rolls_15.stl
Application_UC2_Hi2_Uppsala_v3_Neje_Rolls_25.stl
Application_UC2_Hi2_Uppsala_v3_Neje_Rolls_26.stl
Application_UC2_Hi2_Uppsala_v3_Neje_Rolls_27.stl
Application_UC2_Hi2_Uppsala_v3_TOTEM_Base_Slide_x_20mmrod_1.stl
Application_UC2_Hi2_Uppsala_v3_TOTEM_Base_Slide_x_20mmrod_23.stl
Application_UC2_Hi2_Uppsala_v3_TOTEM_Base_Slide_y_20mmrod_6.stl
Application_UC2_Hi2_Uppsala_v3_TOTEM_Base_Slide_y_20mmrod_7.stl
Application_UC2_Hi2_Uppsala_v3.stl


