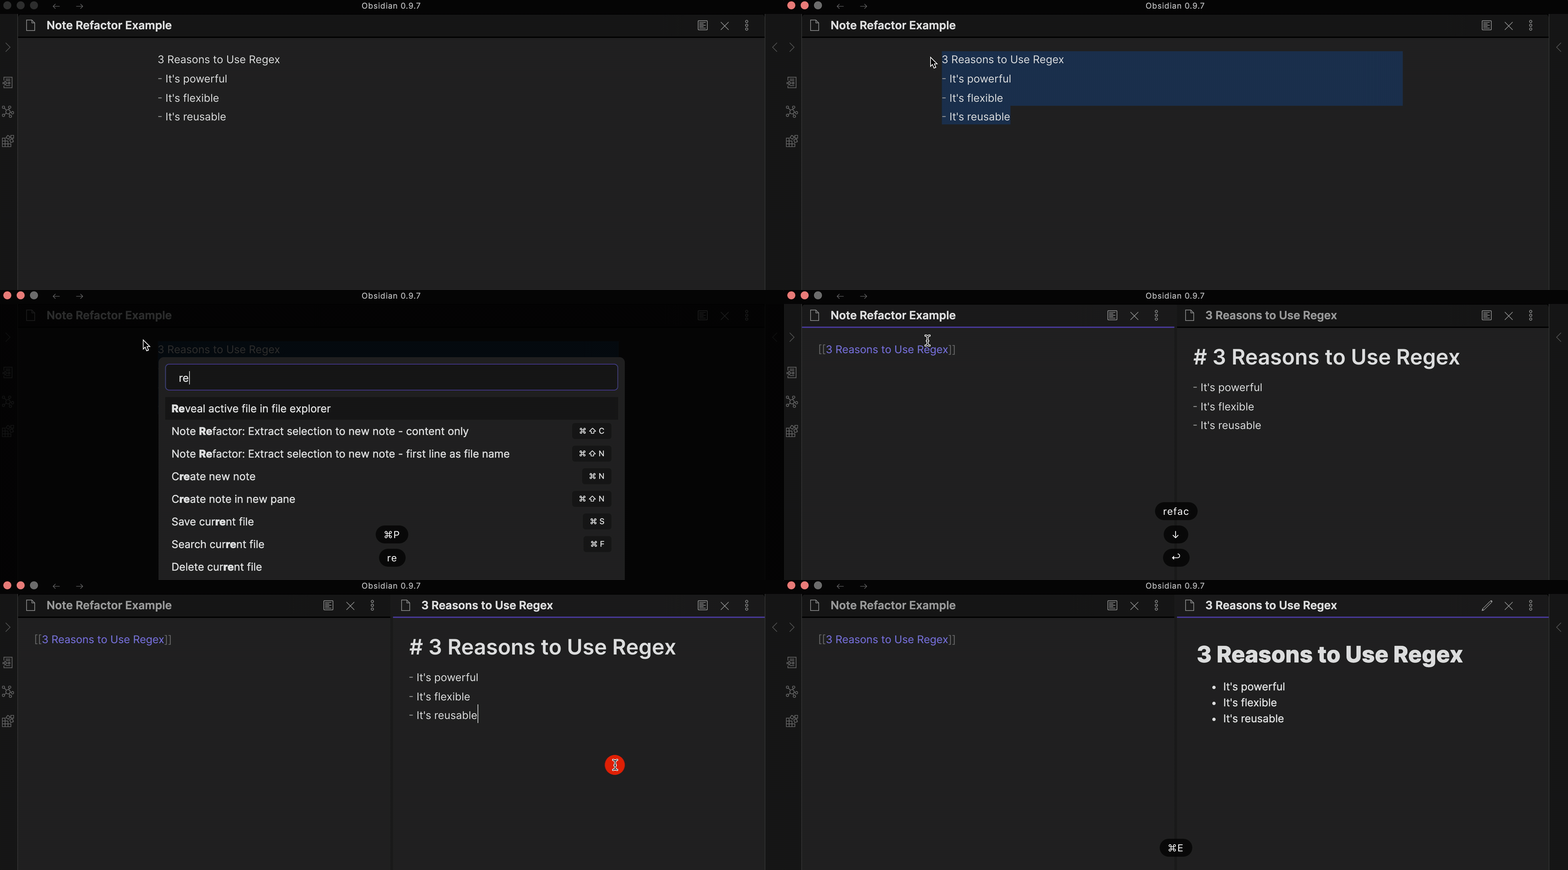
This repository contains a plugin for Obsidian for extracting the selected portion of a notes into new note.
The default hotkeys are:
| Hotkey | Action |
|---|---|
| Ctrl/Cmd + Shift + N | Extract selection to new note - first line as filename: Copy selection into new note with the first line as the file name and replace with a link. |
| Ctrl/Cmd + Shift + C | Extract selection to new note - content only: Copy selection into new note, prompt for a file name and replace with a link. |
⚠️ Hotkey defaults are deliberately not set for note splitting commands to avoid unwanted accidents.
The new note file is created at the root of the vault with the filename as the first line of the selected text and the content as the rest of the selected text.
Heading characters (#) and other illegal characters for filenames are removed including :, \, /.
This table shows the different use cases for this plugin and how commands and settings can be used in each case.
| Use case | Command | Plugin Settings | |
|---|---|---|---|
| 1 | 1. Extract a selection into a new note exactly as it is. 2. File name for new note provided by the user. |
Extract selection to new note - content only | Include Heading False |
| 2 | 1. Extract a selection into a new note exactly as it is. 2. File name for new note set from the first line of the selection |
Extract selection to new note - first line as file name | Exclude First Line False Include Heading False |
| 3 | 1. Extract a selection into a new note. 2. File name for new note set from the first line of the selection. 3. First line included in the new note as a heading. |
Extract selection to new note - first line as file name | Exclude First Line False Include Heading True |
| 4 | 1. Extract a selection into a new note 2. File name for new note set from the first line of the selection. 3. First line not included in the new note. |
Extract selection to new note - first line as file name | Exclude First Line True |
| 5 | 1. Extract a selection into a new note exactly as it is. 2. File name for new note is generated from the File name prefix setting. |
Extract selection to new note - only prefix as file name |
| Use case | Command | Plugin Settings | |
|---|---|---|---|
| 1 | 1. Split a note from the current line of the cursor into new note exactly as it is. 2. File name for new note provided by the user. |
Split note here - content only | Include Heading False |
| 2 | 1. Split a note from the current line of the cursor into new note. 2. File name for new note provided by the user. 3. First line included in the new note as a heading. |
Split note here - content only | Include Heading True |
| 3 | 1. Split a note from the current line of the cursor into new note exactly as it is. 2. File name for new note set from the first line of the selection. |
Split note here - first line as file name | Include Heading False |
| 4 | 1. Split a note from the current line of the cursor into a new note. 2. File name for new note set from the first line of the selection. 3. First line included in the new note as a heading. |
Split note here - first line as file name | Exclude First Line False Include Heading True |
| 5 | 1. Split a note with content under a heading going into a new note for each heading. 2. File name for each new note set from the heading. |
Split note by headings - H1 Split note by headings - H2 Split note by headings - H3 |
Splitting the current note from the current line into a new note or append to an existing one.
This command splits the current note into a new note from the current line using the current line as the file name for the new note.
This command splits the current note into a new note, or append to an existing one, from the current line. The user is prompted to enter a file name for the new note.
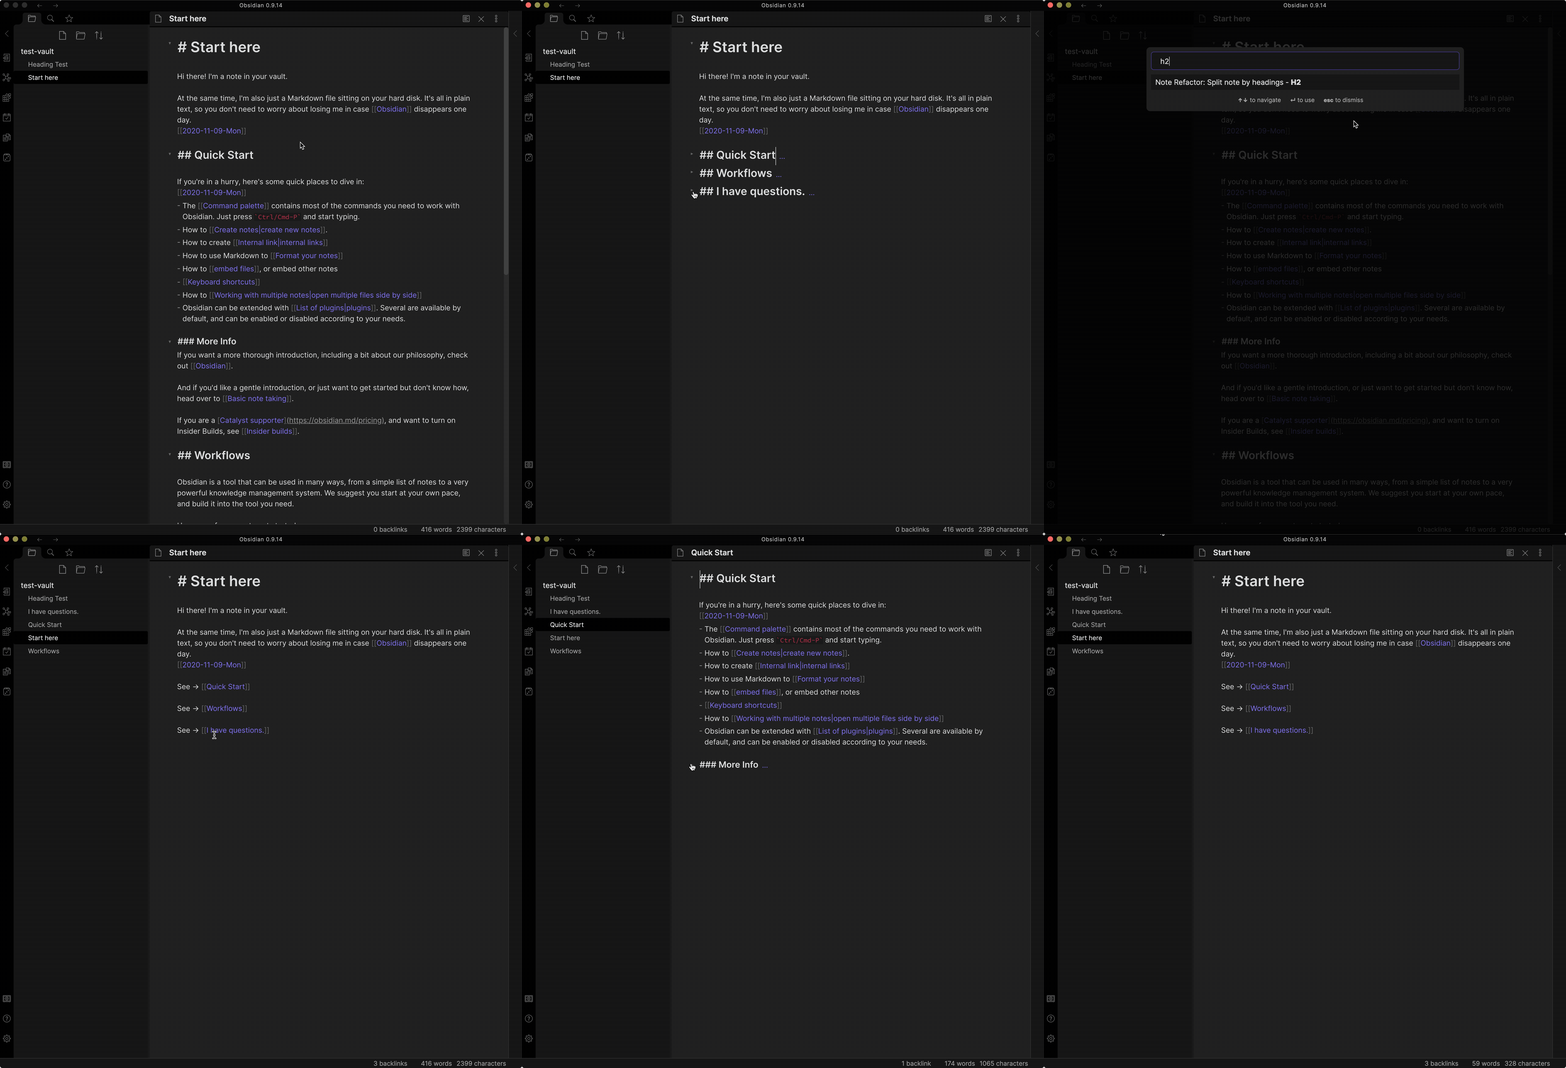
This command splits the current note into a new note for every heading at the level selected (H1, H2 or H3) using the heading as the file name for each new note.
Extracting the current selection into a new note or append to an existing one.
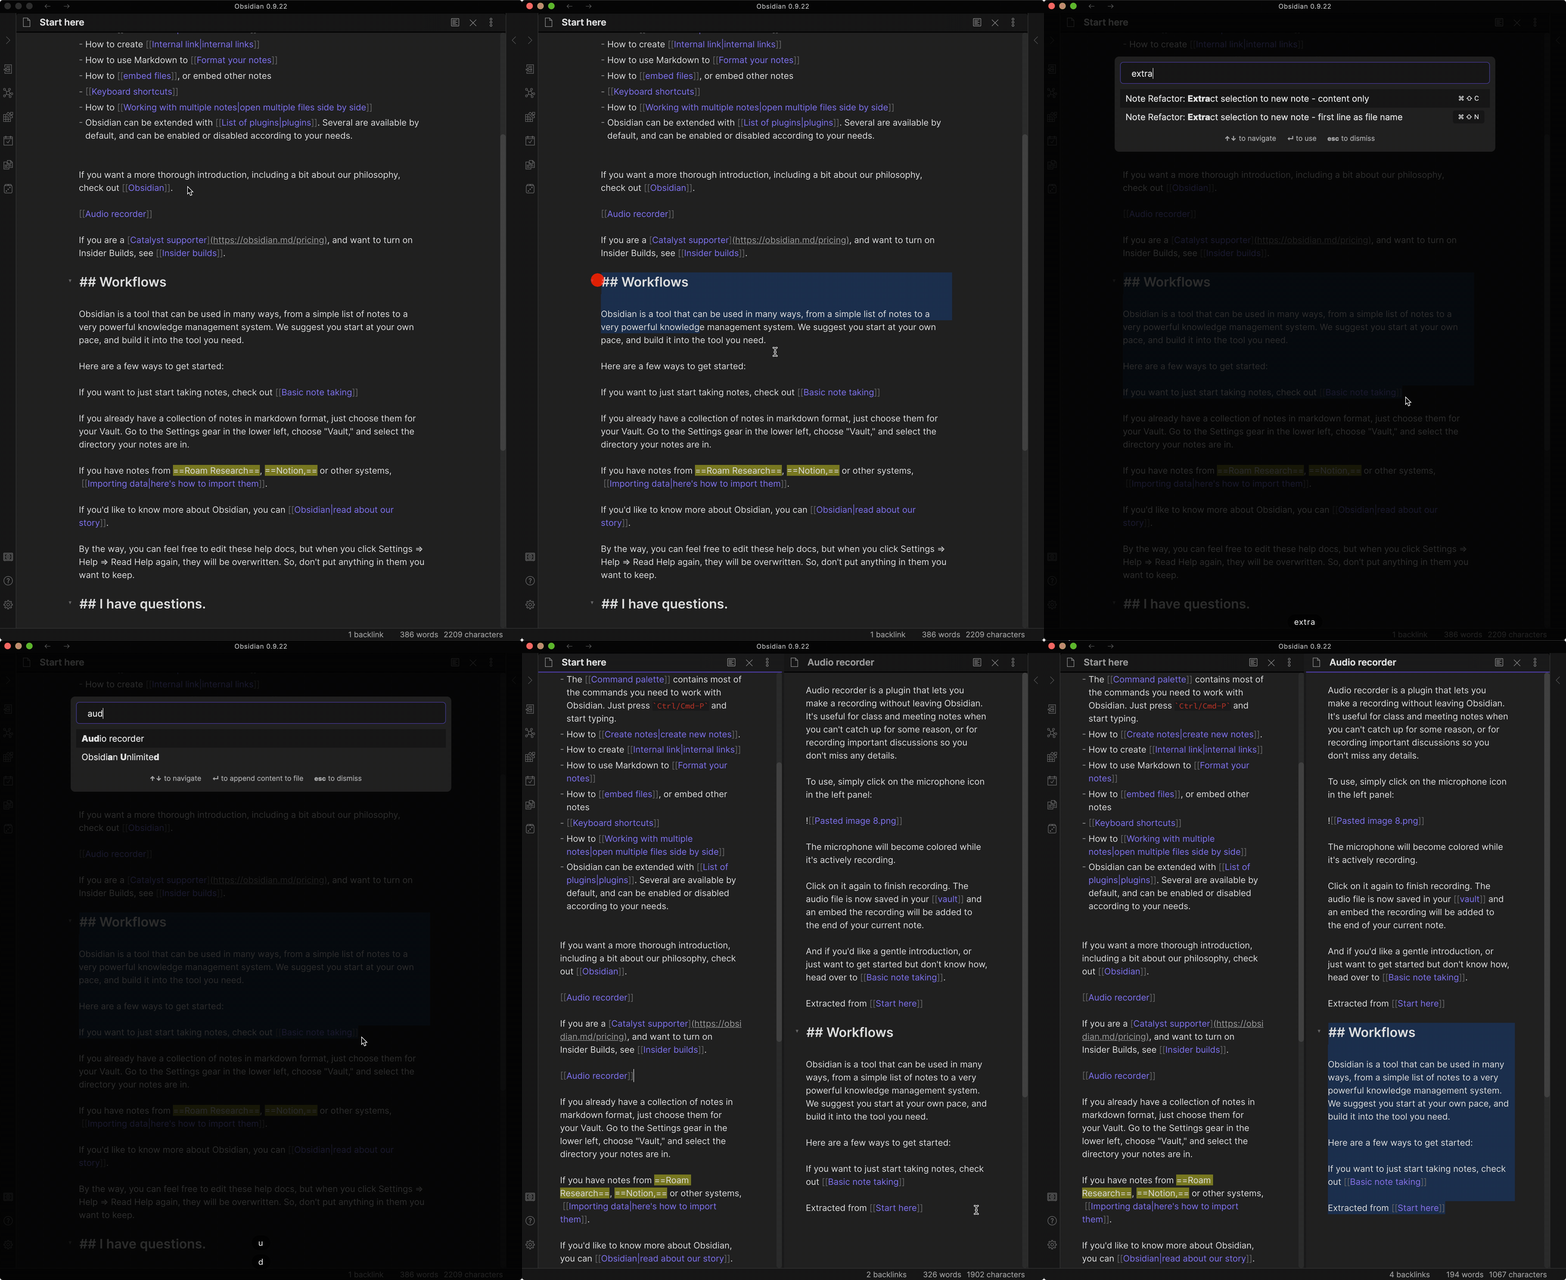
This command copies the selected text into the content of a new note using the first line as the file name for the new note or append to an existing one.
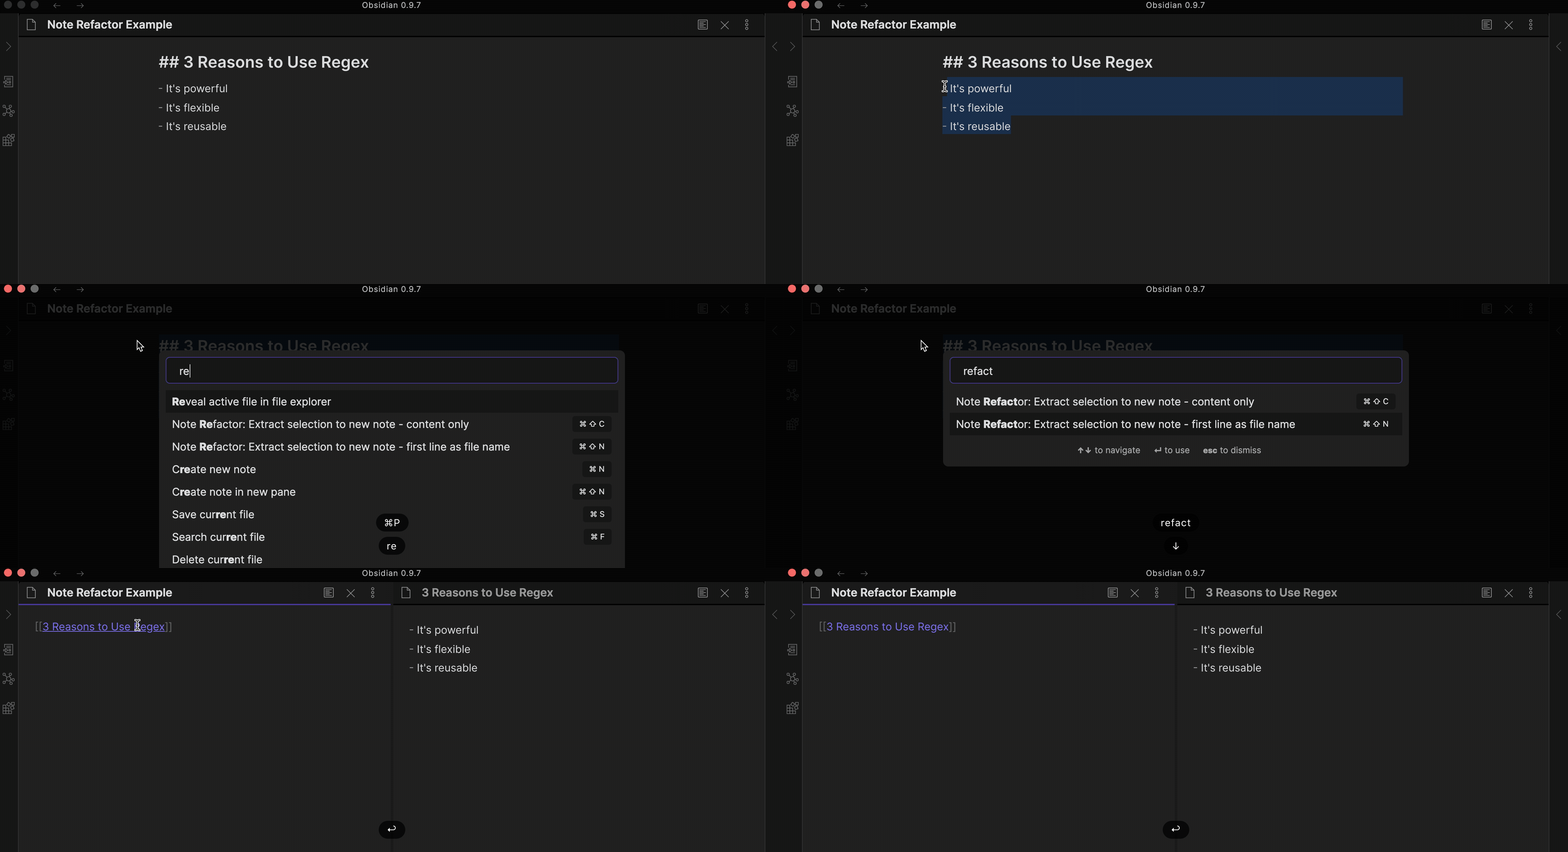
This command only copies the selected text into the content of a new note or append to an existing one. The user is prompted to enter a file name for the new note.
This command only copies the selected text into the content of a new note or append to an existing one. The filename is automatically generated based on the value of File name prefix setting. New note is created silently and will not be shown in a new pane.
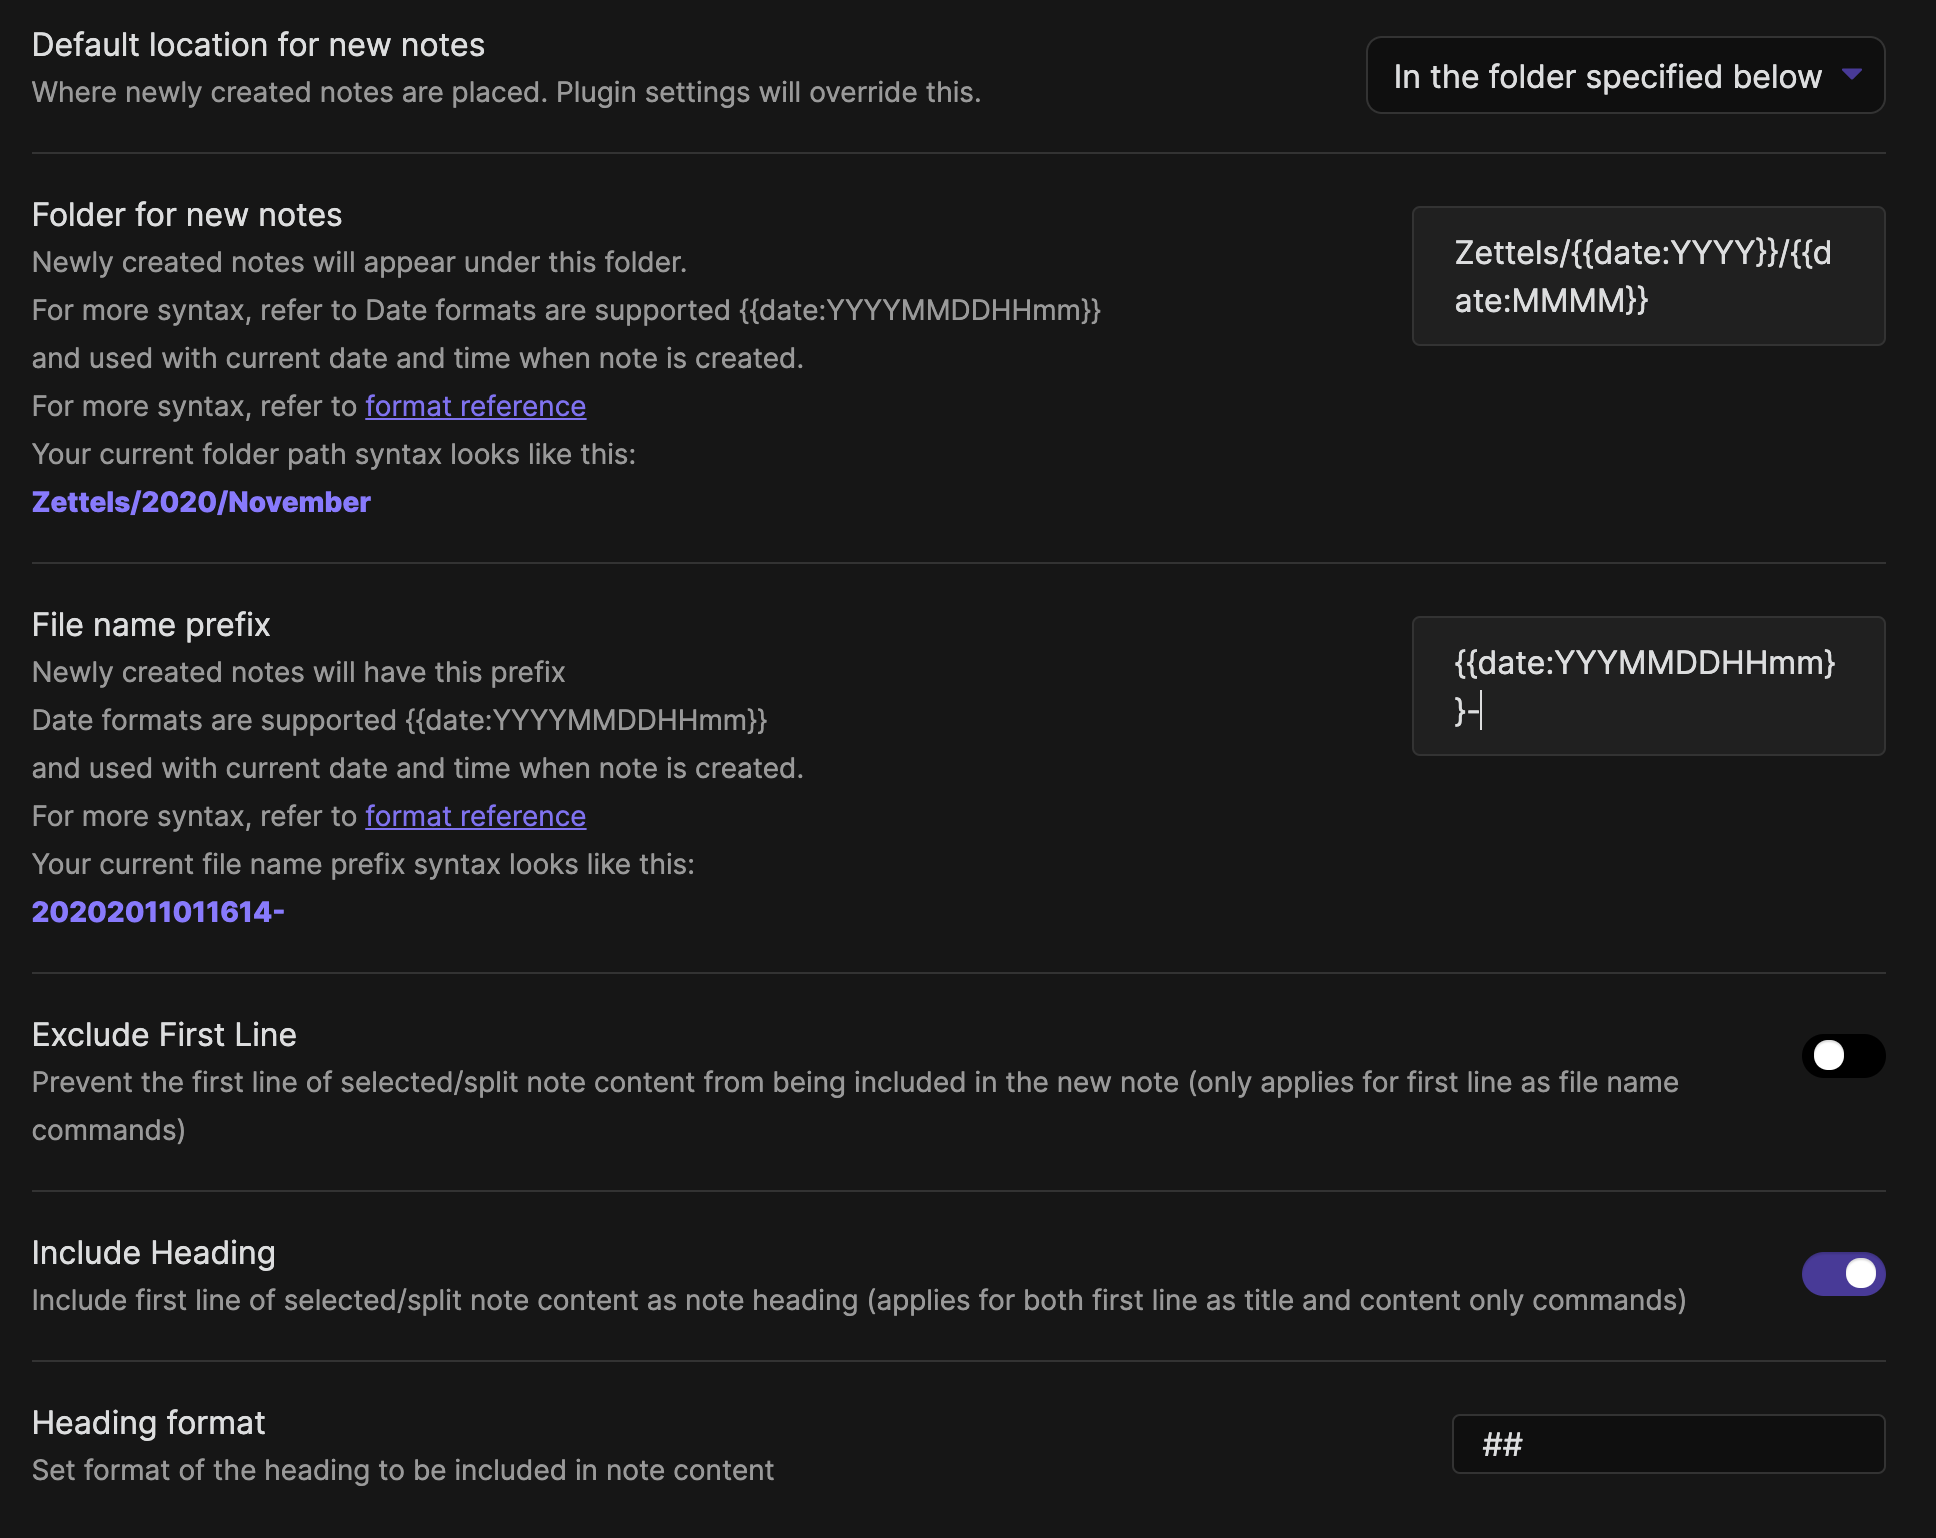
The location for new notes to be saved as a plugin config setting in line with the Obsidian core Default location for new notes setting.
3 options available:
- Vault folder
- Same folder as current file
- Specified folder
The specified folder option allows you to specify a folder path for new notes which can include multiple datetime formats.
Example
A folder path set as Zettels/{{date:YYYY}}/{{date:MMMM}} will add a new file to the following folder structure:
- [Vault]
- Zettels
- 2020
- October
- 2020
- Zettels
The file name prefix option allows you to specify a prefix for new notes which can include multiple datetime formats.
Example
A prefix set as {{date:YYYYMMDDHHmm}}- will add a new file with the following file name:
202010311425-My New Note
This config settings means that all inserted internal links to new notes created by any of the extraction or note splitting commands will be added as a transclusion/note embed ![[new note]] rather than a link [[new note]].
This config setting allows for the first line of the selected text to be included in the new note content as a heading with a configurable heading format #, ##, ###, etc.
This setting is applied for either the First Line filename or Content Only commands.
This setting sets the template used to generate the content to link to the extracted note. This overrides the Transclude by Default setting.
The following placeholders are supported and will be replaced with dynamic values when the plugin command is exectuted:
{{date}}the current date, this also supports date and time formats such asYYYYMMDDandHH:mm.{{title}}the title of the original note.{{new_note_title}}the title of the new note.{{new_note_content}}the refactored content for the new note.
This setting sets the template used to generate the content for the refactored note.
The following placeholders are supported and will be replaced with dynamic values when the plugin command is exectuted:
{{date}}the current date, this also supports date and time formats such asYYYYMMDDandHH:mm.{{title}}the title of the original note.{{new_note_title}}the title of the new note.{{new_note_content}}the refactored content for the new note.
This setting normalizes the levels of the headings in an extracted note.
For example,
## Heading 2
### Heading 3
becomes
# Heading 2
## Heading 3
Custom plugins are only available for Obsidian v0.9.7+.
The current API of this repo targets Obsidian v0.9.10.
As of version 0.9.7 of Obsidian, this plugin is available to be installed directly from within the app. The plugin can be found in the Community Plugins directory which can be accessed from the Settings pane under Third Party Plugins.
- Download the latest release
- Extract the note-refactor-obsidian folder from the zip to your vault's plugins folder:
<vault>/.obsidian/plugins/
Note: On some machines the.obsidianfolder may be hidden. On MacOS you should be able to pressCommand+Shift+Dotto show the folder in Finder. - Reload Obsidian
- If prompted about Safe Mode, you can disable safe mode and enable the plugin.
A check is done to avoid overwriting of existing files but...
💥 PLEASE TRY IN A TEST VAULT FIRST..AND MAKE SURE TO BACKUP! 💥
Credit to MrJackphil, this plugin is based on the code snippet he created.
Pull requests are both welcomed and appreciated. 😀
If you would like to contribute to the development of this plugin, please follow the guidelines provided in CONTRIBUTING.md.
This plugin is provided free of charge. If you would like to donate something to me, you can via PayPal. Thank you!


