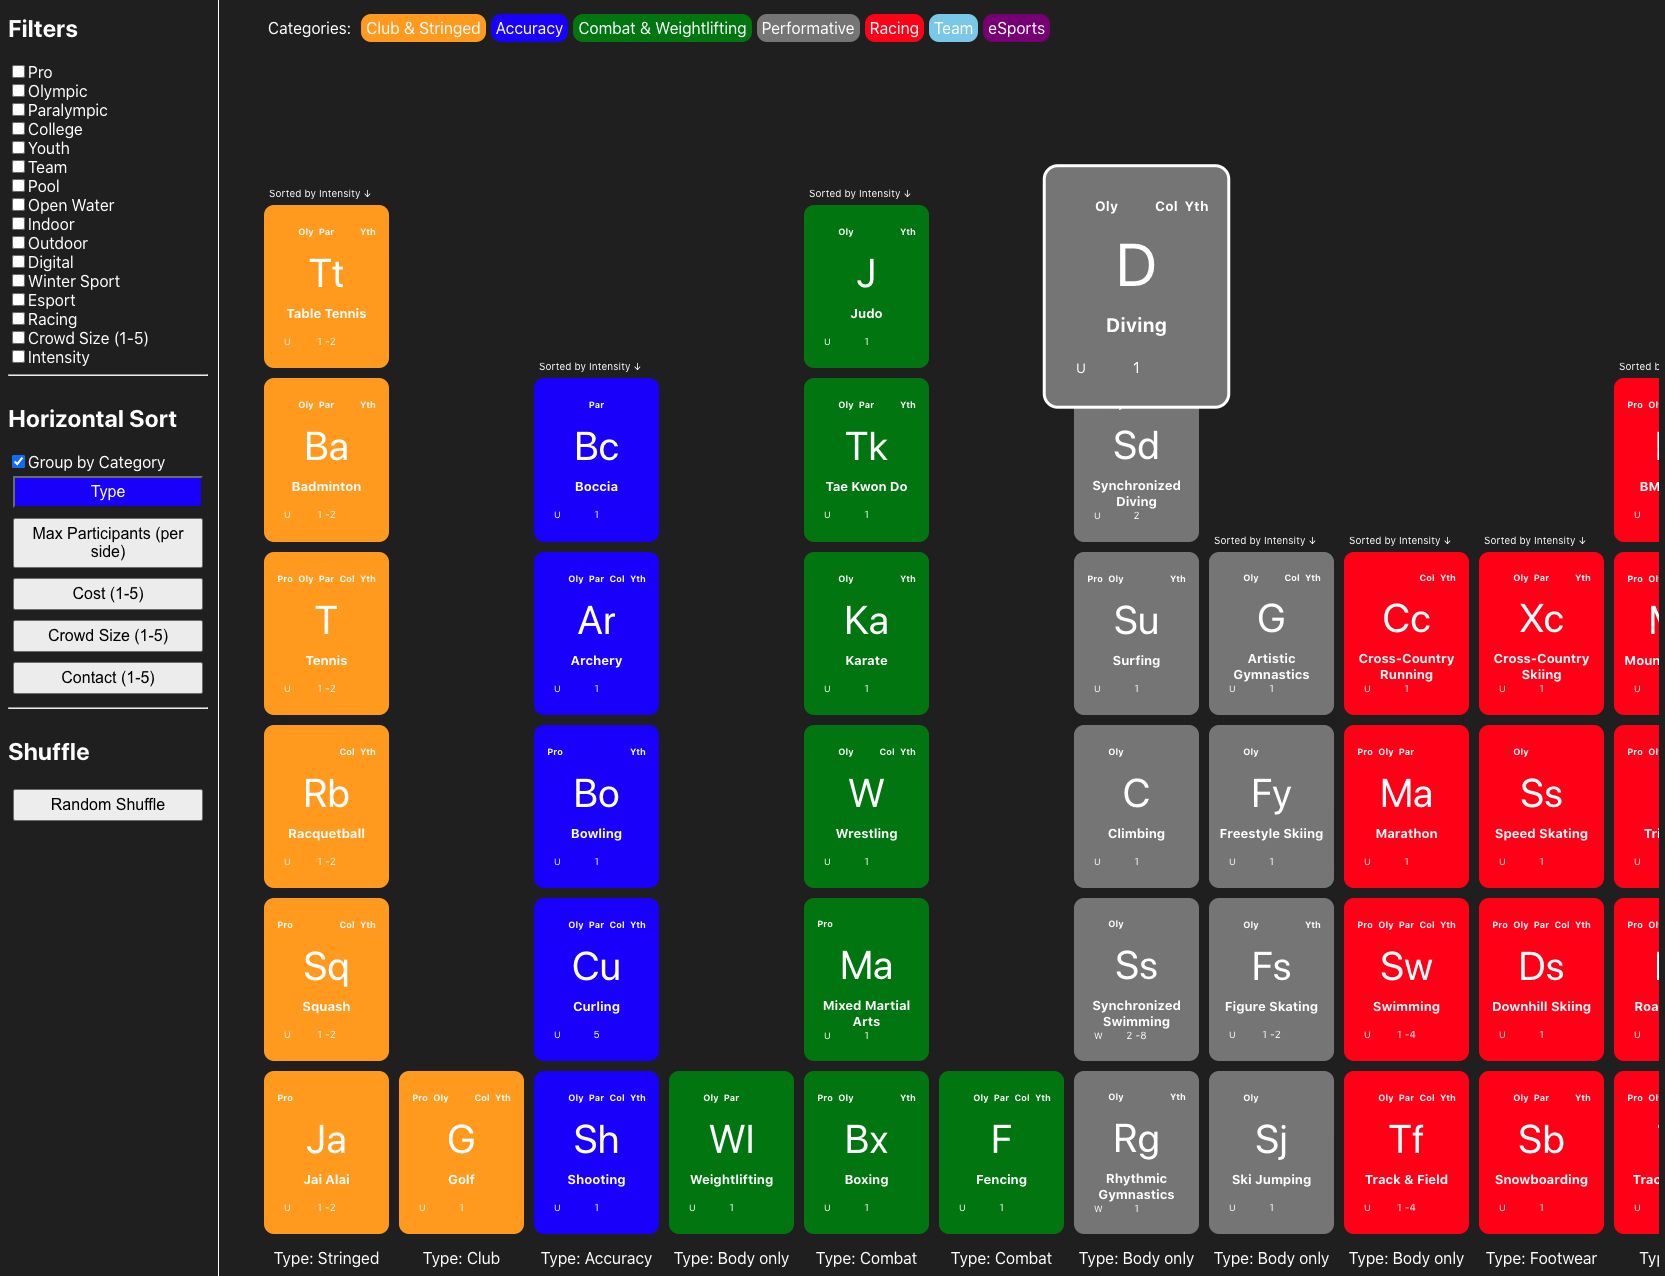
This project is a collaboration with the Sports team at Perkins Eastman. The Periodic Table of Sports presents over 80 differrent sports in a "periodic table" format. The table is sortable by different attributes such as Type and Cost, and filterable by attributes such as Professional or Olympic sports.
This project was bootstrapped with Create React App.
| Area of Focus | Technology |
|---|---|
| Frontend UI | React |
| Component Styling | CSS |
| Database | Google Sheets API |
| Server | Express |
In order to run this application, the following are required:
- Node.js 14.15+
- An IDE (Integrated Development Environment) - VS Code is recommended
- Git
- A Github account
- A Google Account
- A Google API developer key
-
Download and install Git
-
Download and install VS Code
-
Download and install Node.js
-
Create a Github account, login, and fork this repo
-
Open VS Code and navigate to a local working folder (e.g. My Documents)
-
Open a terminal window in VS Code and navigate to the same working folder by using the
cdcommand. -
In the terminal window, run the command
git clone [your-repo-url]to clone your forked repo locally on your computer -
In the terminal window, run the command
cd periodic-table-of-sportsto change the working directory -
Open a browser, login to Google and make a copy of this sheet
-
Click File -> Publish to the Web. Ensure that Entire Document and Web Page are selected and click Publish.
-
Click File -> Share and then enable sharing for
Anyone with the link. -
Open a new tab and login to the Google Developer Console.
-
In the console, create a New Project and name it
periodic-table-of-sports. -
Once the project is created, click Credentials on the side bar. Near the top of the screen click Create Credentials and select API Key. Copy the API Key and Click Close for now.
-
Near the top click
ENABLE APIS AND SERVICES. Search forGoogle Sheets APIand then enable the service. Once it's enabled, go back to the main dashboard. -
In VS Code, create a new file called
.envin theperiodic-table-of-sportsfolder. This environment file will hold the links to your Google Sheet as well as your Google Developer API Key. For security purposes, the spreadhseet links or API Key will never be published to github as long as the.envfile is included in the.gitignorefolder. -
Copy and paste the following into the
.envfile:REACT_APP_SPREADSHEET_LINK=https://sheets.googleapis.com/v4/spreadsheets/[your-google-sheet-id]/values/Levels?key=[your-google-developer-API-key] -
In the
.envfile, replace[your-google-sheet-id]with the Sheet ID from your Google Sheet URL (see screenshot below) and replace[your-google-developer-API-key]with the API key generated in step 12. Save and close the.envfile.
-
In the terminal window, run the command
npm installto install all required packages. -
In the terminal window, run the command
npm startto start the application in Development mode. -
Visit http://localhost:3000 to view the app.
-
Make changes to
src/components/app/app.jsand watch the changes live in the browser. -
To build and serve the app, run the command
npm run serverto build and serve the application in Production mode.
In the project directory, you can run:
Runs the app in the development mode.
Open http://localhost:3000 to view it in the browser.
The page will reload if you make edits.
You will also see any lint errors in the console.
Launches the test runner in the interactive watch mode.
See the section about running tests for more information.
Builds the app for production to the build folder.
It correctly bundles React in production mode and optimizes the build for the best performance.
The build is minified and the filenames include the hashes.
Your app is ready to be deployed!
See the section about deployment for more information.
Builds and serves the static files in the build folder using a simple express.js server. The app will be available at http://localhost.
Note: this is a one-way operation. Once you eject, you can’t go back!
If you aren’t satisfied with the build tool and configuration choices, you can eject at any time. This command will remove the single build dependency from your project.
Instead, it will copy all the configuration files and the transitive dependencies (webpack, Babel, ESLint, etc) right into your project so you have full control over them. All of the commands except eject will still work, but they will point to the copied scripts so you can tweak them. At this point you’re on your own.
You don’t have to ever use eject. The curated feature set is suitable for small and middle deployments, and you shouldn’t feel obligated to use this feature. However we understand that this tool wouldn’t be useful if you couldn’t customize it when you are ready for it.
You can learn more in the Create React App documentation.
To learn React, check out the React documentation.
This section has moved here: https://facebook.github.io/create-react-app/docs/code-splitting
This section has moved here: https://facebook.github.io/create-react-app/docs/analyzing-the-bundle-size
This section has moved here: https://facebook.github.io/create-react-app/docs/making-a-progressive-web-app
This section has moved here: https://facebook.github.io/create-react-app/docs/advanced-configuration
This section has moved here: https://facebook.github.io/create-react-app/docs/deployment
This section has moved here: https://facebook.github.io/create-react-app/docs/troubleshooting#npm-run-build-fails-to-minify
