Qcom CLI is a comfortable environment for learning QcomJS, and is the best way to start building a new single-page application in Qcom by Creating Custom web elements wth Qcom and manage Web components with generating functions in Modern Javascript.
npx @qcom.io/qcom-cli
npm startnpm install @qcom.io/qcom --save<script type="module">
import $ from 'https://unpkg.com/@qcom.io/qcom'
// Or import $ from './node_modules/@qcom.io/qcom/index.js'
$() // Now check your Inspector of Browser He will guide you for further steps
</script><qcom-hello-world></qcom-hello-world>
<script type="module">
import $ from 'https://unpkg.com/@qcom.io/qcom'
// Or import $ from './node_modules/@qcom.io/qcom/index.js'
$({
name:'QcomHelloWorld',
template:()=>h1('Hello World')
})
</script>HTML
<h1 class="head" style = "color:red; background-color: yellow" id="heading" > I am H1 </h1>Qcom
h1({class:'head', style:{ color:'red', backgroundColor : 'Yellow' }, id:'heading' }, 'I am H1' )<qcom-functions></qcom-functions>
<script type="module">
import $ from 'https://unpkg.com/@qcom.io/qcom'
$({
name:'QcomFunctions',
template:()=>div(h1({click:'QcomFunctions.log()'},'Click Here')),
code:{
log:()=>{
//Do something here
alert('clicked')
}
//Create your own functions here like log()
}
})
</script><qcom-data></qcom-data>
<script type="module">
import $ from 'https://unpkg.com/@qcom.io/qcom'
$({
name:'QcomData',
data:{
counter:0
},
template:()=>div( /* div must be here to wrap all internal tags*/
h1(this.data.counter),
button({click:'QcomData.add()'},'+'),
button({click:'QcomData.sub()'},'-')
),
code:{
add:()=>{
this.data.counter += 1
this.render()
},
sub:()=>{
this.data.counter -= 1
this.render()
}
}
})
</script><qcom-loop></qcom-loop>
<script type="module">
import $ from 'https://unpkg.com/@qcom.io/qcom'
$({
name:'QcomLoop',
data:{
items:[{id:1,name:'Abigail',age:21},
{id:2,name:'max',age:29},
{id:3,name:'Alison',age:17},
{id:4,name:'bob',age:32},
{id:5,name:'brad',age:36}]
},
template:()=>div(
table(
tr(
td('Index'),
td('Name'),
td('Age')
),
()=>this.data.items.map(item =>
tr(
td(item.id),
td(item.name),
td(item.age))
)
)
)
})
</script><qcom-get></qcom-get>
<script type="module">
import $ from 'https://unpkg.com/@qcom.io/qcom'
$({
name:'QcomGet',
data:{
items:[]
},
template:()=>div(
table(
tr(
td('Id'),
td('Title'),
td('completed')
),
()=>this.data.items.map(item =>
tr(
td(item.id),
td(item.title),
td(item.completed))
)
)
),
code:{
onload:async ()=>{
this.data.items = await qcom.get('https://jsonplaceholder.typicode.com/todos/')
this.render()
}
}
})
</script><qcom-css-example></qcom-css-example>
<script type="module">
import $,{color} from 'https://unpkg.com/@qcom.io/qcom'
$({
name:'QcomCssExample',
globalcss:{ /* Global CSS*/
'*':{
margin:'50px',
padding:'50px'
}
},
css:{ /* Internal CSS*/
h1:{
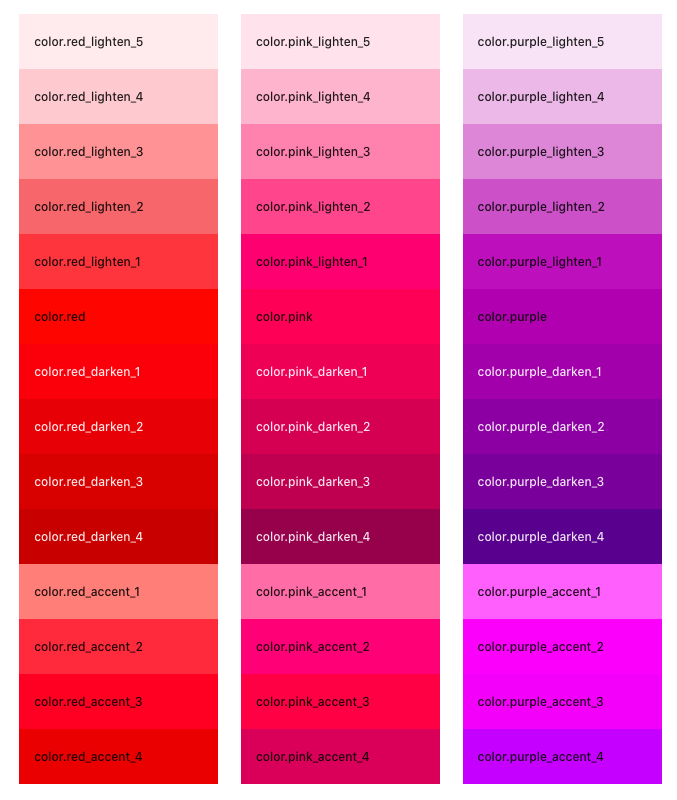
color:color.red,
cursor:'pointer',
backgroundColor:color.yellow
},
'.mt':{
marginTop:'5px'
}
},
template:()=>div(
h1({class:'mt',style:{ /* Inline CSS*/
border:'2px solid red'
}},'Inline Internal and global Style')
)
})
</script><qcom-main></qcom-main>
<script type="module">
import $ from 'https://unpkg.com/@qcom.io/qcom'
let QcomOne = {
name:'QcomOne',
data:{
items:[
{name:'mahesh'},{name:'dipak'}
]
},
template:()=>div(h1('Page One'),
()=>this.data.items.map(item =>
div(item.name)))
}
let QcomTwo ={
name:'QcomTwo',
data:{
items:[]
},
template:()=>row(
col(form(
material(
h1('Registration'),
input({id:'name',class:'mb6',placeholder:'Name'}),
input({id:'email',class:'mb6',placeholder:'Email'}),
input({id:'password',class:'mb6',placeholder:'Password'}),
right(btn({click:'QcomTwo.post()',is:'md'},'Submit')))
)),
col(table(
tr(
td('Name'),
td('Email'),
td('Password')
),
()=>this.data.items.map(item =>
tr(td(item.name),
td(item.email),
td(item.password)))
))
),
code:{
post:()=>{
this.data.items.push({
name:getval('name'),
email:getval('email'),
password:getval('password')
})
this.render()
}
}
}
let QcomError = {
name:'QcomError',template:()=>div(
h1('404 Page')
)
}
$({
name:'QcomMain',
template:()=>div(
appbar(
btn({route:'/QcomOne',is:'link', class:'ml12'},'One'),
btn({route:'/QcomTwo',is:'link', class:'ml12'},'Two'),
btn({route:'/QcomError',is:'link', class:'ml12'},'404')
),
div({class:'mt12', id:'root'})
),
include:[QcomOne,QcomTwo,QcomError],
router:{
root:'QcomOne',
view:'root',
error:$('QcomError')(),
links:['QcomOne','QcomTwo']
}
})
</script>Grammar:
                                        function
 ┌─────────-───────────────────────────────┴────────────────────────────────────────────────────────┐
 │                            separators                                                            |
 │                   ┌────────────┴───┬────────────────┬───────────────────────────┐                |
 |                   ↓                ↓                ↓                           ↓                |
p(  { to:'firstname' ,   class:'mt12' , id:'firstname' , style: {color:color.red} }, 'Hello World'  )
        └───┬───┘          └───┬───┘     └────┬───┘       └────┬────────┘                 |
            ┴───────────┬──────┴─────-──-─────┘-──-─────-─────-┘                          |
                   attributes                                                           Text
Use color : For color coding
import $,{color} from 'https://unpkg.com/@qcom.io/qcom'
$({
    theme:{
        color:color.red,
        background:color.yellow
    }
})
Use to : For Two way data binding
        input({to:'email'}),
            p({to:'email'},'')
Use router : For static and dynamic routing
    template:()=>div(
            appbar(
                btn({route:'/QcomOne',is:'link', class:'ml12'},'One'),
                btn({route:'/QcomTwo',is:'link', class:'ml12'},'Two'),
            ),
            div({class:'mt12', id:'root'})    //<-|
        ),                                   //   |
        include:[QcomOne,QcomTwo,QcomError],//    |
        router:{                           //     |
            root:'QcomOne',               //      |
            view:'root', // id of div <-----------|
            error:$('QcomError')(),
            links:['QcomOne','QcomTwo']
        }


