-
Notifications
You must be signed in to change notification settings - Fork 0
Let's Add A Redux To It
This is an example of how to use redux to go "full circle." This goes over the how of redux, i.e. how to use it and start writing some redux related code. To understand the what or the why, please look here (still a WIP).
This wiki page is based on this PR that adds edit mode to NNB. It mainly deals with the boolean state of isEditing. However, it should be fairly similar to anything else you might want to do with redux.
There are a lot of files to keep track of, but fear not, each one is fairly simple by itself.
// reducers/initialState.js
const initialState = {
  edit: {
    isEditing: false
  }
}

export default initialState// actions/actionTypes.js
export const EDIT_MODE_ENABLED = 'EDIT_MODE_ENABLED'
export const EDIT_MODE_DISABLED = 'EDIT_MODE_DISABLED'The purpose of explicitly declaring constants is so that we can reference the action types via a variable as opposed to a string value. This helps us ensure that typos get caught by compiler or runtime errors instead of causing spooky, hard to find bugs.
Note: anywhere <> is used, you should replace it with the thing you're trying to add. In this example, it will be edit.
// actions/<>.action.js
import * as actionTypes from './actionTypes'

function editModeEnabled() {
  return { type: actionTypes.EDIT_MODE_ENABLED, payload: true }
}

function editModeDisabled() {
  return { type: actionTypes.EDIT_MODE_DISABLED, payload: false }
}
Recall that an action is simply an object that contains a type and a payload. An action creator is a simply a function that creates an action. (how insightful varun...)
Note: the action creator should be called the same thing as its corresponding action, but in camelCase.
// actions/<>.action.js
// action creators above

export function enableEditMode() {
  return dispatch => dispatch(editModeEnabled())
}

export function disableEditMode() {
  return dispatch => dispatch(editModeDisabled())
}
These should return functions that dispatch your actions. Dispatching actions is what "fires" them, which will then let redux know internally that a reducer should pick it up to process them.
This example is very basic since all the enableEditMode function needs to do is fire the EDIT_MODE_DISABLED action. The important thing to account for is when you should dispatch your actions.
For example, if you are making an asynchronous API request, you will want to dispatch the action after you receive your response. For an API request that corresponds to a MAPS_RECEIVED action, it might look something like:
  return dispatch => {
    return Api.getMaps().then(maps => dispatch(mapsReceived(maps)))
  }
}// actions/index.js
import { enableEditMode, disableEditMode } from './edit.action'
export { enableEditMode, disableEditMode }This will simply make all the action dipatcher functions available to import elsewhere in the app.
// reducers/<>.reducer.js

import initialState from './initialState'
import { EDIT_MODE_ENABLED, EDIT_MODE_DISABLED } from '../actions/actionTypes'

export default function edit(state = initialState.edit, action) {
  switch (action.type) {
    case EDIT_MODE_ENABLED:
    case EDIT_MODE_DISABLED:
      return {
        ...state,
        isEditing: action.payload
      }
    default:
      return state
  }
}
Recall that a reducer is simply a pure function f(currentState, action) => nextState.
IMPORTANT: Given the type of action, it's job is to return what the next app state should look like. It's very important that you maintain that this function is pure, i.e. it does NOT mutate the state, and does NOT cause side effects. Read more here.
Here we are making use of the spread operator to make a new copy of the state object. This syntax allows us to concisely create a new, unmutated copy of the state object and change the specified keys.
The switch statement above makes use of the fall through feature.
// reducers/rootReducer.js
import { combineReducers } from 'redux'
import edit from './edit.reducer'

const rootReducer = combineReducers({
  edit
})

export default rootReducer
If the rootReducer already exists, just import your reducer and add it to the object given to combineReducers.
Read this post about Presentational (Dumb) Components and Container (Smart) Components from the creator of redux. Essentially, container components deal with the app logic and app state, whereas presentational components deal with rendering views (JSX/DOM). Splitting them into the two allows for better separation of concerns.
Presentational Component:
import React, { Component } from 'react'

export default class Edit extends Component {
  render() {
    const { isEditing, enableEditMode, disableEditMode } = this.props
    return (
      <div>
        <button onClick={isEditing ? disableEditMode : enableEditMode}>
          {isEditing ? 'disableEditMode' : 'enableEditMode'}
        </button>
      </div>
    )
  }
}
This should look like a very standard react component that you are familiar with. But where are its props coming from? Find out below! (like legit right under this line)
Container:
components/<>.container.js

import { connect } from 'react-redux'
import { bindActionCreators } from 'redux'
import { enableEditMode, disableEditMode } from './../actions'
import Edit from './Edit.component'

function mapStateToProps(state) {
  return {
    isEditing: state.edit.isEditing
  }
}

function mapDispatchToProps(dispatch) {
  return bindActionCreators(
    {
      enableEditMode,
      disableEditMode
    },
    dispatch
  )
}

export default connect(mapStateToProps, mapDispatchToProps)(Edit)
This is where a couple new things are added:
-
mapStateToPropslets you pick which parts of the app state you want to send into the presentational component as props -
mapDispatchToPropslets you pick which action dispatcher functions you want to send into the presentational component as props
This paradigm allows every component to only care about exactly what it needs (props) and what it does (action dispatcher functions).
Install the redux devtools browser extension if you haven't already:
The redux devtools are hella dope, but it's also a reflection of how dope redux itself is.
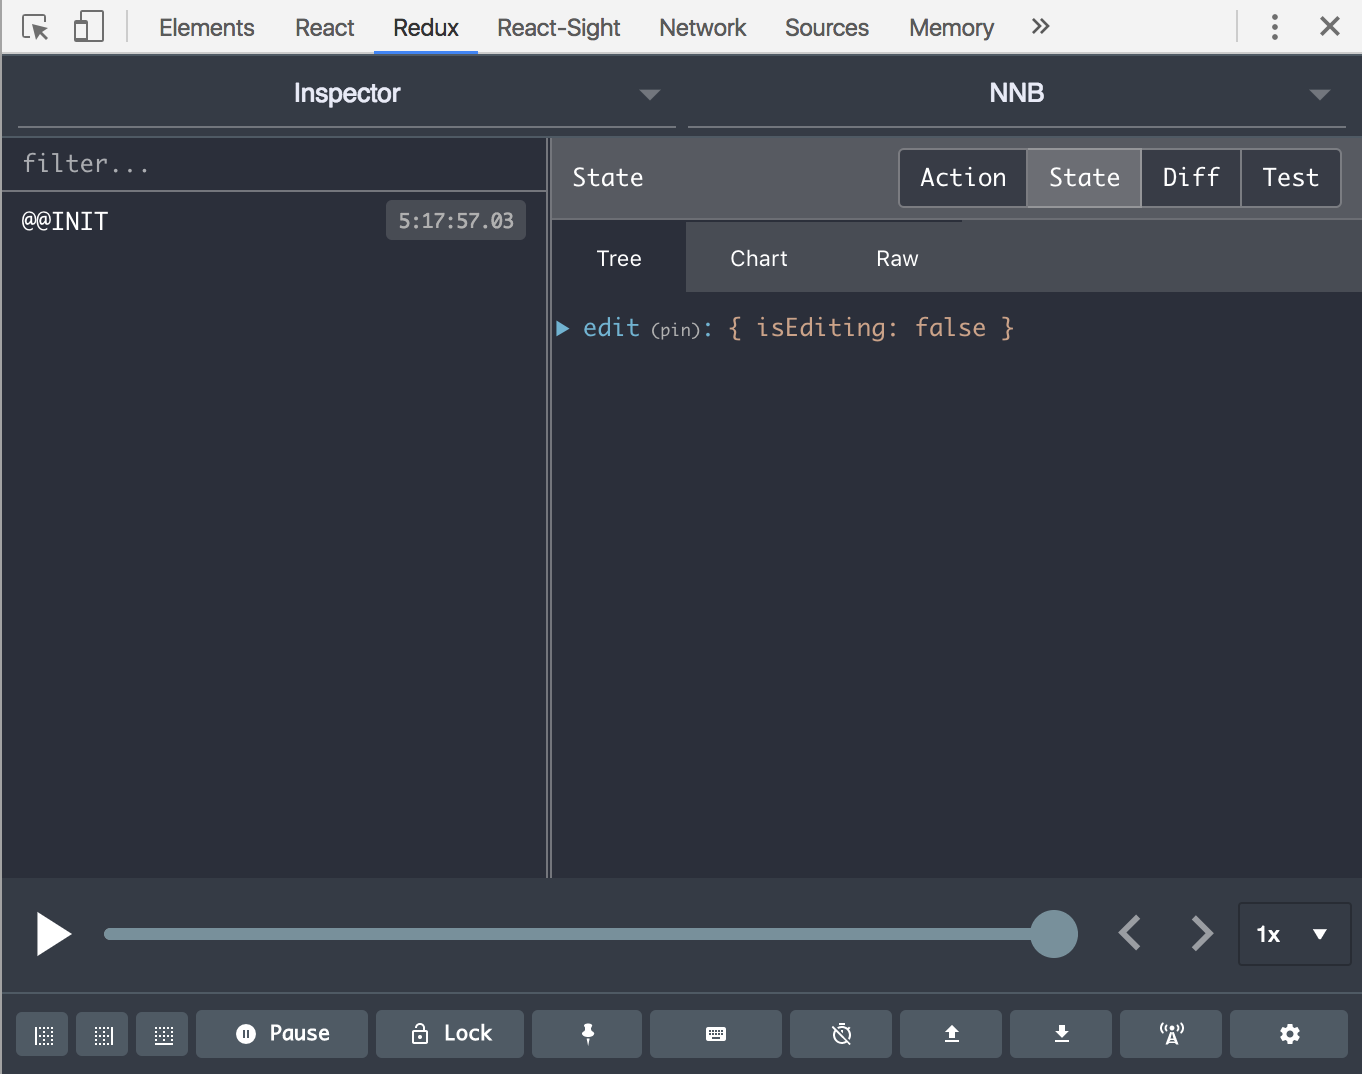
When you start the app, your store should look something like this:

Notice that it's a reflection of your initialState.
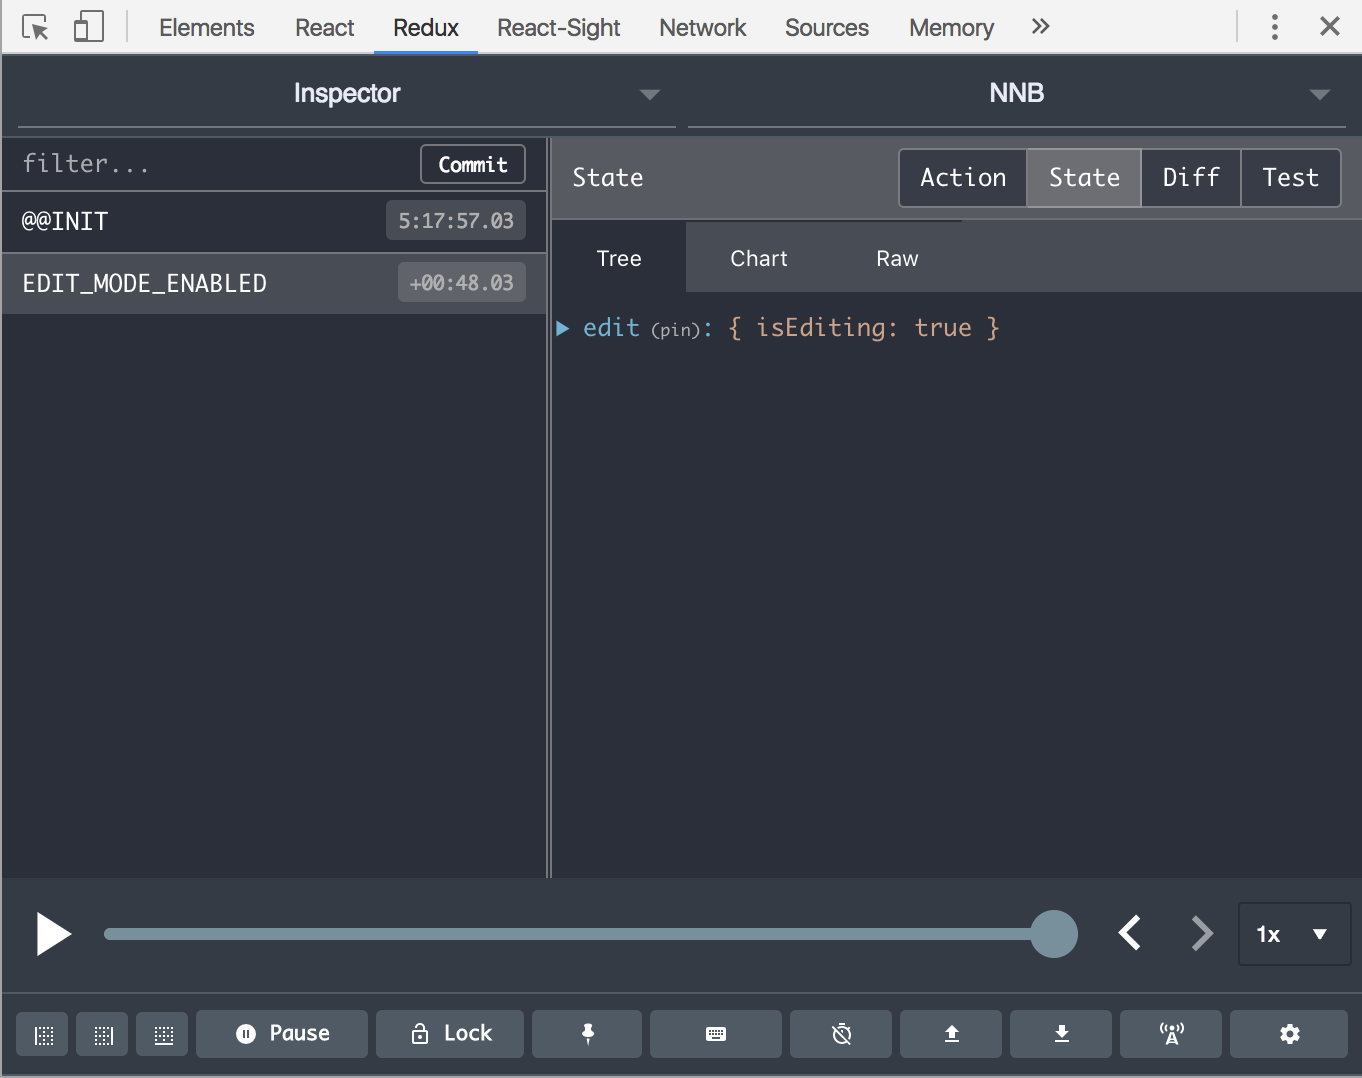
Click the button in the Edit component and watch the state update:

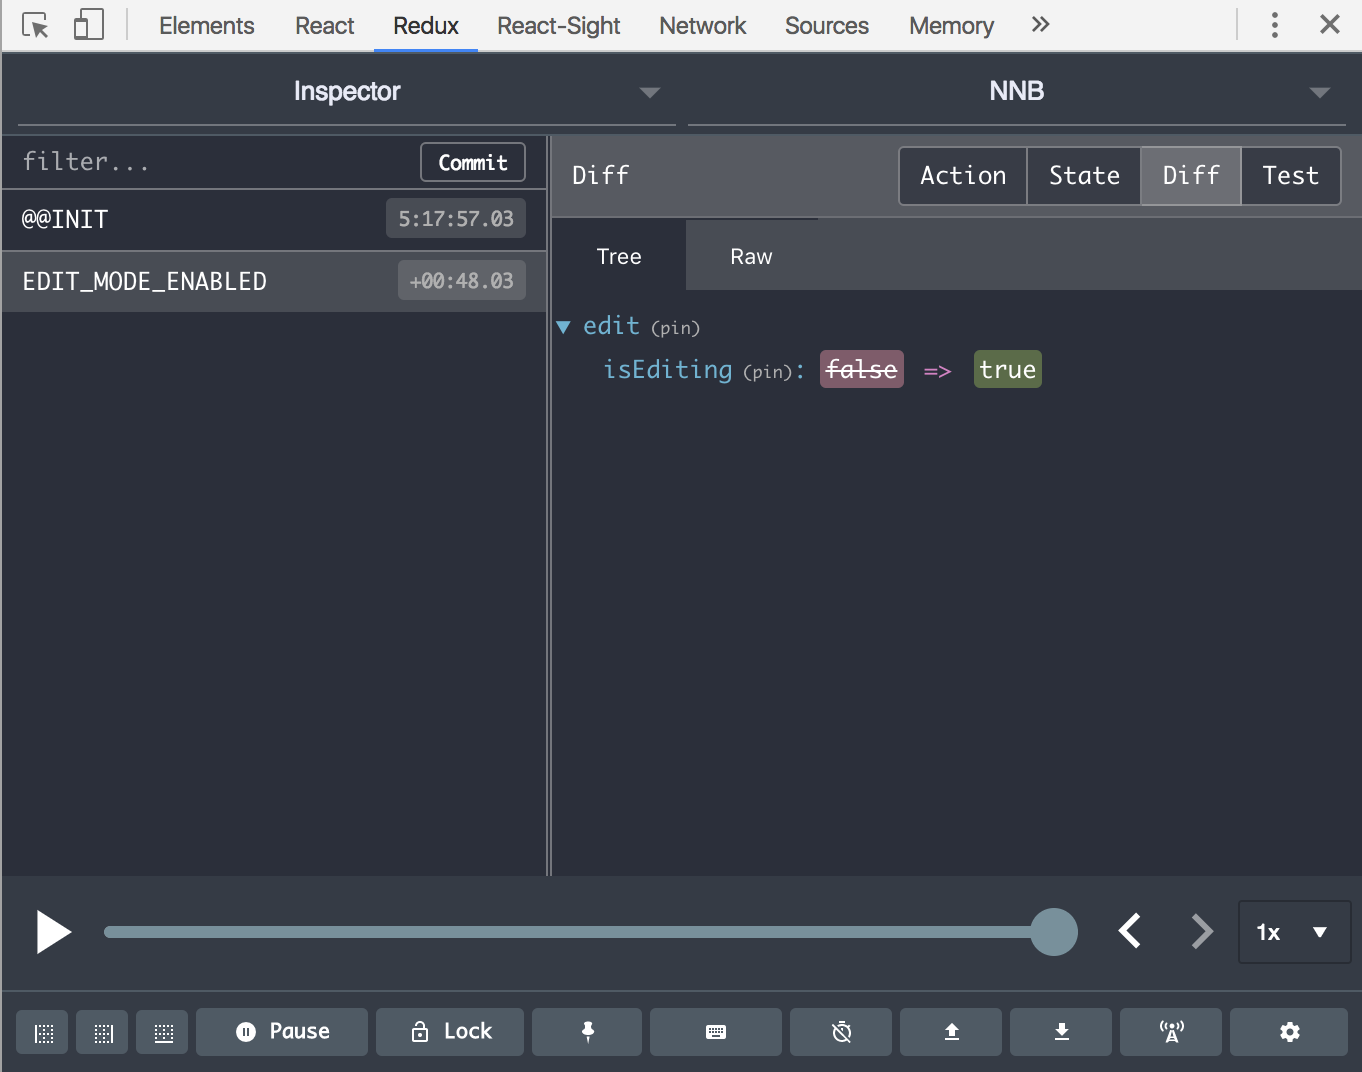
You can also see exactly what changed in the diff tab:

AND you can time travel! Click the arrows in the timeline to rewind and replay the actions! Ain't that HELLA DOPE???
Here is what the data flow looks like for this example:
- click the button defined in the
Editcomponent - the button's
onClickwill call theenableEditModeaction dispatcher function - this dispatches the
EDIT_MODE_ENABLEDaction - the action gets picked up by the edit reducer
- the edit reducer decides what the next state should be given the current state and the action
- the store is updated with the next state the reducer returns
- the new state is delivered to the container/component as props
The cool thing is that this flow will look basically the same for any other feature. Once you get the hang of this, it will be much easier to develop more complicated features yet still maintain readability and minimize complexity!
- Home
- Who we are
- Development Guidelines
- FAQs
- Reading Documentation
- Looking into the Future
- Take Home Exercises
- HTML and CSS
- React
- Common Javascript Syntax in React
- Common React Anti-Patterns and Debugging
- Other Frontend Resources
- Redux
- Let's Add A Redux To It
- React Resources