Some of my custom components for home-assistant. (http://www.home-assistant.io)
- TOON Thermostat climate component
- TOON Smart Meter sensor component
- TOON Boiler Status sensor component
- SolarPortal sensor component
- Battefield1 Stats component
- P2000 Emergency Services component
- Fritzbox_callmonitor Notification example
- Remarks component
- arp-scan Device Tracker component
- Plugwise component
- TheThingsNetwork Gateway status component
- HVCGroep Garbage Collect sensor component
- Volkswagen Carnet component
NOTE: This component only works with rooted TOON devices. Toon's are Thermostats sold by Eneco a Dutch energy company.
More information about preparing for usage with this component can be found here: Eneco TOON as Domotica controller
This component reads the Thermostat Mode, Current Temperature and it's Setpoint. You can also control the thermostat Mode and Setpoint. (target temperature)
- Copy directory
toonto your<config dir>/custom_componentsdirectory. - Configure with config below.
- Restart Home-Assistant.
To use this component in your installation, add the following to your configuration.yaml file:
# Example configuration.yaml entry

climate:
  - platform: toon
    name: Toon Thermostat
    host: IP_ADDRESS
    port: 10080
    scan_interval: 10
Configuration variables:
- name (Optional): Name of the device. (default = 'Toon Thermostat')
- host (Required): The hostname or IP address on which the Toon can be reached.
- port (Optional): Port used by your Toon. (default = 10080)
- scan_interval (Optional): Number of seconds between polls. (default = 60)
NOTE: This component only works with rooted TOON devices.
It reads Smart Meter data from your TOON, gathered by the meteradapter.
- Copy directory
toon_smartmeterto your<config dir>/custom_componentsdirectory. - Configure with config below.
- Restart Home-Assistant.
To use this component in your installation, add the following to your configuration.yaml file:
# Example configuration.yaml entry

sensor:
  - platform: toon_smartmeter
    host: IP_ADDRESS
    port: 10080
    scan_interval: 10
    resources:
      - gasused
      - gasusedcnt
      - elecusageflowpulse
      - elecusagecntpulse
      - elecusageflowlow
      - elecusagecntlow
      - elecusageflowhigh
      - elecusagecnthigh
      - elecprodflowlow
      - elecprodcntlow
      - elecprodflowhigh
      - elecprodcnthigh
      - elecsolar
      - elecsolarcnt
      - heat
Configuration variables:
- host (Required): The hostname or IP address on which the TOON can be reached.
- port (Optional): Port used by your TOON. (default = 10080)
- scan_interval (Optional): Number of seconds between polls. (default = 10)
- resources (Required): This section tells the component which values to display, you can leave out the elecprod values if your don't generate power and the elecusage*pulse types if you use the P1 connection.
If you want them grouped instead of having the separate sensor badges, you can use this in your groups.yaml:
# Example groups.yaml entry

Smart meter:
  - sensor.toon_gas_used_last_hour
  - sensor.toon_gas_used_cnt
  - sensor.toon_power_use_cnt
  - sensor.toon_power_use
  - sensor.toon_p1_power_prod_low
  - sensor.toon_p1_power_prod_high
  - sensor.toon_p1_power_prod_cnt_low
  - sensor.toon_p1_power_prod_cnt_high
  - sensor.toon_p1_power_use_cnt_pulse
  - sensor.toon_p1_power_use_cnt_low
  - sensor.toon_p1_power_use_cnt_high
  - sensor.toon_p1_power_use_low
  - sensor.toon_p1_power_use_high
  - sensor.toon_p1_power_solar
  - sensor.toon_p1_power_solar_cnt
- sensor.toon_p1_heatNOTE: This component only works with rooted TOON devices. And installed BoilerStatus app via ToonStore.
It reads OpenTherm Boiler data from your TOON, gathered by the thermostat adapter.
- Copy directory
toon_boilerstatusto your<config dir>/custom_componentsdirectory. - Configure with config below.
- Restart Home-Assistant.
To use this component in your installation, add the following to your configuration.yaml file:
# Example configuration.yaml entry

sensor:
  - platform: toon_boilerstatus
    host: IP_ADDRESS
    port: 10080
    scan_interval: 10
    resources:
      - boilersetpoint
      - boilerintemp
      - boilerouttemp
      - boilerpressure
      - boilermodulationlevel
      - roomtemp
      - roomtempsetpoint
Configuration variables:
- host (Required): The hostname or IP address on which the TOON can be reached.
- port (Optional): Port used by your TOON. (default = 10080)
- scan_interval (Optional): Number of seconds between polls. (default = 10)
- resources (Required): This section tells the component which values to display and monitor.
By default the values are displayed as badges.
If you want them grouped instead of having the separate sensor badges, you can use this in your groups.yaml:
# Example groups.yaml entry

Boiler Status:
  - sensor.toon_boiler_intemp
  - sensor.toon_boiler_outtemp
  - sensor.toon_boiler_setpoint
  - sensor.toon_boiler_pressure
  - sensor.toon_boiler_modulation
  - sensor.toon_room_temp
- sensor.toon_room_temp_setpointNOTE: API seem to have changed, need new reverse engineering!
Dear Customers,
Omnik old version APP has removed,and no running anymore. Please download new APP version (Omnik Portal) from the App Store.
If you use Android system, please go to Google play download: "Omnik Portal" https://play.google.com/store/apps/details?id=com.jialeinfo.omniksolar&hl=en
If you use iOS system, please go to iOS App store download: "Omnik Portal" https://itunes.apple.com/cn/app/id1246117091
Thank you so much for your notice.
Omnik Team
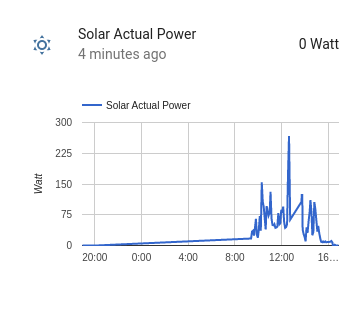
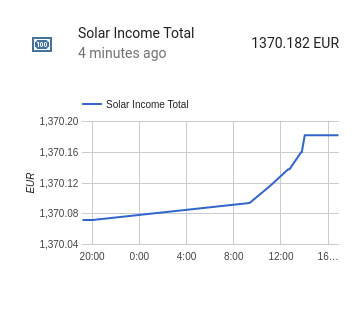
There are several solarpower portals storing you power generation data using the same API. You can query the information uploaded by your solarpanels. I have a Omnik inverter and so I'm using it with omnikportal, only one I tested it with.
- Copy directory
solarportalto your<config dir>/custom_componentsdirectory. - Configure with config below.
- Restart Home-Assistant.
To use this component in your installation, add the following to your configuration.yaml file:
# Example configuration.yaml entry

sensor:
  - platform: solarportal
    host: www.omnikportal.com
    port: 10000
    username: PORTAL_LOGIN
    password: PORTAL_PASSWORD
    scan_interval: 30
    resources:
      - actualpower
      - energytoday
      - energytotal
      - incometoday
      - incometotal
Configuration variables:
- host (Required): The website url of the portal to query for the list below.
- port (Optional): Port in use by the portal API. (default = 10000)
- username (Required): The login name for the website, normally this is an email address.
- password (Required): Your password for the website.
- scan_interval (Optional): Number of seconds between polls. (default = 30)
- resources (Required): This section tells the component which values to display.
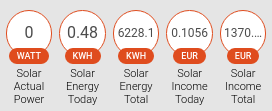
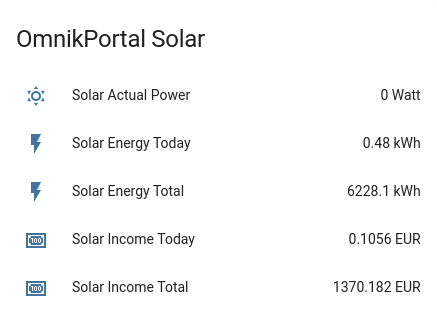
If you want them grouped instead of having the separate sensor badges, you can use this in your groups.yaml:
# Example groups.yaml entry

OmnikPortal Solar:
  - sensor.solar_actual_power
  - sensor.solar_energy_today
  - sensor.solar_energy_total
  - sensor.solar_income_today
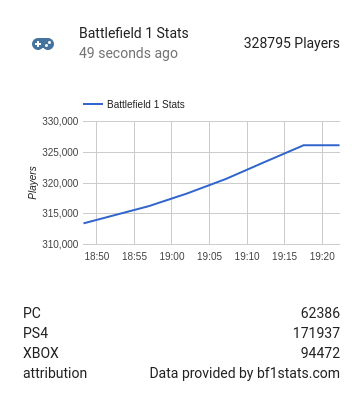
- sensor.solar_income_totalI'm playing BF1 sometimes, and notices there was an bf1stats api available, so I wrote a small component to query and log the number of online players. I could have done this with a few rest sensor type sensors, but I didn't find out a way to calculate a total count this way, from all the different platform counters. So this is what this component does and combine them into one sensor.
- Copy directory
bf1statsto your<config dir>/custom_componentsdirectory. - Configure with config below.
- Restart Home-Assistant.
To use this component in your installation, add the following to your configuration.yaml file:
# Example configuration.yaml entry

sensor:
  - platform: bf1stats
Configuration variables:
- None
This component queries the portal http://feeds.livep2000.nl every interval seconds, and check it's output against the parameters set in the config. It's only based on Dutch services. When matched service calls are found the sensor state gets filled, so you can trigger automation, display sensor data, and even plot in on map (see example below)
- Copy directory
p2000to your<config dir>/custom_componentsdirectory. - Configure with config below.
- Restart Home-Assistant.
To use this component in your installation, add the following to your configuration.yaml file:
# Example configuration.yaml entry

sensor:
  - platform: p2000
    regios: 18
    disciplines: 1,2,3,4
    radius: 15000
    scan_interval: 20

  - platform: p2000
    name: Amsterdam
    regios: 13
    disciplines: 1,2,3,4
    radius: 10000
    scan_interval: 10
    latitude: 52.3680
    longitude: 4.9036
Configuration variables:
- regios (Required): You have to specify at least one, if you want more seperate them by commas.
- 1 = Groningen
- 2 = Friesland
- 3 = Drenthe
- 4 = IJsselland
- 5 = Twente
- 6 = Noord en Oost Gelderland
- 7 = Gelderland Midden
- 8 = Gelderland Zuid
- 9 = Utrecht
- 10 = Noord Holland Noord
- 11 = Zaanstreek-Waterland
- 12 = Kennemerland
- 13 = Amsterdam-Amstelland
- 14 = Gooi en Vechtstreek
- 15 = Haaglanden
- 16 = Hollands Midden
- 17 = Rotterdam Rijnmond
- 18 = Zuid Holland Zuid
- 19 = Zeeland
- 20 = Midden- en West-Brabant
- 21 = Brabant Noord
- 22 = Brabant Zuid en Oost
- 23 = Limburg Noord
- 24 = Limburg Zuid
- 25 = Flevoland
- disciplines (Optional): Disciplines to display, separate them by commas. (default = 1,2,3,4)
- 1 = Brandweer
- 2 = Ambulance
- 3 = Politie
- 4 = KNRM
- radius (Optional): Only display on calls within this range in meters, it uses the lat/lon from your home-assistant.conf file as center or the optional values. (default = 5000)
- scan_interval (Optional): Check every x seconds. (default = 30)
- name (Optional): Name for sensor.
- lat (Optional): Latitude of center radius.
- lon (Optional): Longitude of center radius.
It triggers only on new messages, at a home-assistant restart old messages are skipped.
You can use a state trigger event to send a push notification like this:
# Example automation.yaml entry

automation:
  - alias: 'P2000 Bericht'
    trigger:
      platform: state
      entity_id: sensor.p2000
    action:
      - service_template: notify.html5
        data_template:
          title: "P2000 Bericht"
          message: "{{ states.sensor.p2000.state}}"
          data:
            url: "https://www.google.com/maps/search/?api=1&query={{ states.sensor.p2000.attributes.latitude }},{{ states.sensor.p2000.attributes.longitude }}"
Above is for html5 nofity, you can click the notify message to open google maps with the lat/lon location if available in the p2000 message.
NOTE: When migrating from old P2000 platform component do the following:
- Delete /custom_components/p2000.py
- Copy p2000 directory to /custom_components
- Change your configuration entry move p2000: to sensor section.
- Give platform name p2000.
- Rename 'distance' to 'radius' and 'interval' to 'scan_interval'.
- Add optional extra sensors with different lat/lon and regios/disciplines entries.
- Change automation to use state triggers instead of event trigger.
Lovelace cards:
cards:
      - entity: sensor.p2000
        icon: 'mdi:ambulance'
        name: P2000 Dordrecht
        type: sensor
      - entity: sensor.amsterdam
        icon: 'mdi:fire-truck'
        name: P2000 Amsterdam
        type: sensor
      - default_zoom: 7
        entities:
          - entity: sensor.p2000
          - entity: zone.home
          - entity: sensor.amsterdam
        title: P2000 Dordrecht & Amsterdam
type: mapThis is not a new component but an example automation config useable together with the fritzbox_callmonitor component. The example below will generate several messages depending on status of the event.
# Example configuration.yaml entry

- platform: fritzbox_callmonitor
# Example automation.yaml entry
- alias: 'Phone Status'
trigger:
platform: state
entity_id: sensor.phone
action:
- service: notify.pushover
data:
title: "Phone"
message: >
{% if is_state( "sensor.phone", "ringing" ) %}
{% if states.sensor.phone.attributes.from %}
Ringing on incoming call from {{ states.sensor.phone.attributes.from }}.
{% else %}
Ringing on incoming call from an Unknown or Hidden number.
{% endif %}
{%-elif is_state( "sensor.phone", "talking" ) %}
Call answered.
{%-elif is_state( "sensor.phone", "dialing" ) %}
Calling {{ states.sensor.phone.attributes.to }} with {{ states.sensor.phone.attributes.device }}.
{%-elif is_state( "sensor.phone", "idle" ) %}
{% if states.sensor.phone.attributes.duration | int > 59 %}
Phone call ended, duration was {{ (float(states.sensor.phone.attributes.duration) / 60) | round }} Minute(s).
{% else %}
Phone call ended, duration was {{ states.sensor.phone.attributes.duration }} Second(s).
{% endif %}
{% endif %}This component fetches random tags from files to be tweeted. The data files are taken from misterhouse, so al courtesy goes to that project. Currently there are two types of remarks implemented, random daily one taken from file specified in config. And outside temperature based.
- Copy file
remarks.pyto your<config dir>/custom_componentsdirectory. - Copy the data directory
remarksto your<config dir>directory. - Configure with config below.
- Restart Home-Assistant.
To use this component in your installation, add the following to your configuration.yaml file:
# Example configuration.yaml entry

remarks:
   file: 1100tags.txt
   hour: 9
   minute: 0
   outside_temp_sensor: sensor.pws_temp_c
   cold_threshold: 5
   freeze_threshold: -5
   temp_hour: 6
   temp_minute: 30
Configuration variables:
- file (Optional): The file we want to pick a random tag from, one from the
remarksdirectory. (default = 1100tags.txt) - hour (Optional): The hour on which we want to generate a random tag. (default = 9)
- minute (Optional): The minute on which we want to generate a random tag. (default = 0)
- outside_temp_sensor (Optional): Sensor device to use to get the outside temperature. (default = sensor.pws_temp_c)
- cold_threshold (Optional): Below this temperature a tag will be picked from the
list_temp_below_20.txt. (default = 5) - freeze_threshold (Optional): Below this temperature a tag will be picked from the file
list_temp_below_0.txt. (default = -5) - temp_hour (Optional): The hour on which we want to generate a temperature remark if it is below thresholds. (default = 6)
- temp_minute (Optional): The minute on which we want to generate a temperature remark. (default = 30)
Now for both tags an event will be fired.
You can trigger on this with automation rules.
For example you can send them as tweets, to do so place this in your automation.yaml
# Example automation.yaml entry

- alias: Tweeting Remarks
  trigger:
    platform: event
    event_type: remarks
  action:
  - service_template: notify.twitter
    data_template:
message: "{{ trigger.event.data.text }}"This component tracks devices using the arp-scan command, it's very fast, and reasonably accurate.
- Copy directory
arpscan_trackerto your<config dir>/custom_componentsdirectory. - Install the arp-scan command and set it's sticky bit, so it can be run as root.
$ sudo apt-get install arp-scan
$ sudo chmod +s /usr/bin/arp-scan
- Configure with config below.
- Restart Home-Assistant.
To use this component in your installation, add the following to your configuration.yaml file:
# Example configuration.yaml entry

device_tracker:
  - platform: arpscan_tracker
    interval_seconds: 15
    consider_home: 60
    track_new_devices: true
    exclude:
      - 192.168.178.1
      - 192.168.178.3
Configuration variables:
- interval_seconds (Optional) Seconds between each scan for new devices. (default = 12)
- consider_home (Optional): Seconds to marking device as 'not home' after not being seen (default = 180)
- track_new_device (Optional): If new discovered devices are tracked by default. (default = True)
- exclude (Optional): List of IP addresses to skip tracking for.
- scan_options (Optional): Configurable scan options for arp-scan. (default is
-l -g -t1 -q)
This component can read values from and control Plugwise circles/plugs.
Although it works rather well, it is still work in progress, it uses the older python-plugwise code. And it must be made async so it plays nice when it cannot reach a plug it queries resulting in timeouts.
- Copy directory
plugwiseto your<config dir>/custom-componentsdirectory. - It has as dependency the 'plugwise' module from PyPi, but it will be installed automatically.
- Configure with config below.
- Restart Home-Assistant.
To use this component in your installation, add the following to your configuration.yaml file:
# Example configuration.yaml entry

switch:
  - platform: plugwise
    port: /dev/ttyUSB0
    circles:
      CirclePlus: 000D6F000023711C
      Koelkast: 000D6F00001C8F33
Configuration variables:
- port (Optional): Port used by your plugwise stick. (default = /dev/ttyUSB0)
- circles (Required): This section tells the component which mac addresses your plugs have and which device names you want to use.
If you want to graph power consumption values you can convert the attribute of the switch into a sensor using template platform like so:
# Example sensor.yaml entry

- platform: template
  sensors:
    circleplus_power_usage:
      friendly_name: "CirclePlus Power Usage"
      unit_of_measurement: 'Watt'
      value_template: "{{ states.switch.circleplus.attributes.current_consumption }}"
NOTE: works in Hass.io
This component can read status values from a local TTN Gateway.
- Copy directory
ttn_gatewayto your<config dir>/custom-componentsdirectory. - Configure with config below.
- Restart Home-Assistant.
To use this component in your installation, add the following to your configuration.yaml file:
# Example configuration.yaml entry

sensor:
  - platform: ttn_gateway
    host: IP_ADDRESS
    scan_interval: 10
    resources:
      - gateway
      - hwversion
      - blversion
      - fwversion
      - uptime
      - connected
      - interface
      - ssid
      - activationlocked
      - configured
      - region
      - gwcard
      - brokerconnected
      - packetsup
      - packetsdown
      - estore
Configuration variables:
- host (Required): The IP address of the gateway you want to monitor.
- scan_interval (Optional): Number of seconds between polls. (default = 30)
- resources (Required): This section tells the component which values to monitor.
If you want them grouped instead of having the separate sensor badges, you can use this in your groups.yaml:
# Example groups.yaml entry

TTN Gateway:
  - sensor.ttn_gw_hardware_version
  - sensor.ttn_gw_bootloader_version
  - sensor.ttn_gw_firmware_version
  - sensor.ttn_gw_uptime
  - sensor.ttn_gw_connected
  - sensor.ttn_gw_interface
  - sensor.ttn_gw_gateway
  - sensor.ttn_gw_ssid
  - sensor.ttn_gw_activation_locked
  - sensor.ttn_gw_configured
  - sensor.ttn_gw_region
  - sensor.ttn_gw_gateway_card
  - sensor.ttn_gw_broker_connected
  - sensor.ttn_gw_packets_up
  - sensor.ttn_gw_packets_down
- sensor.ttn_gw_external_storageGets garbage pickup dates straight from HVC Groep's rest API.
- Copy directory
hvcgroepto your<config dir>/custom_componentsdirectory. - Configure with config below.
- Restart Home-Assistant.
To use this component in your installation, add the following to your configuration.yaml file:
# Example configuration.yaml entry

sensor:
  - platform: hvcgroep
    postcode: 1234AB
    huisnummer: 1
    resources:
      - gft
      - plastic
      - papier
      - restafval
Configuration variables:
- postcode (Required): Your postal code.
- huisnummer (Required): Your house number.
- resources (Required): This section tells the component which types of garbage to get pickup dates for.
You can create 2 extra sensors which hold the type of garbage to pickup today and tomorrow:
  - platform: template
    sensors:
      afval_vandaag:
        friendly_name: 'Vandaag'
        value_template: >-
          {% if is_state_attr('sensor.hvc_groep_gft', 'day', 'Vandaag') %}
          {% set gft = 'Groene Bak' %}
          {% endif %}
          {% if is_state_attr('sensor.hvc_groep_papier', 'day', 'Vandaag') %}
          {% set papier = 'Blauwe Bak' %}
          {% endif %}
          {% if is_state_attr('sensor.hvc_groep_plastic', 'day', 'Vandaag') %}
          {% set plastic = 'Plastic' %}
          {% endif %}
          {% if is_state_attr('sensor.hvc_groep_restafval', 'day', 'Vandaag') %}
          {% set restafval = 'Grijze Bak' %}
          {% endif %}
             {{gft}} {{papier}} {{plastic}} {{restafval}}

  - platform: template
    sensors:
      afval_morgen:
        friendly_name: 'Morgen'
        value_template: >-
          {% if is_state_attr('sensor.hvc_groep_gft', 'day', 'Morgen') %}
          {% set gft = 'Groene Bak' %}
          {% elif is_state_attr('sensor.hvc_groep_papier', 'day', 'Morgen') %}
          {% set papier = 'Blauwe Bak' %}
          {% if is_state_attr('sensor.hvc_groep_plastic', 'day', 'Morgen') %}
          {% set plastic = 'Plastic' %}
          {% endif %}
          {% if is_state_attr('sensor.hvc_groep_restafval', 'day', 'Morgen') %}
          {% endif %}
          {% set restafval = 'Grijze Bak' %}
          {% endif %}
             {{gft}} {{papier}} {{plastic}} {{restafval}}
And you can group them like so:
Afval Ophaaldagen:
  - sensor.hvc_groep_gft
  - sensor.hvc_groep_papier
  - sensor.hvc_groep_plastic
  - sensor.hvc_groep_restafval
  - sensor.afval_vandaag
  - sensor.afval_morgen
Thing to fix/add is multiple pickups per day for 'today' and 'tomorrow' sensor.
Cloned from https://github.com/robinostlund/homeassistant-volkswagencarnet
So all credits to Robin Ostlund.
I stripped out non supported stuff to get it to work with my VW T-ROC.
This also needs a modified volkswagencarnet python module!
# Example configuration.yaml entry

volkswagencarnet:
    username: [email protected]
    password: yourpassword
    update_interval:
      minutes: 5
    resources:
      - last_connected
      - position
      - distance
      - fuel_level
      - service_inspection
      - oil_inspection
      - parking_light
      - doors_locked
      - trunk_locked
      - combined_range
Configuration variables:
- username (Required): Your email address for carnet portal.
- password (Required): Your password for carnet portal.
- minutes (Required): Update every x minutes, minimum is 3.
- resources (Required): Values to fetch.
- Make the components work async.


