AI nights Automated Machine Learning train-the-trainer content
Automated machine learning (automated ML) builds high quality machine learning models for you by automating model and hyperparameter selection. Bring a labelled dataset that you want to build a model for, automated ML will give you a high quality machine learning model that you can use for predictions.
If you are new to Data Science, automated ML will help you get jumpstarted by simplifying machine learning model building. It abstracts you from needing to perform model selection, hyperparameter selection and in one step creates a high quality trained model for you to use.
If you are an experienced data scientist, automated ML will help increase your productivity by intelligently performing the model and hyperparameter selection for your training and generates high quality models much quicker than manually specifying several combinations of the parameters and running training jobs. Automated ML provides visibility and access to all the training jobs and the performance characteristics of the models to help you further tune the pipeline if you desire.
The presentation can be found in this repository here. (.zip file)
To learn more about automated ML, see documentation here.
Try the sample notebooks here.
Azure subscirption and Azure ML workspace. See instructions on how to create a worksapce here.
Follow the instructions in the documentation for a full overview of the user interface.
-
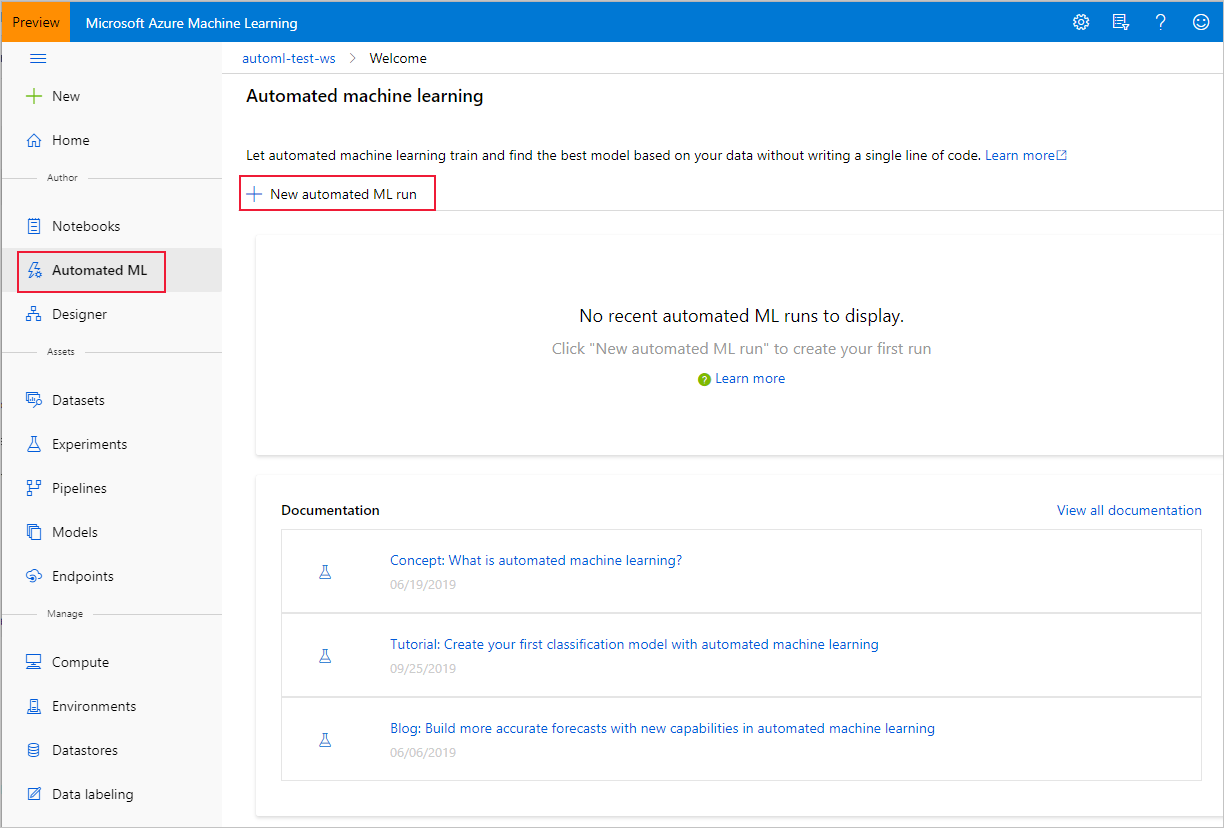
Navigate to the left pane of your workspace. Select Automated Machine Learning under the Authoring (Preview) section.
.
-
Enter your experiment name, then select a compute from the list of your existing computes or create a new compute. Make sure you use at least 1 node if you also want to inspect the data.
 This enabled the profiling option, so you can inspect the data that you will upload in the next step.

-
Select a data file from your storage container, or upload a file from your local computer to the container. Car price dataset downloadable from this location. If you use this original file, you would have to do some data cleaning and change the format to .csv. You can also use the cleaned version of this dataset.
-
Preview data and keep all columns selected for training.
-
Select the training job type: regression
-
Select target column: price
-
Open “Advanced settings”, set training job time to 15 minutes (for the workshop).
-
Hit "Start" and wait for the training job to start. You’ll be able to see the models which are created during the run, click on any of the models to open the detailed view of that model, where you can analyze the graphs and metrics.
-
Once the run is completed, click deploy the best model to create a deployed endpoint from the model.
-
Once deployed, follow instructions to consume from Power BI.
Follow the instructions to run automated ML from a Jupyter notebook using Azure ML service Notebook VM. A more comprehensive tutorial can be found here.
-
Open your Machine Learning service workspace and go to "Notebook VMs"
-
Create a new Notebook VM following the instructions here.
-
After VM has started (~10mins) click on Jupyter to open the Jupyter notebook client.
-
Open the energy demand notebook: Click on root folder > Samples-x.x.xx > how-to-use-azureml > automated-machine-learning > forecasting-energy-demand > /auto-ml-forecasting-energy-demand.ipynb
-
Follow instructions in notebook executing each cell.


