-
Notifications
You must be signed in to change notification settings - Fork 36
Deferred Rendering
Read and understood the Multipass Rendering - quick start guide page.
Advanced knowledge in shader programming, especially lighting calculation, is recommended.
The opposite of Deferred Rendering is Forward Rendering. With this we light an object according to all light sources in the scene and move to the next object. As a consequence we need to iterate over each light source for every fragment in the fragment shader.
This can result in heavy performance issues if the scene contains more than a handful of lights.
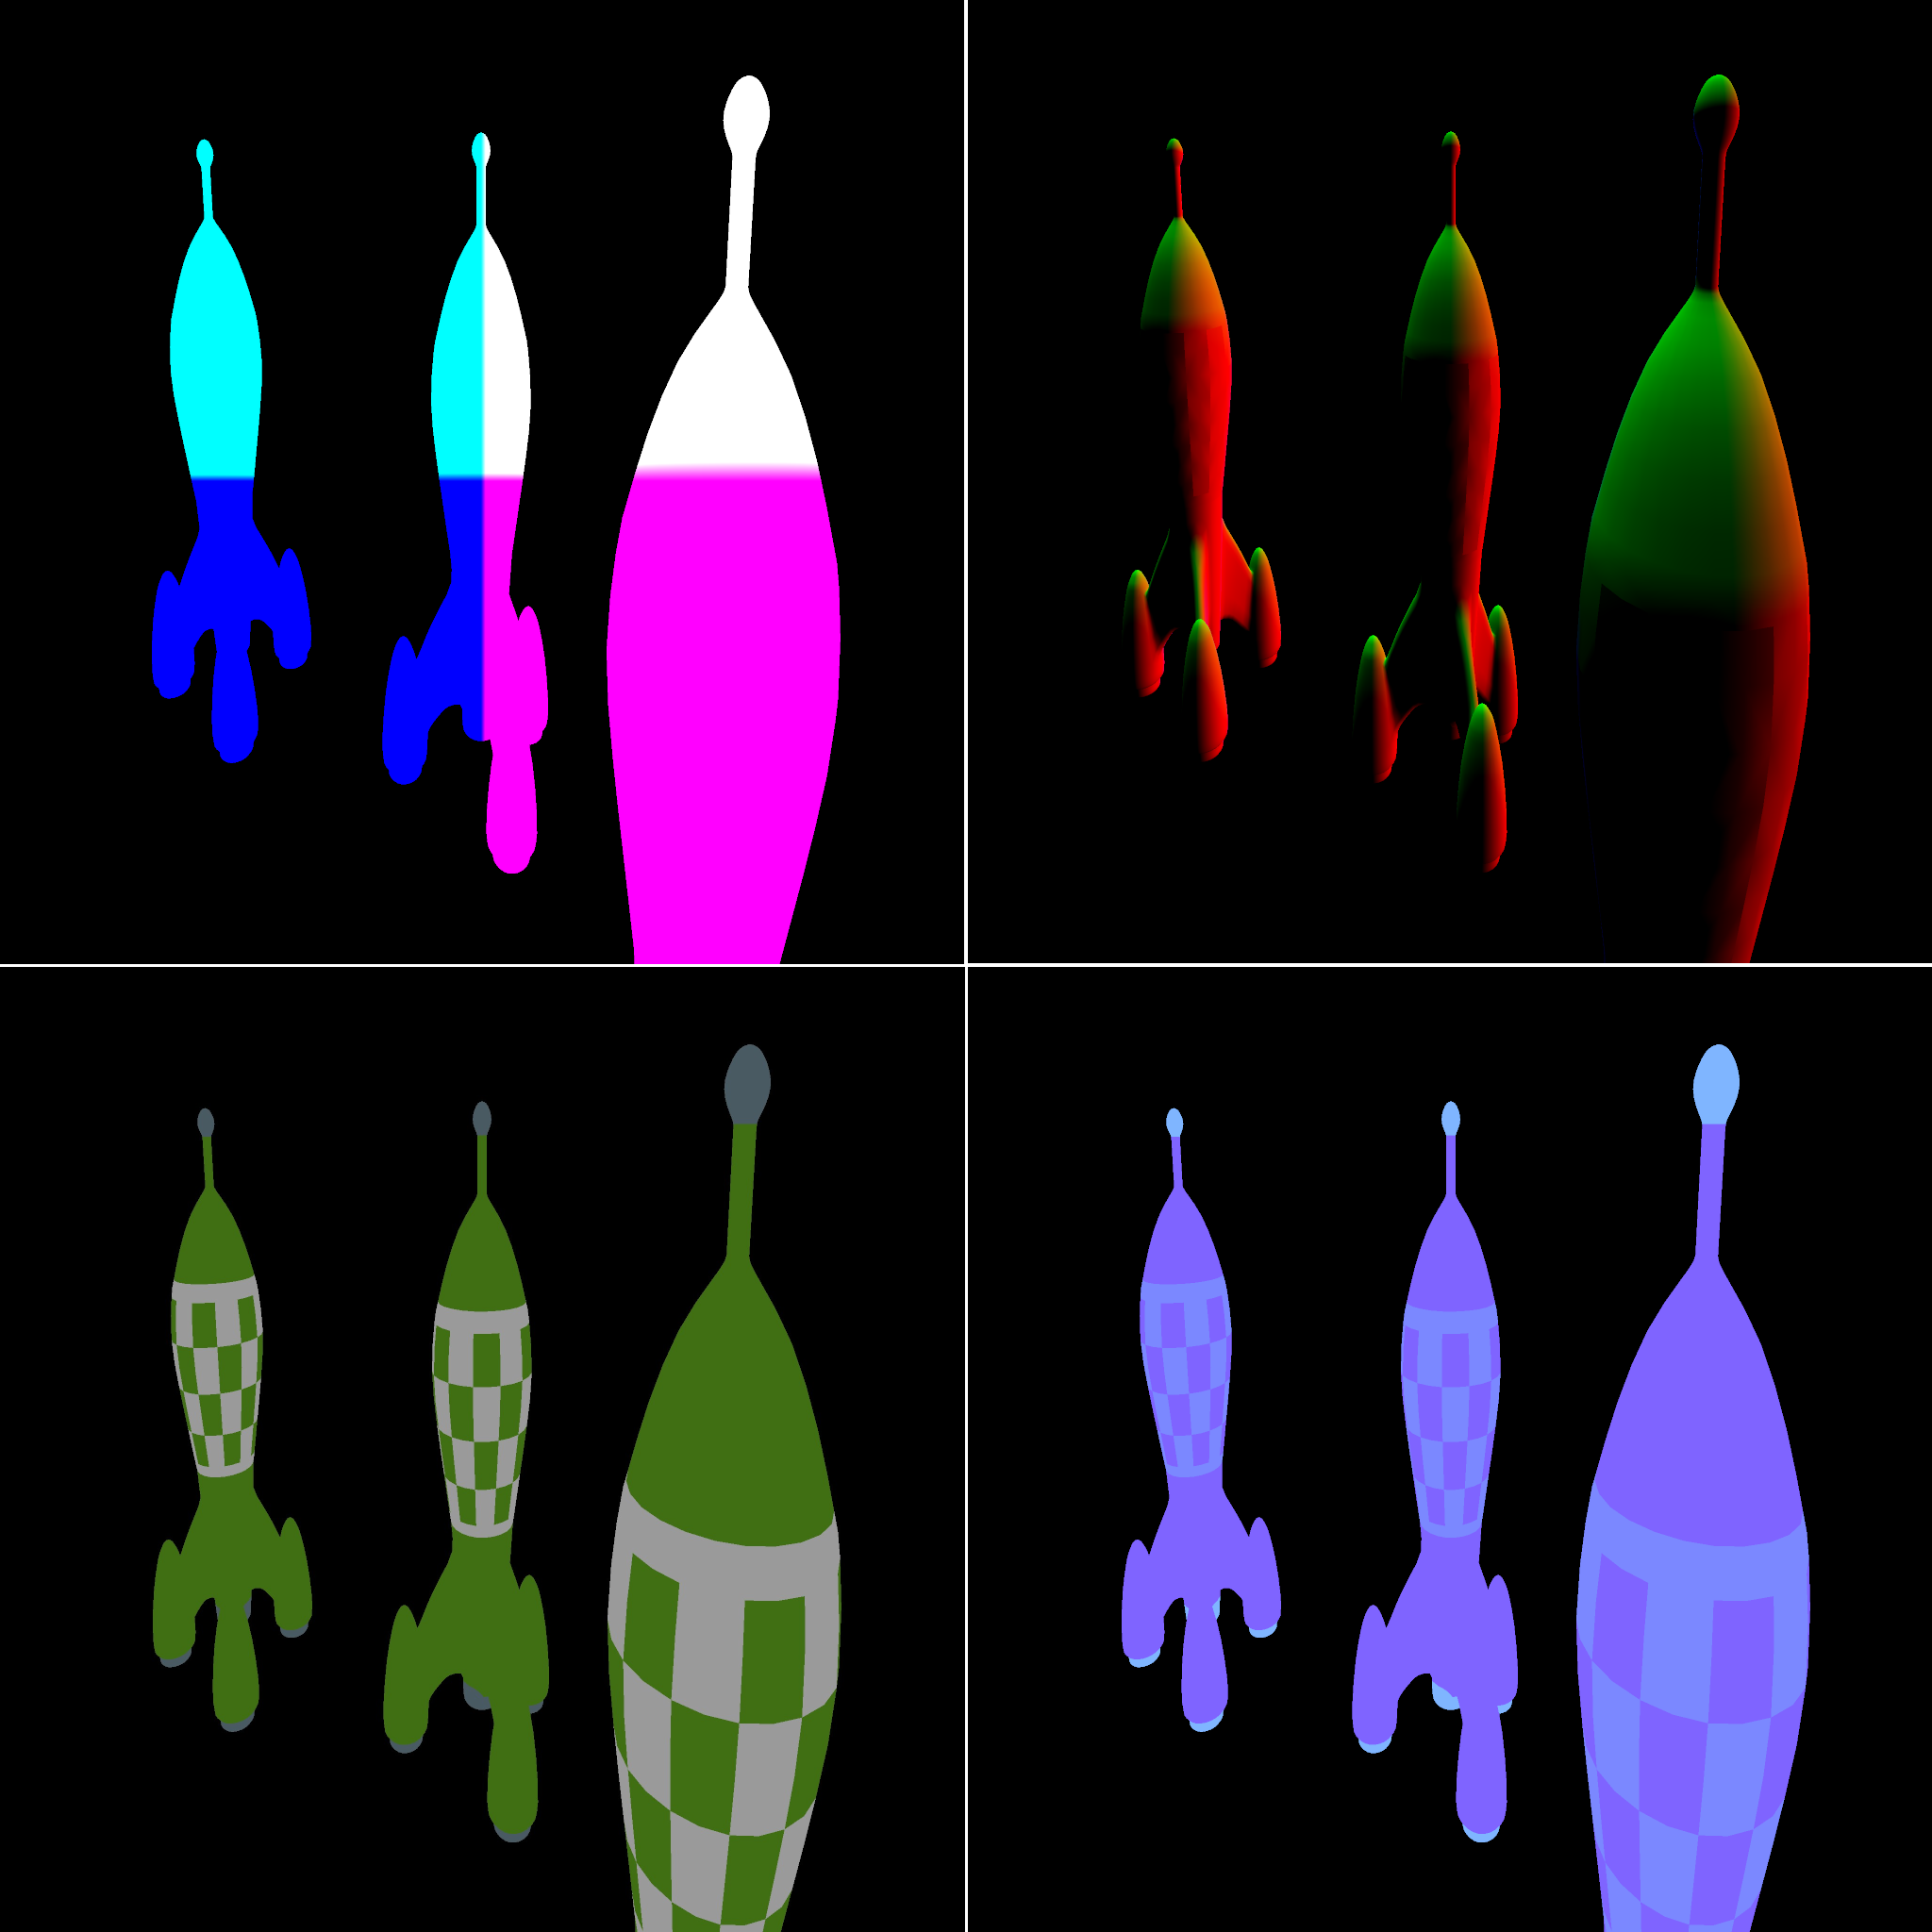
Deferred Rendering or Deferred Shading is a technique which tries to overcome those issues by a multipass approach. In the first pass, the so called Geometry Pass, we render the light source independent scene information into a Framebuffer object (in deferred rendering called G-Buffer), consisting of multiple textures. A G-Buffer may contain textures storing the position, normal, albedo and specular information of every object in the scene that is visible from the cameras point of view.
To render the lighted scene to the screen we do not use the original scene geometry, but a screen filled quad. The fragment shader to render this quad uses the geometry and material information from the textures and a light source to calculate the color of every fragment.
This kind of render pipeline can also easily be extended by various effects like SSAO (Screen Space Ambient Occlusion) or FXAA (Fast Approximate Anti Aliasing).
The following sections are focused on how to setup and use deferred Rendering in FUSEE. For a more detailed background and a description on how deferred rendering works with plane OpenGL we refer to this tutorial on learnopengl.com.
Every FUSEE Application is able to render deferred by just using a SceneRendererDeferred instead of a SceneRendererForward and that's just it. The G-Buffer used in this scene renderer is composed as follows (geometric information is stored in screen space):
Geometric information
- Position (x, y, z, shading model)
- Normal (x, y, z)
Note that we need to store the geometric information in a texture that can store negative values. When using OpenGL we can use the data type float to achieve this.
Material information
- Albedo (r, g, b)
- Specular (shading model dependent)
Depth information
- Depth (d)

The image above shows the G-Buffer textures as follows (top to bottom and left to right): position, normal, albedo, specular.
Additionally the SceneRendererDeferred offers some public parameters to customize the rendering output and the the pipeline itself.
Additionally you can customize the background color, as in forward rendered apps, via RC.ClearColor. This color can be animated in RenderAFrame.
The object we use to abstract the G-Buffer in the engine is called RenderTarget. If we create a new instance of this type we have to give the constructor a texture resolution. This ensures, that all our G-Buffer textures will have the same size, which is mandatory here.
The heart of the RenderTarget is the RenderTextures array. We can fill this by using the appropriate methods. For a albedo texture this is SetAlbedoTex, for a depth texture SetDepthTex and so on. Those calls will create a WritableTexture with the correct format for their type.
A RenderTarget is used in the Geometry Pass in the SceneRendererDeferred, but we may also use it with forward rendering directly in a FUSEE Application by calling Render(renderContext, renderTarget) or in a self-made SceneRenderer by calling RenderContext.SetRenderTarget(renderTarget). If a render target is set, a Framebuffer Object is created on the GPU and its textures are bound. In the last two mentioned cases we have to make sure to use a appropriate fragment shader, that does not have a single output color but as much as our RenderTarget has textures. For a complete G-Buffer it may look like this:
layout (location = 0) out vec4 Position;
layout (location = 1) out vec4 Albedo;
layout (location = 2) out vec4 Normal;
layout (location = 3) out vec4 Depth;
layout (location = 4) out vec4 Specular;
layout (location = 5) out vec4 Emission;
Note that we do not have to handle the shaders ourself if we use the SceneRendererDeferred!
- Using FUSEE
- Tutorials
- Examples
- In-Depth Topics
- Input and Input Devices
- The Rendering Pipeline
- Render Layer
- Camera
- Textures
- FUSEE Exporter Blender Add on
- Assets
- Lighting & Materials
- Serialization and protobuf-net
- ImGui
- Blazor/WebAssembly
- Miscellaneous
- Developing FUSEE