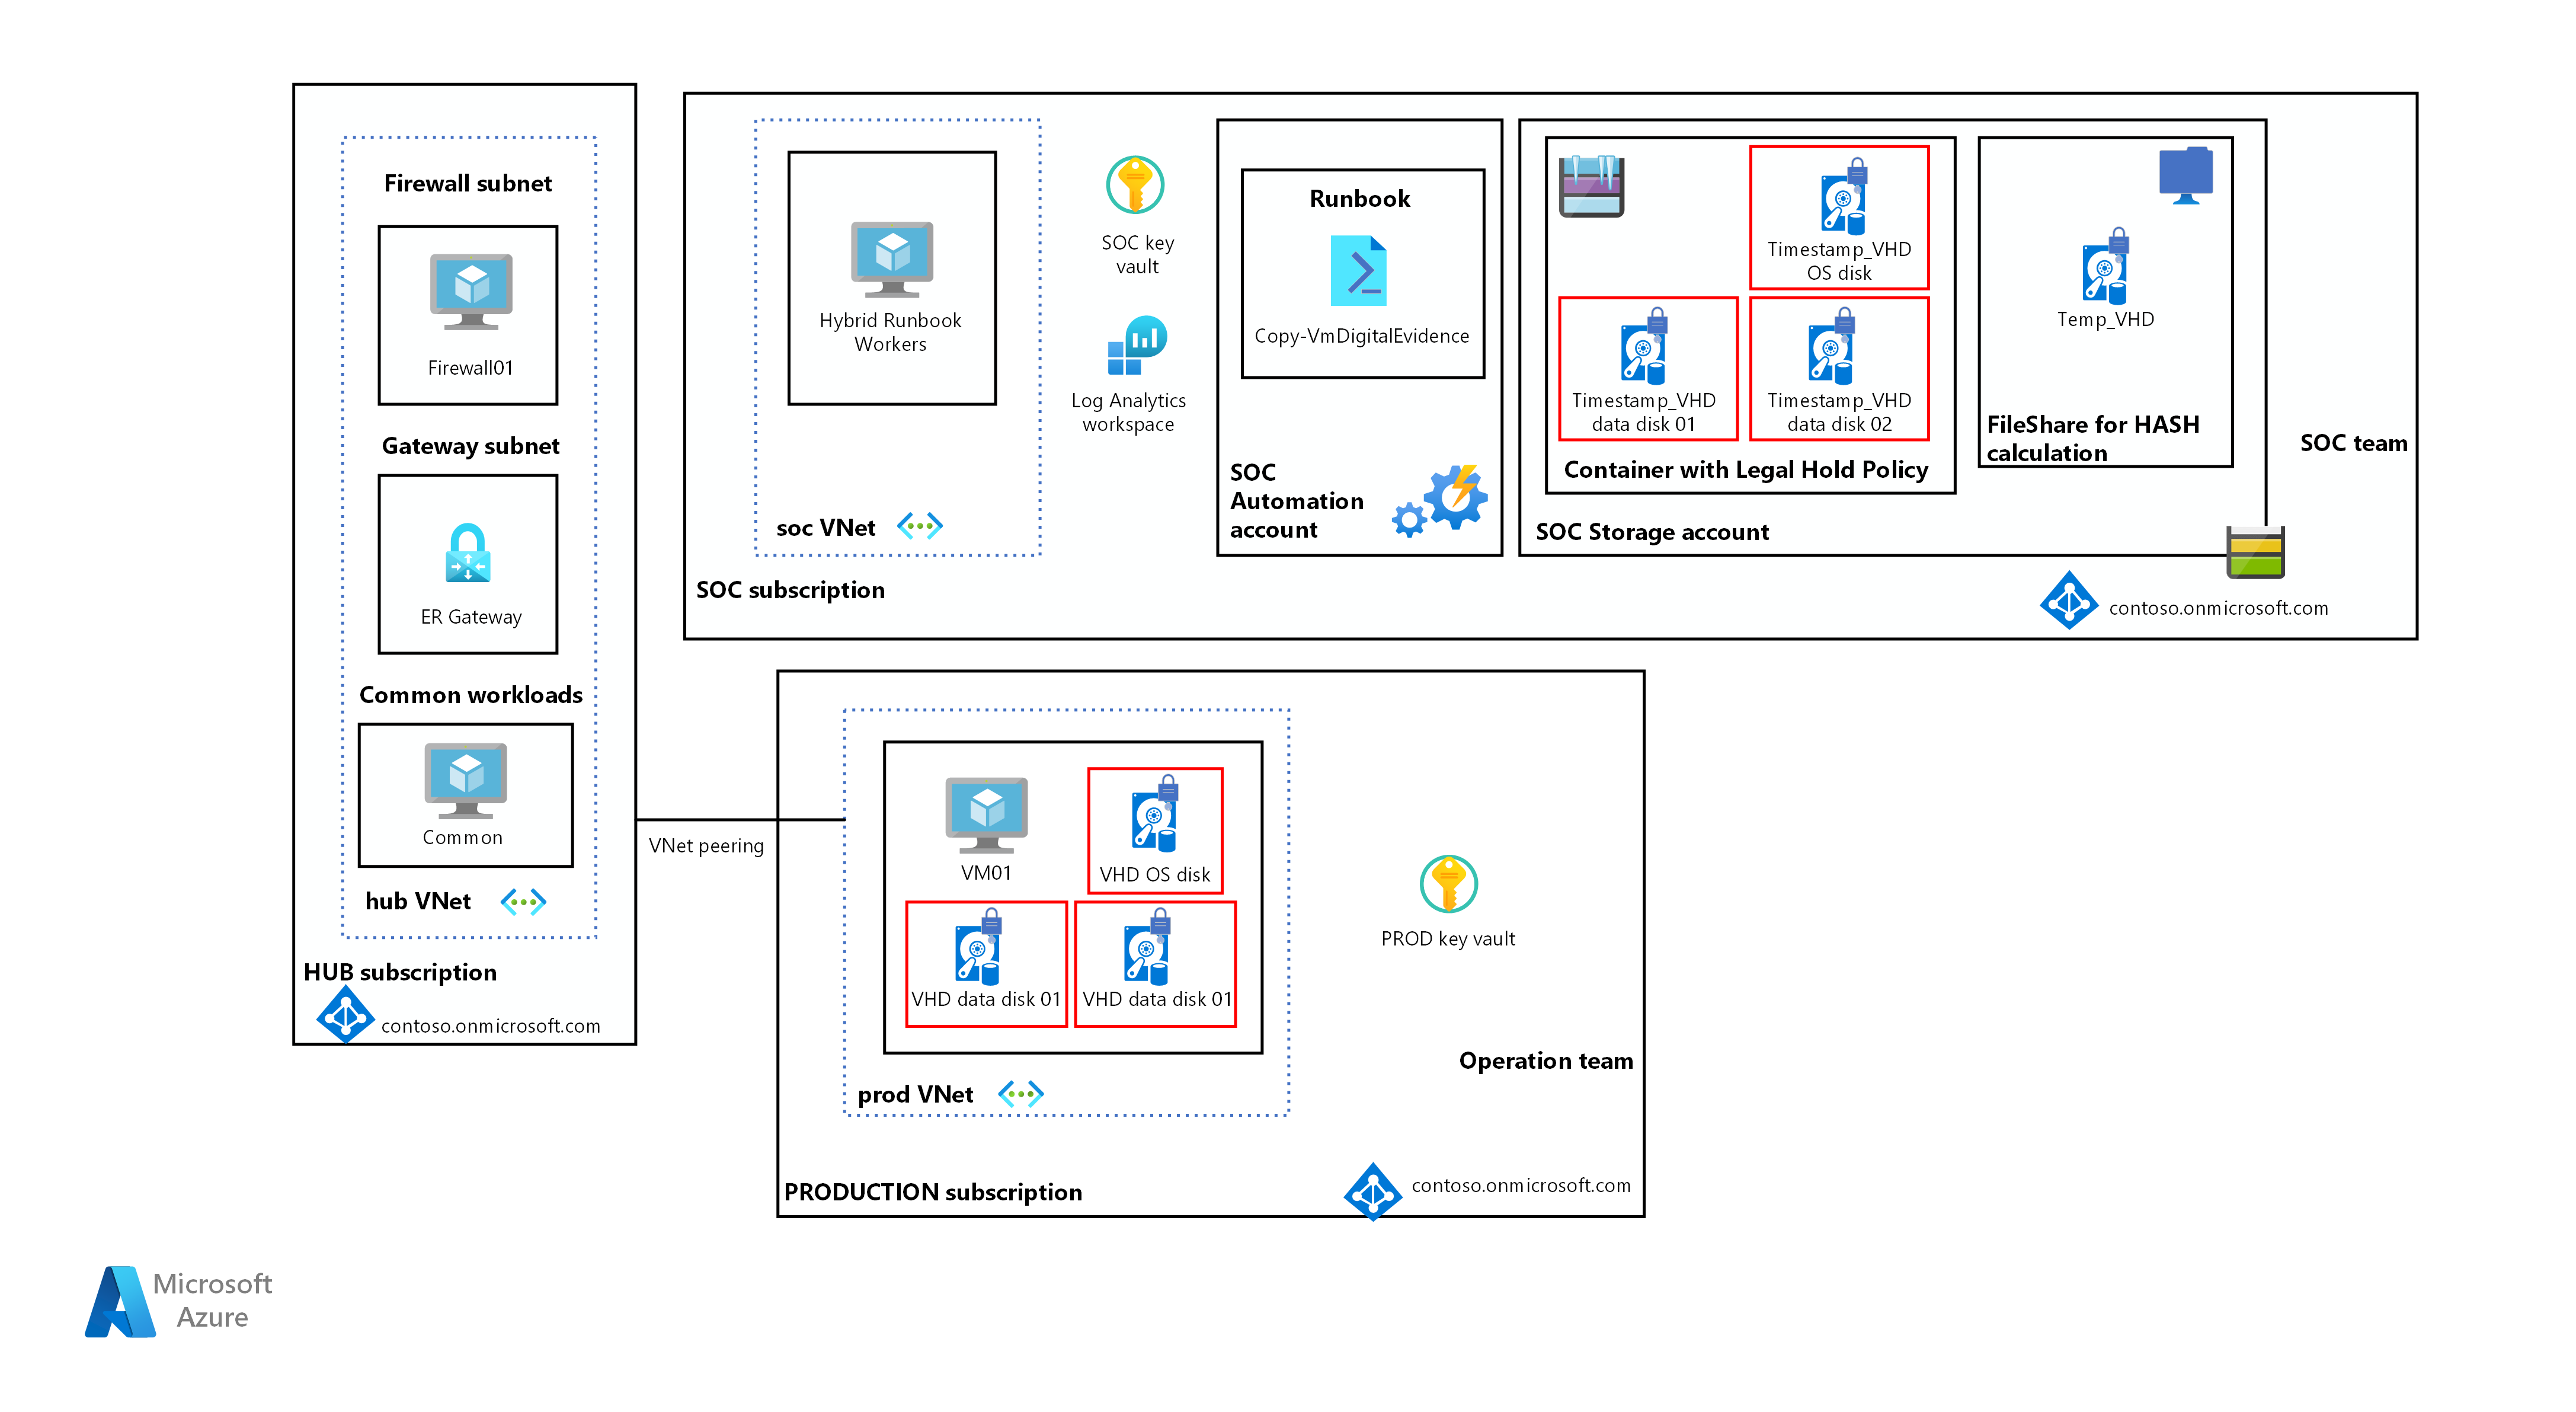
This repo contains Azure Bicep Source code to deploy a computer forensics chain of custody solution based on the following article.
Microsoft Docs - Computer Forensics Chain of custody
The Azure Bicep code that you will find in this repository will deploy all the Azure infrastructure components, including all automation account runbooks required to build both Hybrid workers and execute the workflow activities of the chain of customer concept as illustrated below within the SoC Subscription.
This guide assumes that you already have Azure Powershell installed and ready for use on your local machine or the machine you wish to run the deployment from. For more information on Azure PS installation see here: Install Azure PS
- Pull down the contents on this repository, all the source code for infrastructure and chain of custody automation resides in here.
- Once you have pulled the repo down, navigate to the main.bicep file. You will need to update the following parameter values.
- location - This is the Azure region you wish to deploy to. Default is australiaeast.
- environmentType - This is to identify what environment you are deploying into. dev,tst,uat,prd are your options.
- objectID - this is your user object ID in Azure AD. You will need to get this manually. Use Get-AzADUser -UserPrincipleName 'YOUR UPN'
- tenantID - this is the ID of your Azure AD Tenant. You will need to get this manually. Use Get-AzTenant
- Open up a PS terminal and cd to the .\bicep directory where the main.bicep file resides.
- Login to Azure with login-azAccount. Ensure that once you are logged in, you are in the correct subscription context.
- By default the deployment is scoped at the subscription level. Deploy Template using the following command:
- New-AzSubscriptionDeployment -Location australiaeast TemplateFile main.bicep
- Once the deployment has finished, check in Azure for the resource group and resources. You should find a single RG and 11 resources.
- Navigate to the Automation acocunt that was just provisioned and create a RunAs Account. Whilst in the Account, create a hybrid worker group.
- Select and existing or Provision a virtual machine in Azure that become the Hybrid Worker.
- You can add it to worker Group by installing the extension. See here for more info
- Once the VM is online, connect to it and install the AZ PS Modules.
- Modify RBAC on subscription, KV and Storage accounts. See the table below for specifics.
- Note the Run As account will permissions over all subscriptions containing virtual machines that you may wish to target this runbook at. See the table below for specifics.
- Make the following changes to the runbook constants
- Update lines: 51-57 with specifics on the provisioned storage accounts, keyvaults.
- The runbook needs to mount your Azure File share, the easiest way to do this is to grab the connection snippet from the storage account itself. Read how to, here.
- Replace lines 83-91 with your file share connection from the linked articles steps above. Save and Publish.
- Test it out. Trigger the run book, provide the follow details for the target VM.
- Subscription ID
- Resource Group Name
- VM Name
I am currently working thorugh a least priviledged model as of July 2022 for this scenario with some customers. Once complete, I shall publish the table here.
