| title | thumbnail | authors | |||
|---|---|---|---|---|---|
What's new in Diffusers? 🎨 |
/blog/assets/102_diffusers_2nd_month/inpainting.png |
|
A month and a half ago we released diffusers, a library that provides a modular toolbox for diffusion models across modalities. A couple of weeks later, we released support for Stable Diffusion, a high quality text-to-image model, with a free demo for anyone to try out. Apart from burning lots of GPUs, in the last three weeks the team has decided to add one or two new features to the library that we hope the community enjoys! This blog post gives a high-level overview of the new features in diffusers version 0.3! Remember to give a ⭐ to the GitHub repository.
- Image to Image pipelines
- Textual Inversion
- Inpainting
- Optimizations for Smaller GPUs
- Run on Mac
- ONNX Exporter
- New docs
- Community
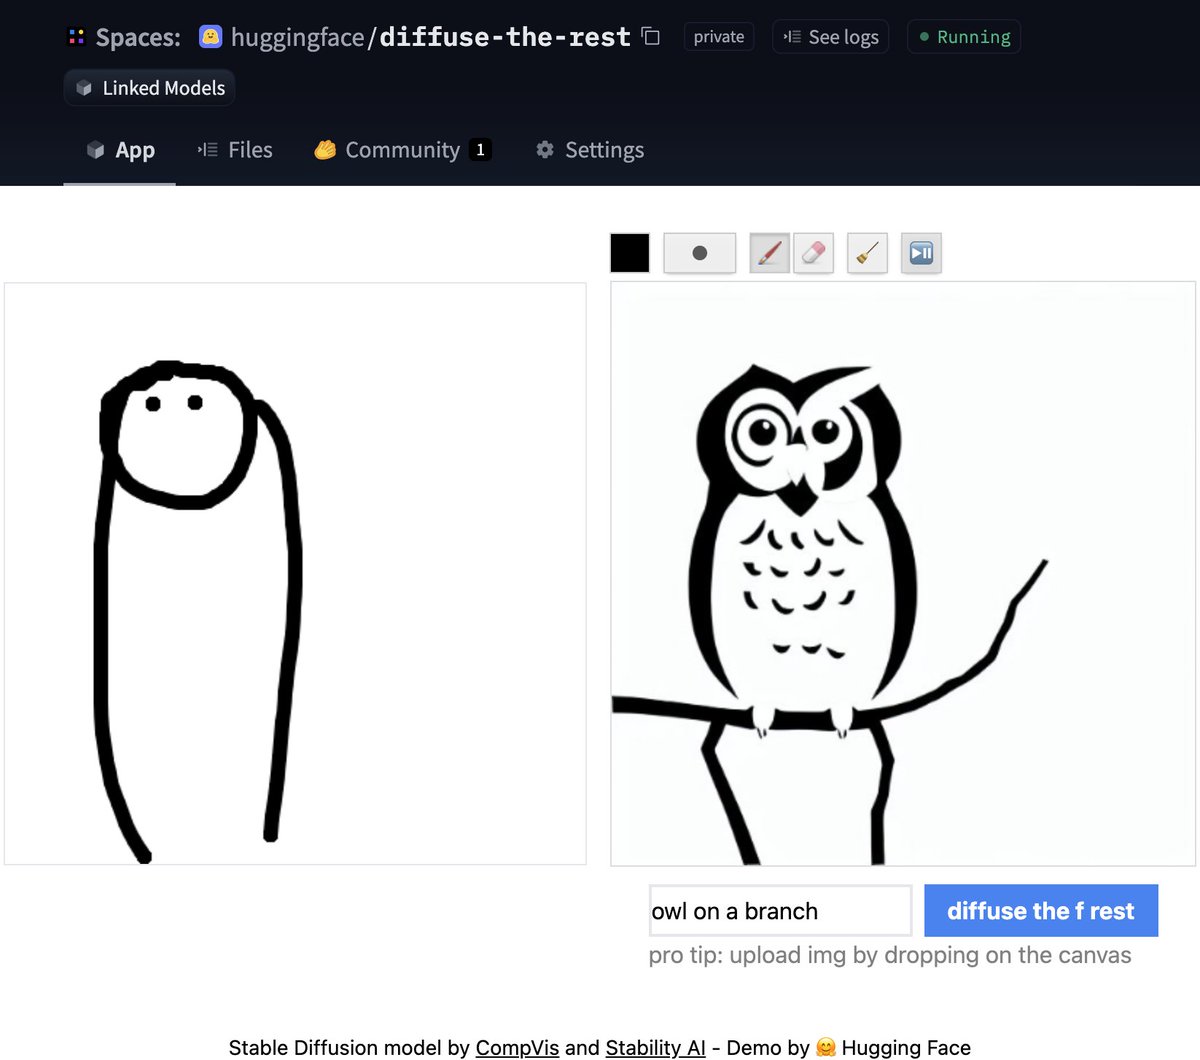
One of the most requested features was to have image to image generation. This pipeline allows you to input an image and a prompt, and it will generate an image based on that!
Let's see some code based on the official Colab notebook.
from diffusers import StableDiffusionImg2ImgPipeline

pipe = StableDiffusionImg2ImgPipeline.from_pretrained(
    "CompVis/stable-diffusion-v1-4",
    revision="fp16",
    torch_dtype=torch.float16,
    use_auth_token=True
)

# Download an initial image
# ...

init_image = preprocess(init_img)

prompt = "A fantasy landscape, trending on artstation"
images = pipe(prompt=prompt, init_image=init_image, strength=0.75, guidance_scale=7.5, generator=generator)["sample"]
Don't have time for code? No worries, we also created a Space demo where you can try it out directly
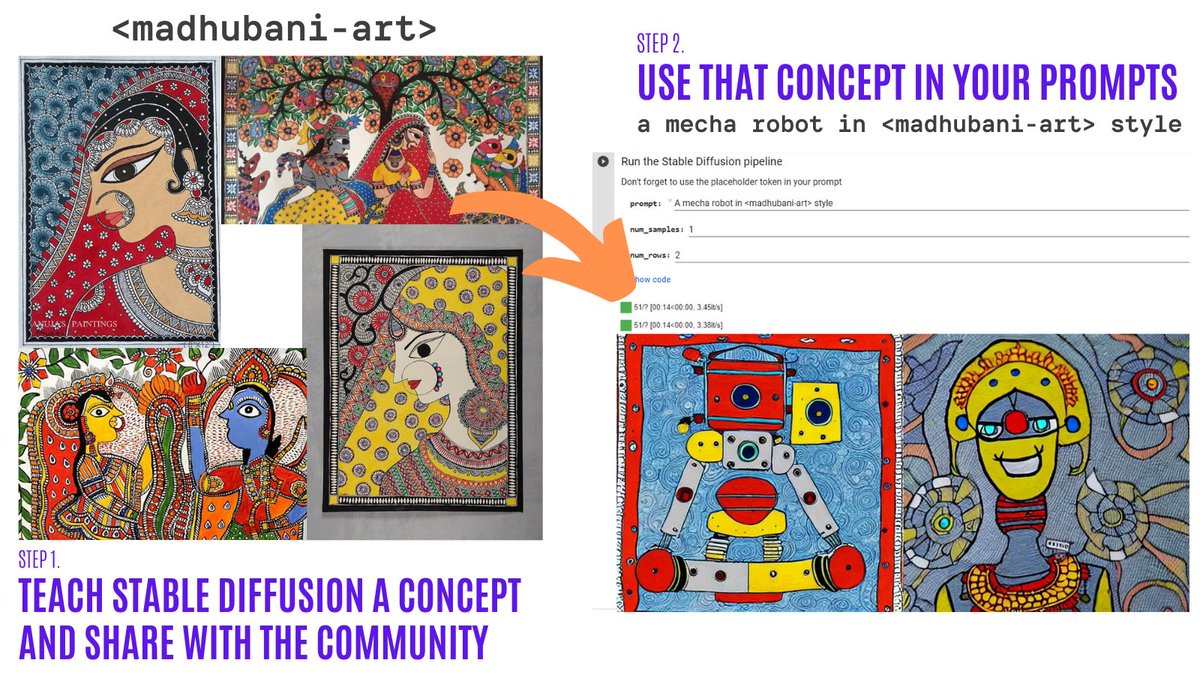
Textual Inversion lets you personalize a Stable Diffusion model on your own images with just 3-5 samples. With this tool, you can train a model on a concept, and then share the concept with the rest of the community!
In just a couple of days, the community shared over 200 concepts! Check them out!
- Organization with the concepts.
- Navigator Colab: Browse visually and use over 150 concepts created by the community.
- Training Colab: Teach Stable Diffusion a new concept and share it with the rest of the community.
- Inference Colab: Run Stable Diffusion with the learned concepts.
Inpainting allows to provide an image, then select an area in the image (or provide a mask), and use Stable Diffusion to replace the mask. Here is an example:
You can try out a minimal Colab notebook or check out the code below. A demo is coming soon!
from diffusers import StableDiffusionInpaintPipeline

pipe = StableDiffusionInpaintPipeline.from_pretrained(
    "CompVis/stable-diffusion-v1-4",
    revision="fp16",
    torch_dtype=torch.float16,
    use_auth_token=True
).to(device)

images = pipe(
    prompt=["a cat sitting on a bench"] * 3,
    init_image=init_image,
    mask_image=mask_image,
    strength=0.75,
    guidance_scale=7.5,
    generator=None
).images
Please note this is experimental, so there is room for improvement.
After some improvements, the diffusion models can take much less VRAM. 🔥 For example, Stable Diffusion only takes 3.2GB! This yields the exact same results at the expense of 10% of speed. Here is how to use these optimizations
from diffusers import StableDiffusionPipeline

pipe = StableDiffusionPipeline.from_pretrained(
    "CompVis/stable-diffusion-v1-4",
    revision="fp16",
    torch_dtype=torch.float16,
    use_auth_token=True
)
pipe = pipe.to("cuda")
pipe.enable_attention_slicing()
This is super exciting as this will reduce even more the barrier to use these models!
🍎 That's right! Another widely requested feature was just released! Read the full instructions in the official docs (including performance comparisons, specs, and more).
Using the PyTorch mps device, people with M1/M2 hardware can run inference with Stable Diffusion. 🤯 This requires minimal setup for users, try it out!
from diffusers import StableDiffusionPipeline

pipe = StableDiffusionPipeline.from_pretrained("CompVis/stable-diffusion-v1-4", use_auth_token=True)
pipe = pipe.to("mps")

prompt = "a photo of an astronaut riding a horse on mars"
image = pipe(prompt).images[0]The new experimental pipeline allows users to run Stable Diffusion on any hardware that supports ONNX. Here is an example of how to use it (note that the onnx revision is being used)
from diffusers import StableDiffusionOnnxPipeline

pipe = StableDiffusionOnnxPipeline.from_pretrained(
    "CompVis/stable-diffusion-v1-4",
    revision="onnx",
    provider="CPUExecutionProvider",
    use_auth_token=True,
)

prompt = "a photo of an astronaut riding a horse on mars"
image = pipe(prompt).images[0]
Alternatively, you can also convert your SD checkpoints to ONNX directly with the exporter script.
python scripts/convert_stable_diffusion_checkpoint_to_onnx.py --model_path="CompVis/stable-diffusion-v1-4" --output_path="./stable_diffusion_onnx"
All of the previous features are very cool. As maintainers of open-source libraries, we know about the importance of high quality documentation to make it as easy as possible for anyone to try out the library.
💅 Because of this, we did a Docs sprint and we're very excited to do a first release of our documentation. This is a first version, so there are many things we plan to add (and contributions are always welcome!).
Some highlights of the docs:
- Techniques for optimization
- The training overview
- A contributing guide
- In-depth API docs for schedulers
- In-depth API docs for pipelines
And while we were doing all of the above, the community did not stay idle! Here are some highlights (although not exhaustive) of what has been done out there
Create 🔥 videos with Stable Diffusion by exploring the latent space and morphing between text prompts. You can:
- Dream different versions of the same prompt
- Morph between different prompts
The Stable Diffusion Videos tool is pip-installable, comes with a Colab notebook and a Gradio notebook, and is super easy to use!
Here is an example
from stable_diffusion_videos import walk

video_path = walk(['a cat', 'a dog'], [42, 1337], num_steps=3, make_video=True)
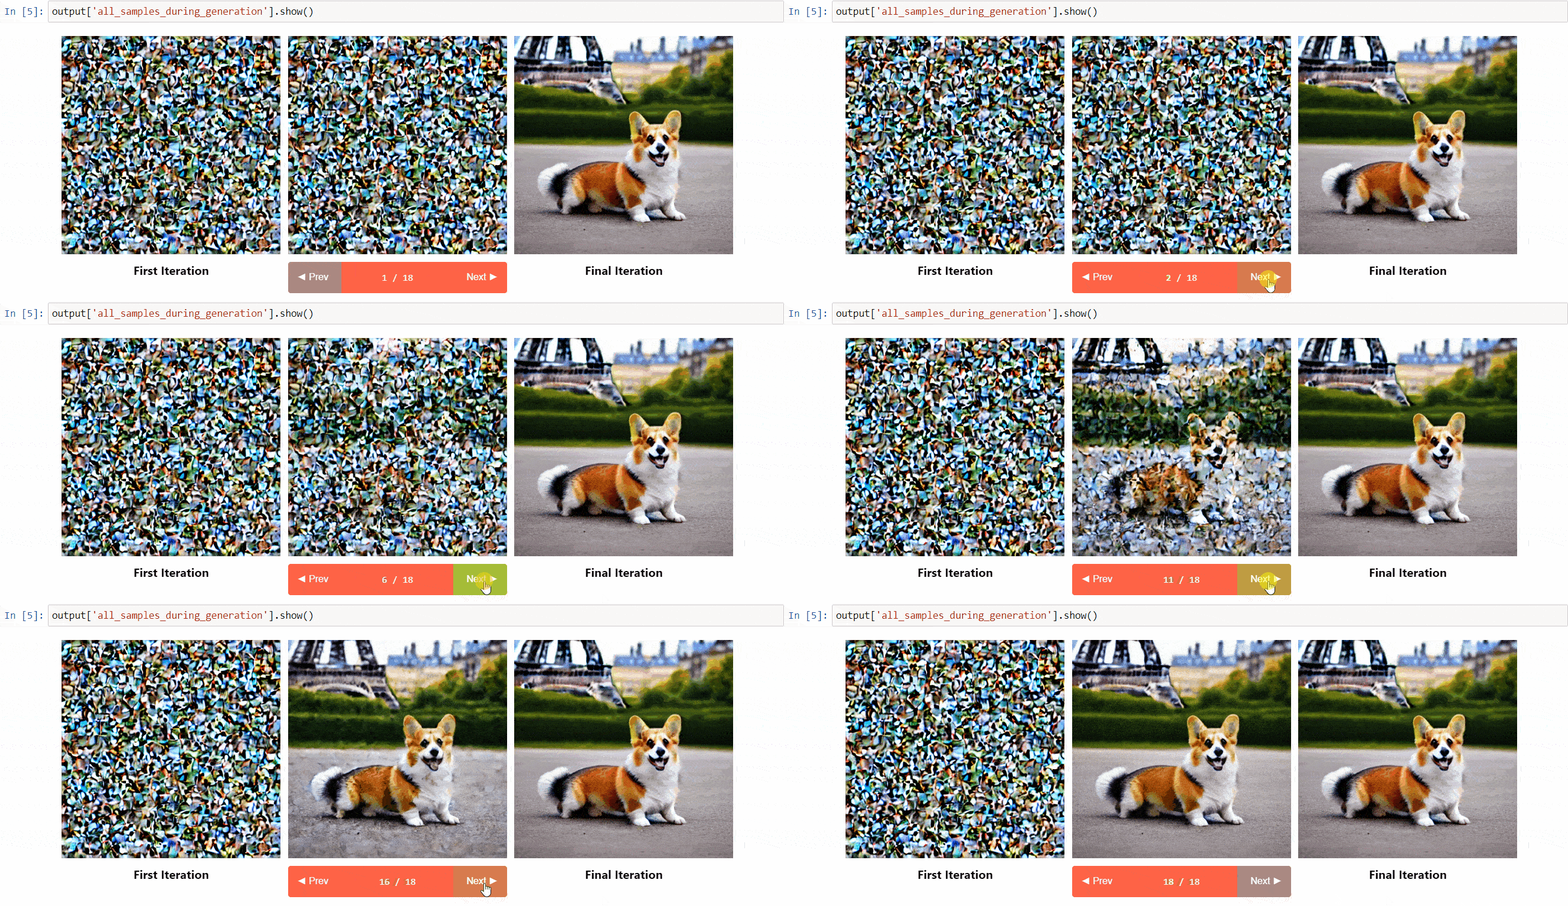
Diffusers interpret is an explainability tool built on top of diffusers. It has cool features such as:
- See all the images in the diffusion process
- Analyze how each token in the prompt influences the generation
- Analyze within specified bounding boxes if you want to understand a part of the image

# pass pipeline to the explainer class
explainer = StableDiffusionPipelineExplainer(pipe)

# generate an image with `explainer`
prompt = "Corgi with the Eiffel Tower"
output = explainer(
    prompt,
    num_inference_steps=15
)

output.normalized_token_attributions # (token, attribution_percentage)
#[('corgi', 40),
# ('with', 5),
# ('the', 5),
# ('eiffel', 25),
# ('tower', 25)]The name says it all! The goal of JSD was to train a model that also captures information about the culture, identity and unique expressions. It was trained with 100 million images with Japanese captions. You can read more about how the model was trained in the model card
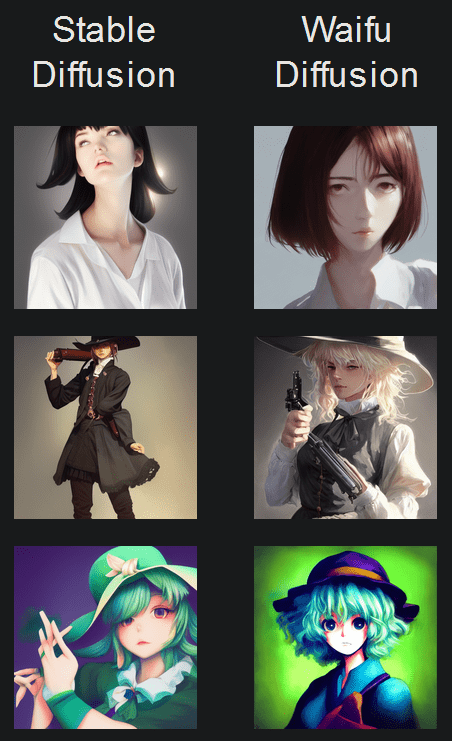
Waifu Diffusion is a fine-tuned SD model for high-quality anime images generation.
(Image from the tool repository)Cross Attention Control allows fine control of the prompts by modifying the attention maps of the diffusion models. Some cool things you can do:
- Replace a target in the prompt (e.g. replace cat by dog)
- Reduce or increase the importance of words in the prompt (e.g. if you want less attention to be given to "rocks")
- Easily inject styles
And much more! Check out the repo.
One of the most impressive early demos of Stable Diffusion was the reuse of seeds to tweak images. The idea is to use the seed of an image of interest to generate a new image, with a different prompt. This yields some cool results! Check out the Colab
I hope you enjoy reading this! Remember to give a Star in our GitHub Repository and join the Hugging Face Discord Server, where we have a category of channels just for Diffusion models. Over there the latest news in the library are shared!
Feel free to open issues with feature requests and bug reports! Everything that has been achieved couldn't have been done without such an amazing community.


