-
Notifications
You must be signed in to change notification settings - Fork 1
Board: Arduino Due
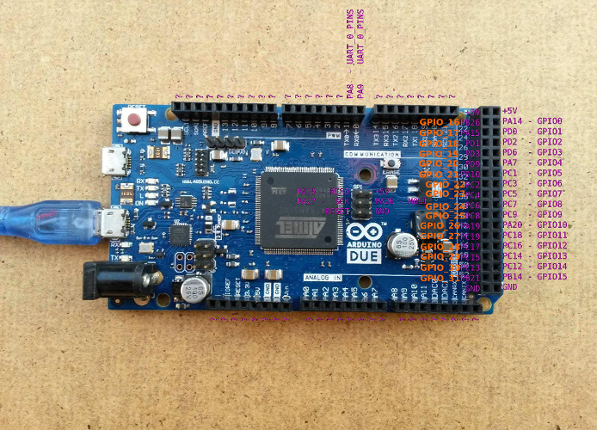
The Arduino Due is one of the newest members of the Arduino family. It is the first ARM Cortex-M based board supported by Arduino, using the same pin layout and being mostly compatible to the existing shields (be careful for the changed pin voltage - 3V3 instead of 5V).
NOTE: In case you are wondering if flashing RIOT on your Arduino Due will overwrite the Arduino bootloader: you can be reassured. After flashing RIOT you can without any intermediate steps just go over to flashing Arduino sketches again.
| MCU | SAM3X8E |
|---|---|
| Family | ARM Cortex-M3 |
| Vendor | Atmel |
| Package | LQFP144 |
| RAM | 96Kb (64Kb + 32Kb) |
| Flash | 512Kb |
| Frequency | 84MHz |
| FPU | no |
| Timers | 3 (3x 32bit) |
| ADCs | 1x 15 channel 6 to 12-bit |
| UARTs | 5 |
| SPIs | 1 |
| I2Cs | 2 (called TWI) |
| Vcc | 2.0V - 3.6V |
| Datasheet / Reference Manual | Datasheet and Reference Manual |
| Board Manual | Board Manual |
| Pins | PINs |
Please refer to this document for RIOTs static pin mapping chosen for this board. This mapping is completely arbitrary, it can be adjusted in boards/arduino-due/include/periph_conf.h
NOTE: If you install a GPIO interrupt on a pin, you can not use other pins on this GPIO-Bank and the board deadlocks if you try to.
Flashing RIOT on the Arduino Due is quite straight forward, just connect your Arduino Due using the programming port to your host computer and type:
make flash
This should take care of everything!
RIOTs Makefile carries out a two step process for flashing the Arduino Due:
-
the (serial) programming port is programmed to run at 1200bps. This will trigger the on-board ATMega to reset the SAM3X and boot it to the internal serial flash bootloader
-
we use the open
bossactool to write the new code into the SAM3X's flash
NOTES:
- if
bossacfails to flash your Arduino Due and emits an error like 'Auto scan for device failed' or 'No device found on [serial port designation] ', try to press the ERASE button of your Arduino Due (during at least one second) before trying again to flash up RIOT. - once the flashing process of your Due is done, you have to press the RESET button to actually start RIOT.
RIOT - The friendly Operating System for the Internet of Things
Homepage | [GitHub] (https://github.com/RIOT-OS/) | Developers Mailing List | Users Mailing List | Twitter @RIOT_OS
- Family: ARM
- Board: Airfy Beacon
- Board: Arduino Due
- Board: CC2538DK
- Board: CC2650STK
- Board: HikoB Fox
- Board: IoT LAB M3
- Board: LimiFrog-v1
- Board: mbed_lpc1768
- Board: MSB-IoT
- Board: MSBA2
- Board: Nucleo-L1
- Board: Nucleo-F334
- Board: Nucleo-F303
- Board: Nucleo-F091
- Board: Mulle
- Board: OpenMote
- Board: PCA1000x (nRF51822 Development Kit)
- Board: Phytec phyWAVE-KW22
- Board: RFduino
- Board: SAMR21-xpro
- Board: SAML21-xpro
- Board: Seeeduino Arch-Pro
- Board: Spark Core
- Board: STM32F0discovery
- Board: STM32F3discovery
- Board: STM32F4discovery
- Board: UDOO
- Board: yunjia-nrf51822
- Board: Zolertia remote
- Family: ATmega
- Board: Arduino Mega2560
- Board: Arduino Uno
- Board: Arduino Duemilanove
- Family: MSP430
- Board: MSB-430H
- Board: TelosB
- Board: WSN430
- Board: Zolertia Z1
- Board: eZ430-Chronos
- Family: native
- Board: native
- Family: x86
- Board: Intel Galileo
