npx create-next-app nextjs-blog --use-npm --example "https://github.com/vercel/next-learn/tree/master/basics/dynamic-routes-starter"
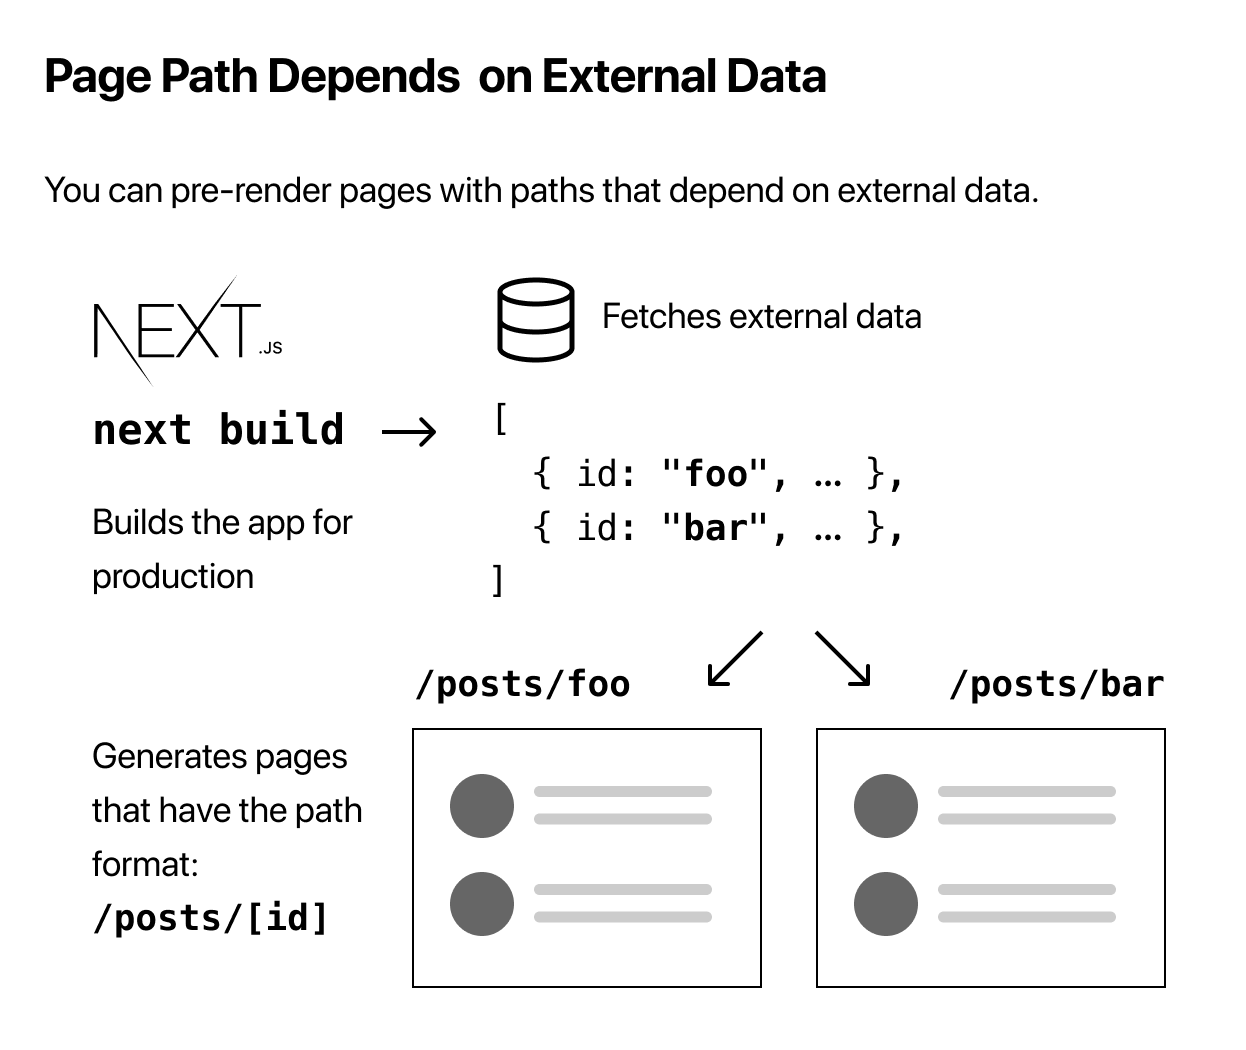
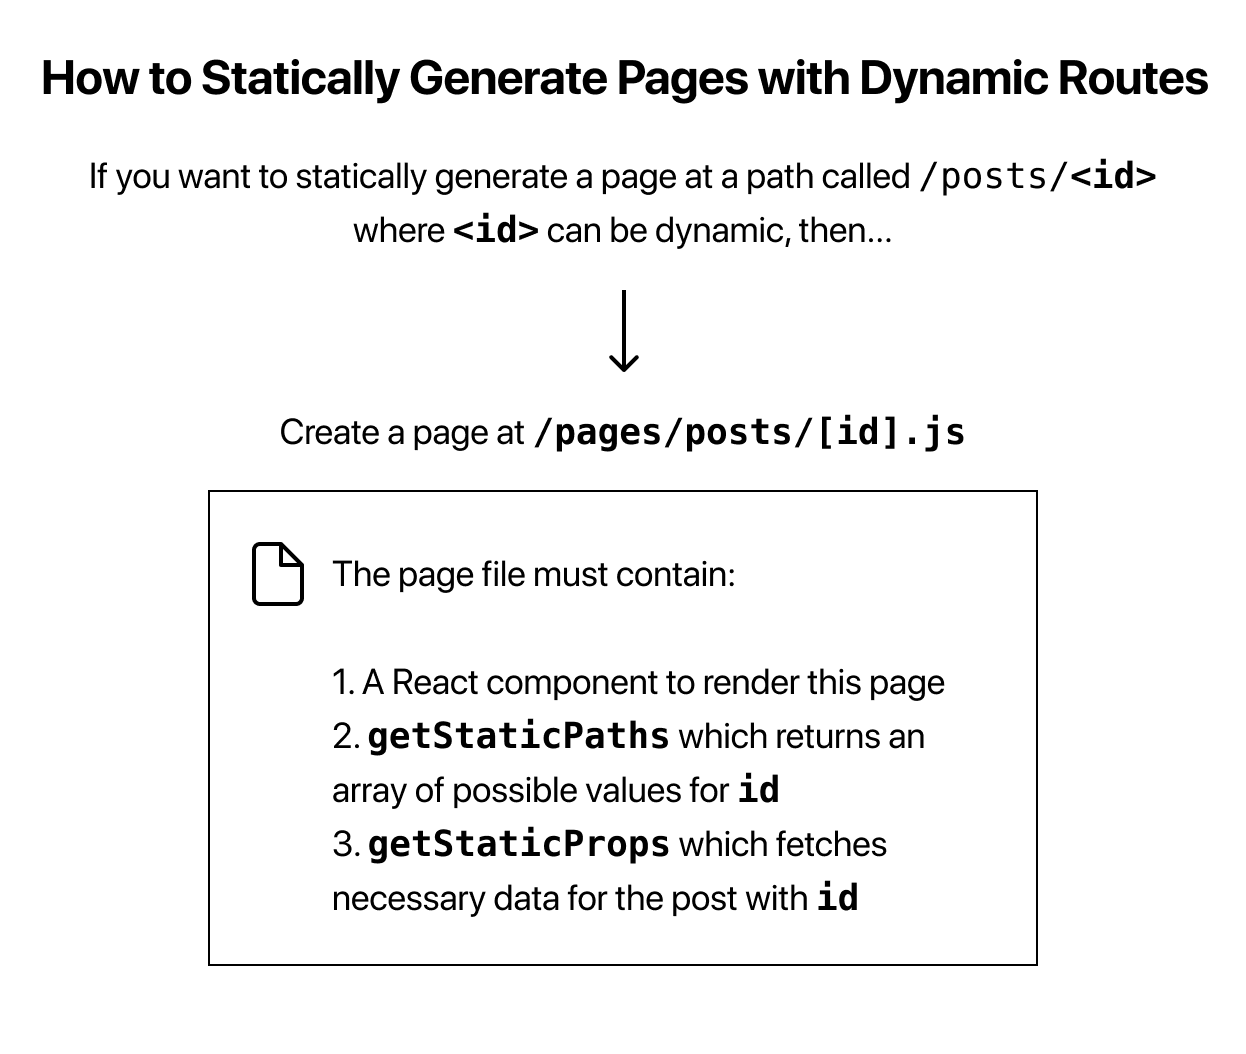
In pages/posts/[id].js, we’ll write code that will render a post page — just like other pages we’ve created.
import Layout from '../../components/layout'

export default function Post() {
  return <Layout>...</Layout>
}
We’ll export an async function called getStaticPaths from this page. In this function, we need to return a list of possible values for id.
import Layout from '../../components/layout'

export default function Post() {
  return <Layout>...</Layout>
}

export async function getStaticPaths() {
  // Return a list of possible value for id
}
import Layout from '../../components/layout'

export default function Post() {
  return <Layout>...</Layout>
}

export async function getStaticPaths() {
  // Return a list of possible value for id
}
implement getStaticProps again - this time, to fetch necessary data for the blog post with a given id. getStaticProps is given params, which contains id (because the file name is [id].js).
import Layout from '../../components/layout'

export default function Post() {
  return <Layout>...</Layout>
}

export async function getStaticPaths() {
  // Return a list of possible value for id
}

export async function getStaticProps({ params }) {
  // Fetch necessary data for the blog post using params.id
}
First, let’s set up the files:
- Create a file called [id].js inside the pages/posts directory.
- Also, remove first-post.js inside the pages/posts directory — we’ll no longer use this.
- open lib/posts.js again and add the following getPostData function at the bottom. It will return the post data based on id:
export function getPostData(id) {
  const fullPath = path.join(postsDirectory, `${id}.md`)
  const fileContents = fs.readFileSync(fullPath, 'utf8')

  // Use gray-matter to parse the post metadata section
  const matterResult = matter(fileContents)

  // Combine the data with the id
  return {
    id,
    ...matterResult.data
  }
}
- open pages/posts/[id].js and replace this line:
import { getAllPostIds } from '../../lib/posts'
import { getAllPostIds, getPostData } from '../../lib/posts'

export async function getStaticProps({ params }) {
  const postData = getPostData(params.id)
  return {
    props: {
      postData
    }
  }
}
- Post component to use postData. In pages/posts/[id].js replace the exported Post component with the following code:
export default function Post({ postData }) {
  return (
    <Layout>
      {postData.title}
      <br />
      {postData.id}
      <br />
      {postData.date}
    </Layout>
  )
}
To render markdown content, we’ll use the remark library,install it:
npm install remark remark-html
Then, open lib/posts.js and add the following imports to the top of the file:
import { remark } from 'remark'
import html from 'remark-html'
- And update the getPostData() function in the same file as follows to use remark:
export async function getPostData(id) {
  const fullPath = path.join(postsDirectory, `${id}.md`)
  const fileContents = fs.readFileSync(fullPath, 'utf8')

  // Use gray-matter to parse the post metadata section
  const matterResult = matter(fileContents)

  // Use remark to convert markdown into HTML string
  const processedContent = await remark()
    .use(html)
    .process(matterResult.content)
  const contentHtml = processedContent.toString()

  // Combine the data with the id and contentHtml
  return {
    id,
    contentHtml,
    ...matterResult.data
  }
}
- update getStaticProps in pages/posts/[id].js to use await when calling getPostData:
export async function getStaticProps({ params }) {
  // Add the "await" keyword like this:
  const postData = await getPostData(params.id)
  // ...
}
- update the Post component in pages/posts/[id].js to render contentHtml using dangerouslySetInnerHTML:
export default function Post({ postData }) {
  return (
    <Layout>
      {postData.title}
      <br />
      {postData.id}
      <br />
      {postData.date}
      <br />
      <div dangerouslySetInnerHTML={{ __html: postData.contentHtml }} />
    </Layout>
  )
}
- add an import for next/head at the top of the file and add the title tag by updating the Post component:
// Add this import
import Head from 'next/head'

export default function Post({ postData }) {
  return (
    <Layout>
      {/* Add this <Head> tag */}
      <Head>
        <title>{postData.title}</title>
      </Head>

      {/* Keep the existing code here */}
    </Layout>
  )
}
To format the date, we’ll use the date-fns library. First, install it:
npm install date-fns
import { parseISO, format } from 'date-fns'

export default function Date({ dateString }) {
  const date = parseISO(dateString)
  return <time dateTime={dateString}>{format(date, 'LLLL d, yyyy')}</time>
}
Open pages/posts/[id].js, then add an import for the CSS file, and replace the Post component with the following code:
// Add this import at the top of the file import utilStyles from '../../styles/utils.module.css'
export default function Post({ postData }) {
  return (
    <Layout>
      <Head>
        <title>{postData.title}</title>
      </Head>
      <article>
        <h1 className={utilStyles.headingXl}>{postData.title}</h1>
        <div className={utilStyles.lightText}>
          <Date dateString={postData.date} />
        </div>
        <div dangerouslySetInnerHTML={{ __html: postData.contentHtml }} />
      </article>
    </Layout>
  )
}
- On your personal GitHub account, create a new repository called nextjs-blog.
- The repository can be public or private. You do not need to initialize it with a README or other files.
Create_a_Vercel_Account import nextjs-blog repository on Vercel.use
You’ll need to Install Vercel for GitHub. You can give it access to All Repositories. Once you’ve installed Vercel, import nextjs-blog.

