This document shows how to run the watson-discovery-ui application in a container running on Red Hat OpenShift.
You will need a running OpenShift cluster, or OKD cluster. You can provision OpenShift on the IBM Cloud.
- Clone the repo
- Create your Watson Discovery service
- Load Discovery files and configure collection
- Create an OpenShift project
- Create the config map
- Run the application
git clone https://github.com/IBM/watson-discovery-uiTo create your Watson Discovery service:
-
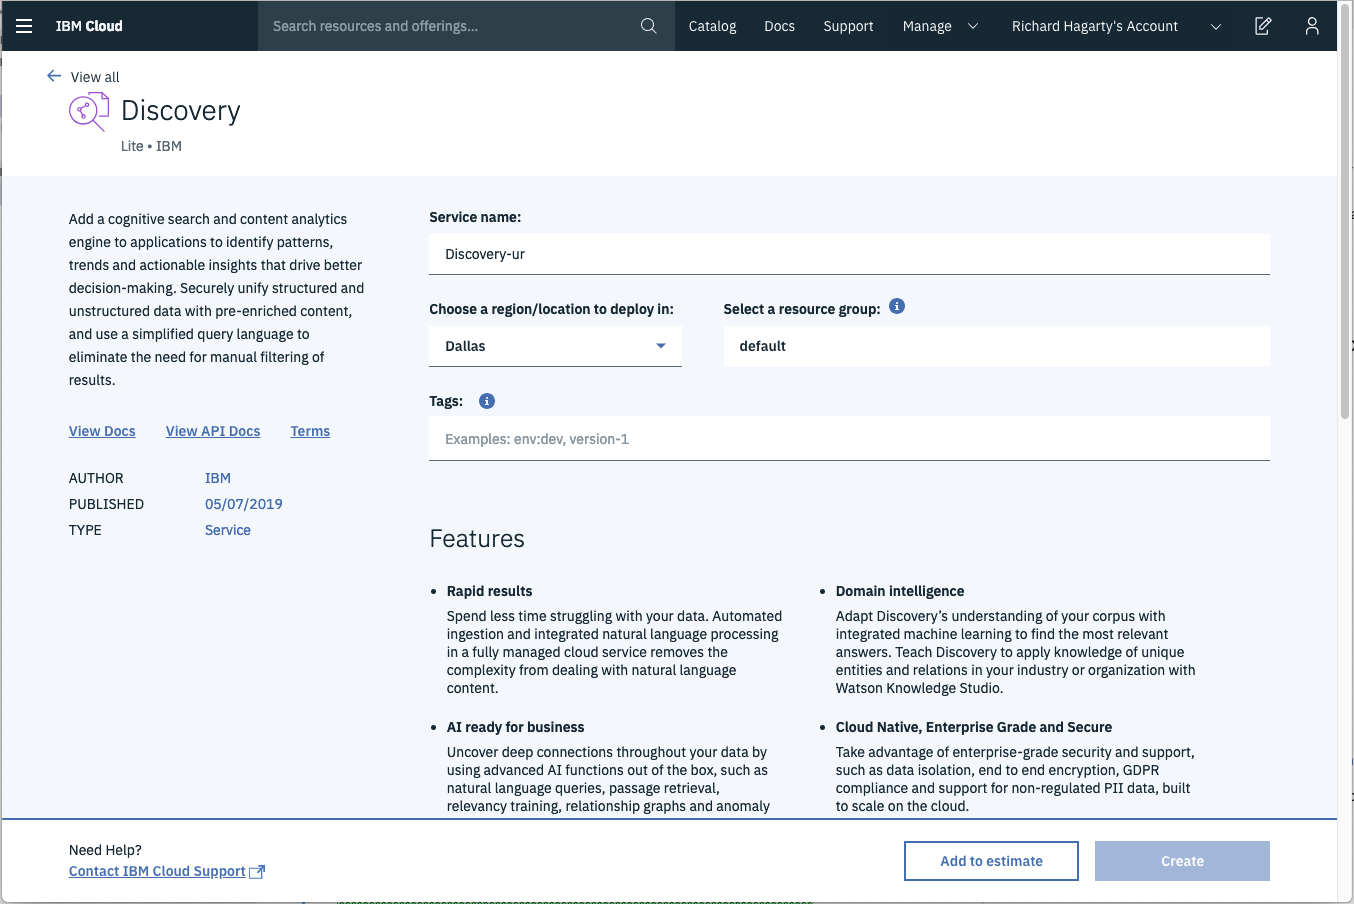
Click Create resource on your IBM Cloud dashboard.
-
Search the catalog for
discovery. -
Click the Discovery tile to launch the create panel.
From the panel, enter a unique name, a region and resource group, and a plan type (select the default lite plan). Click Create to create and enable your service.
Launch the Watson Discovery tool. Create a new data collection by selecting the Update your own data option. Give the data collection a unique name.
When prompted to get started by uploading your data, select and upload the first 2 json documents located in your local data/airbnb directory. Once uploaded, you can then use the Configure data option to add the Keyword Extraction enrichment, as show here:
Note: failure to do this will result in no keywords being shown in the app.
Once the enrichments are selected, use the Apply changes to collection button to upload the remaining json files found in data/airbnb. Warning - this make take several minutes to complete.
There may be a limit to the number of files you can upload, based on your IBM Cloud account permissions.
-
Using the OpenShift web console, select the
Application Consoleview. -
Use the
+Create Projectbutton to create a new project, then click on your project to open it. -
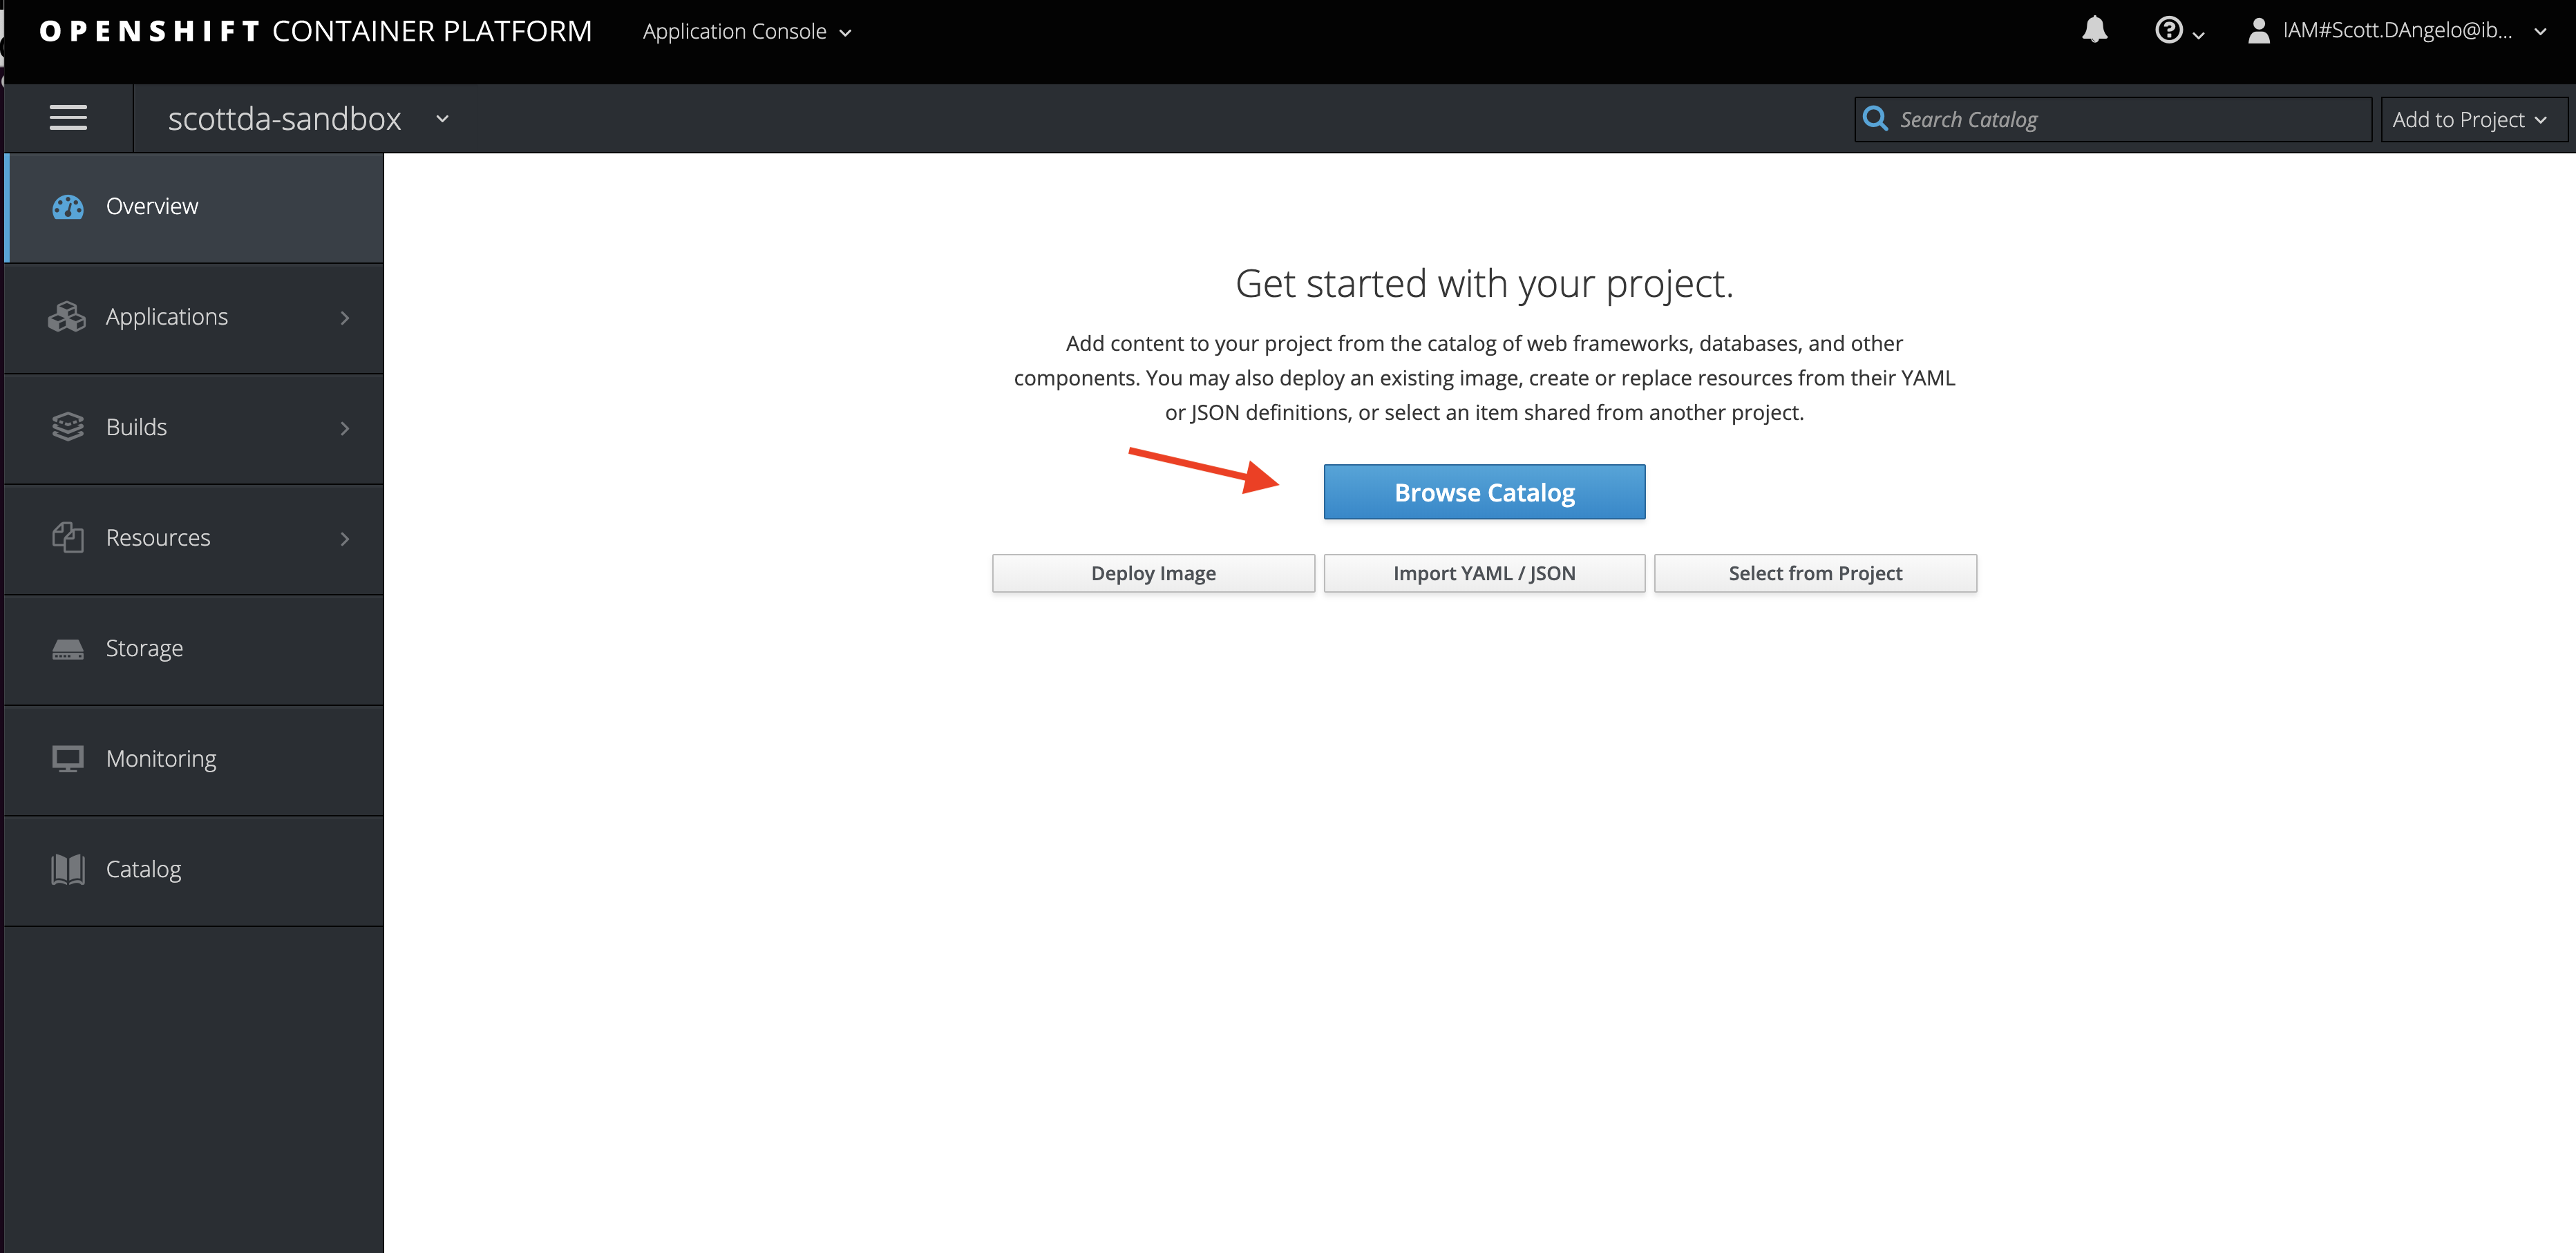
In the
Overviewtab, click onBrowse Catalog. -
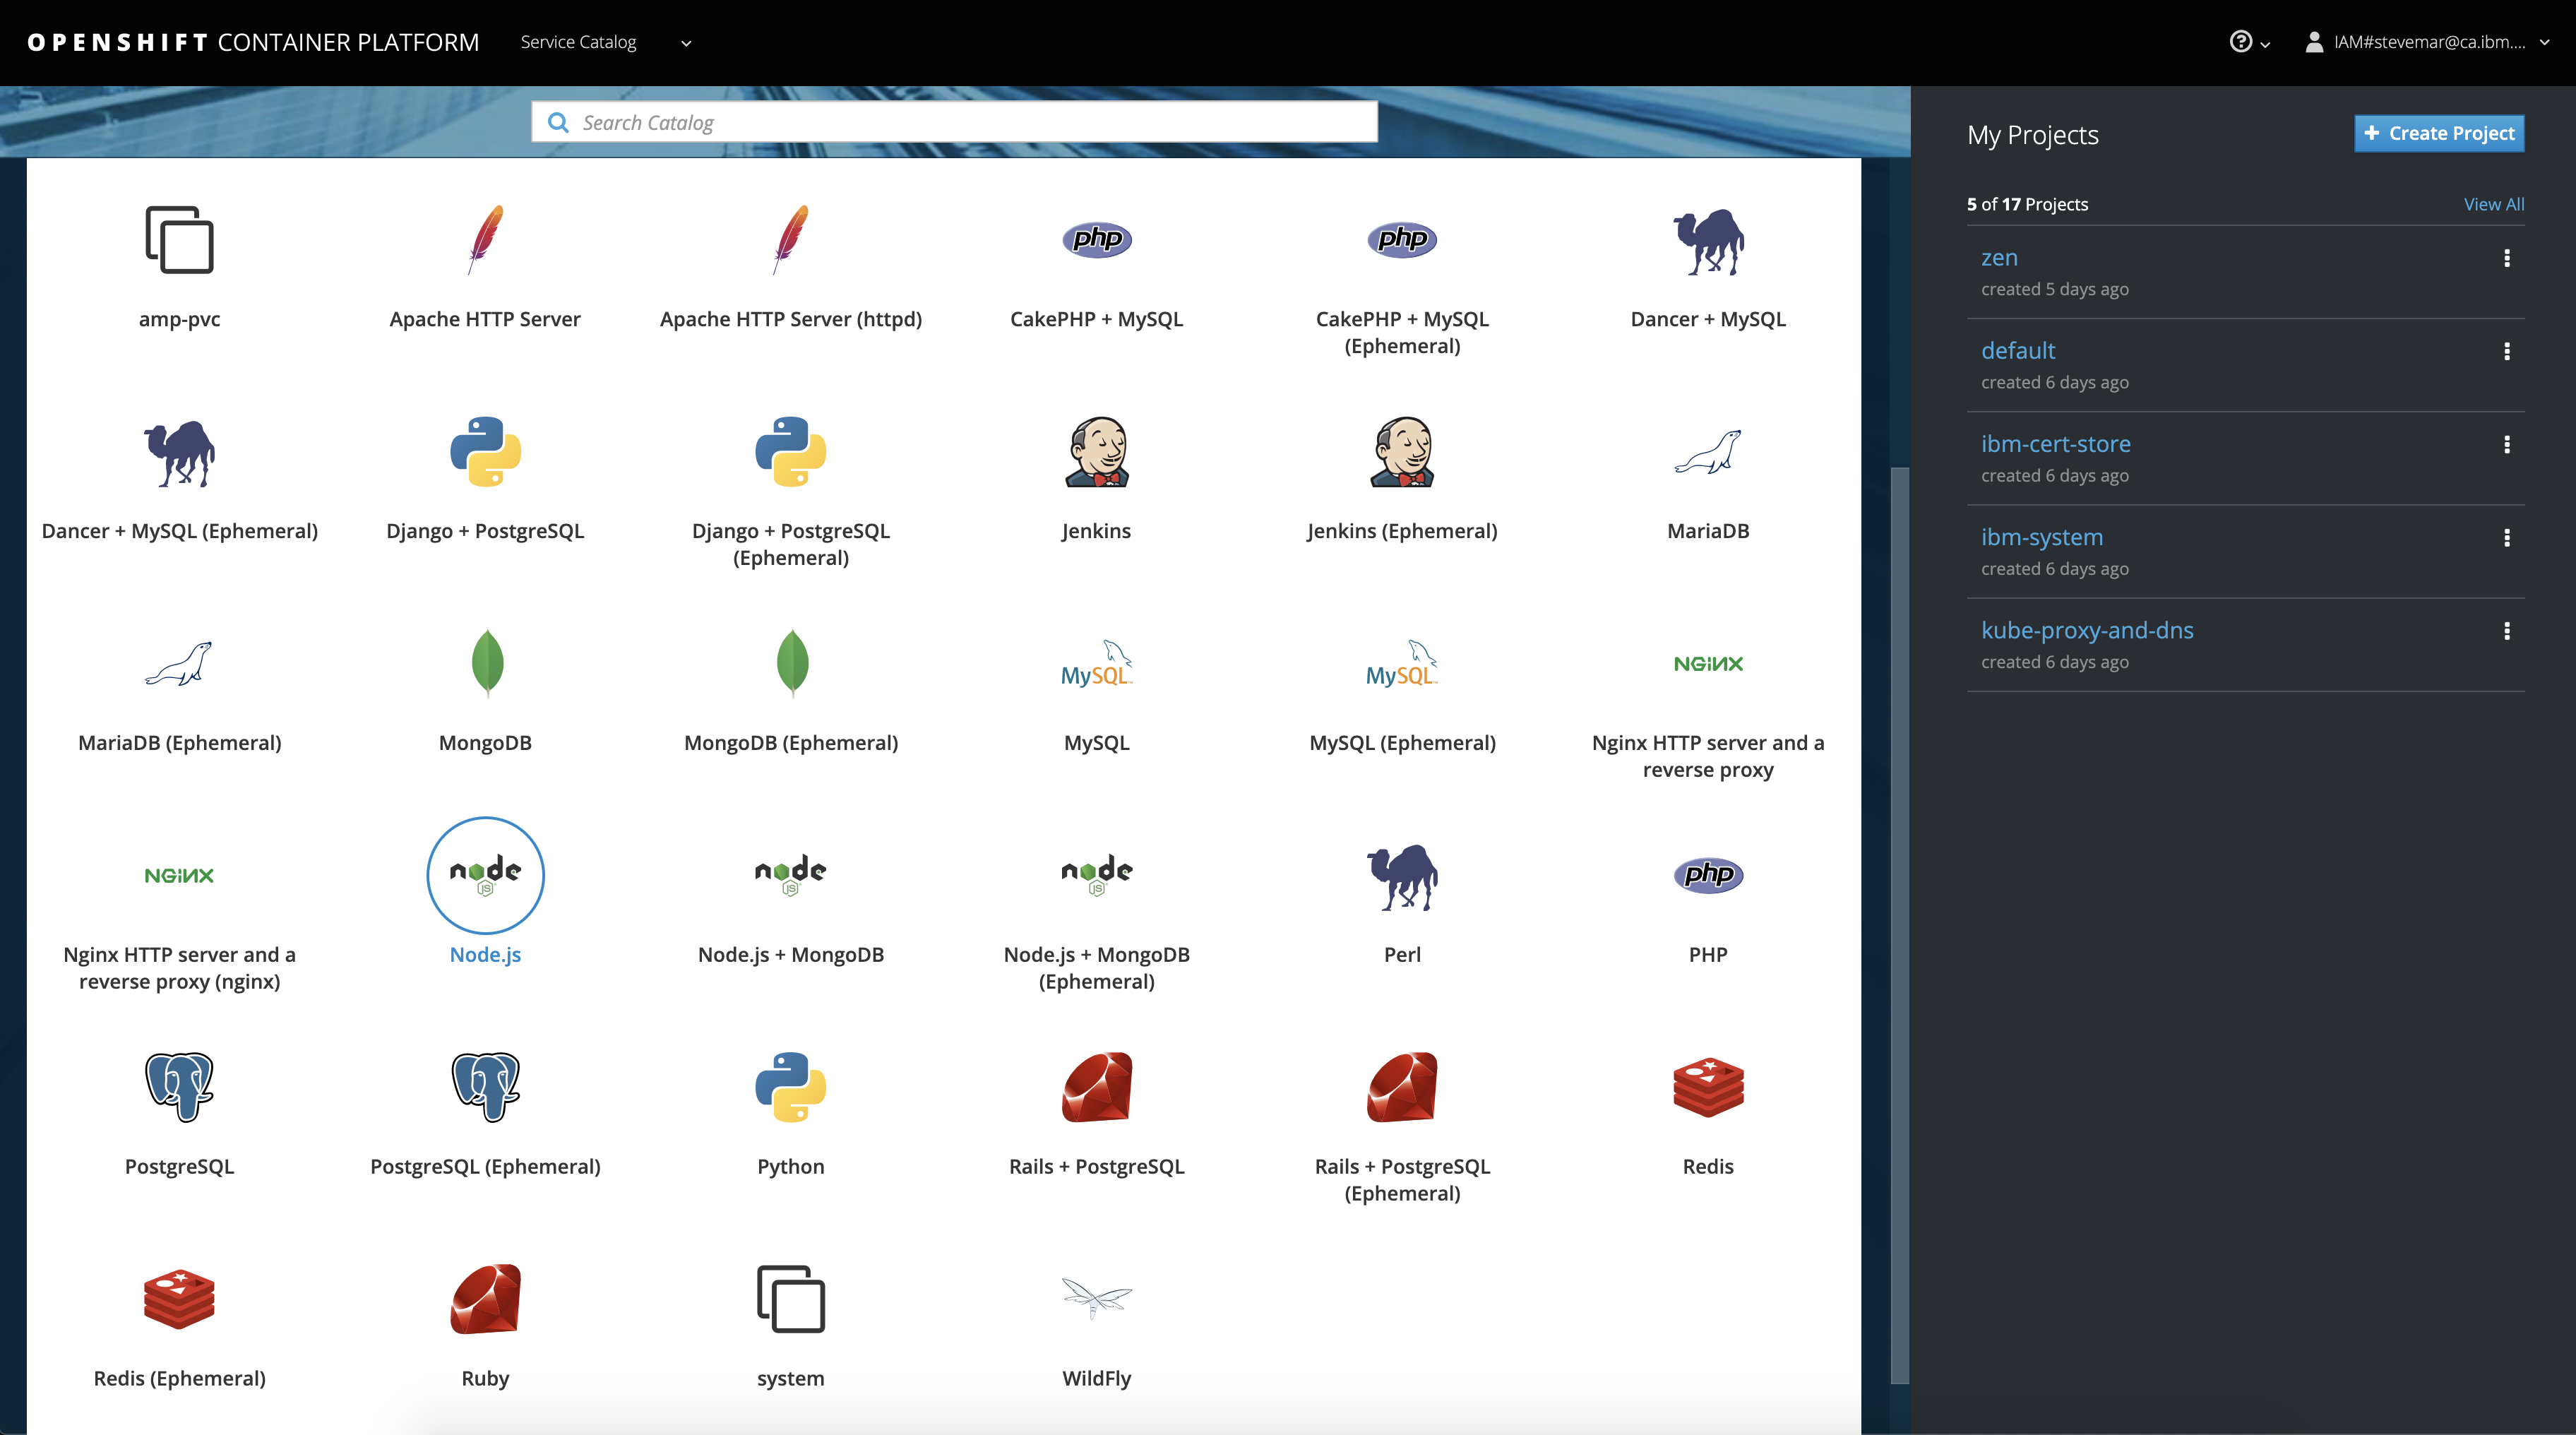
Choose the
Node.jsapp container and clickNext. -
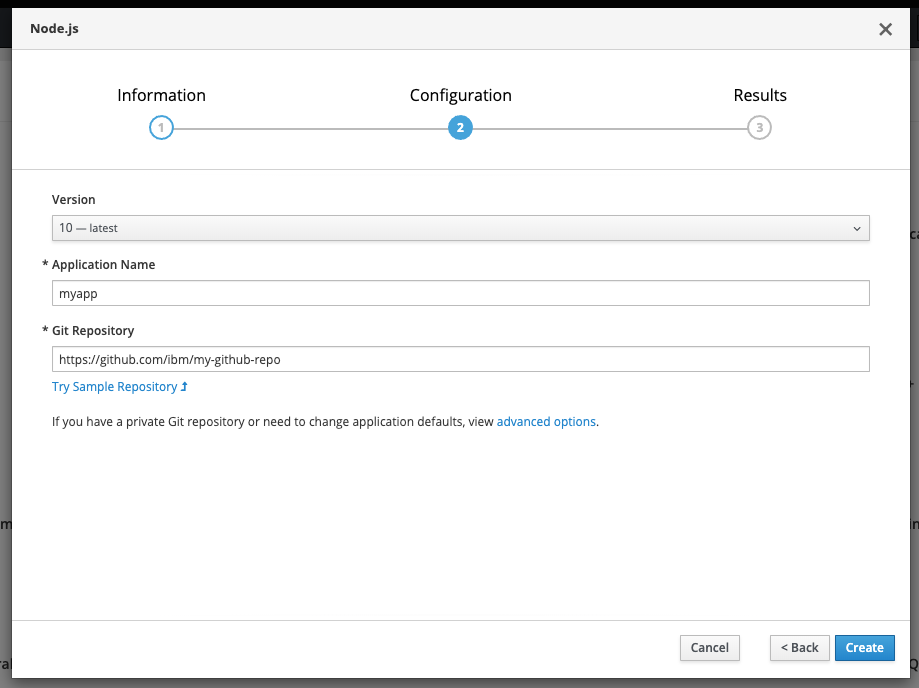
Give your app a name and add
https://github.com/IBM/watson-discovery-uifor the github repo, then clickCreate.
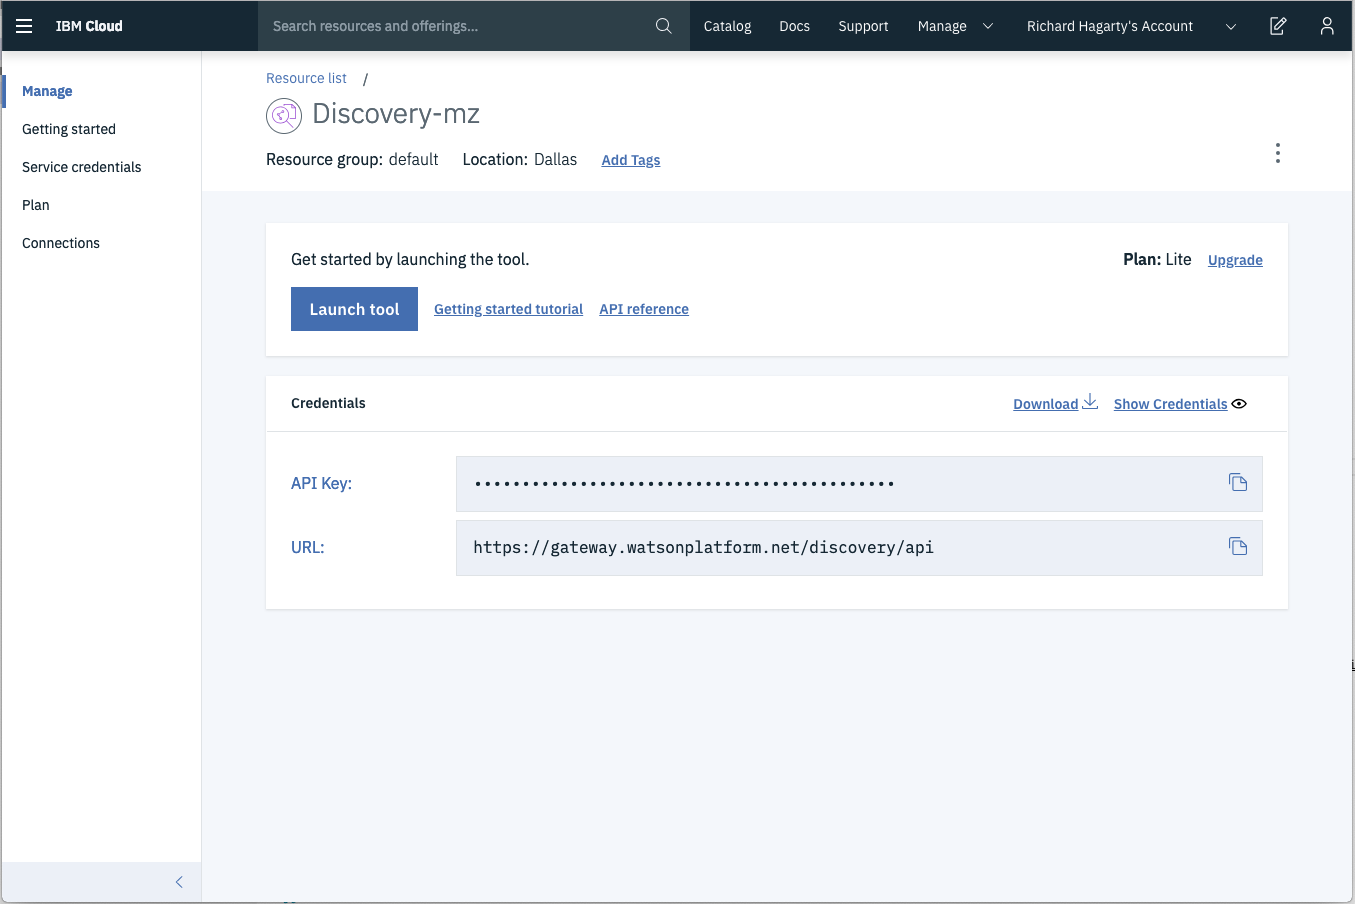
To complete the config map instructions below, you will need to gather some key values from your Discovery service.
-
You can find your service credentials on the home page of your Discovery service. This includes your
API Keyand serviceURLvalues: -
From your Discovery service collection page, you can find the credentials for your collection by clicking the dropdown button located at the top right. Included will be the
Collection IDandEnvironment IDvalues.
Now that we know where to find these value, let's move on to creating the config map.
Click on the Resources tab and choose Config Maps and then click the Create Config Map button:
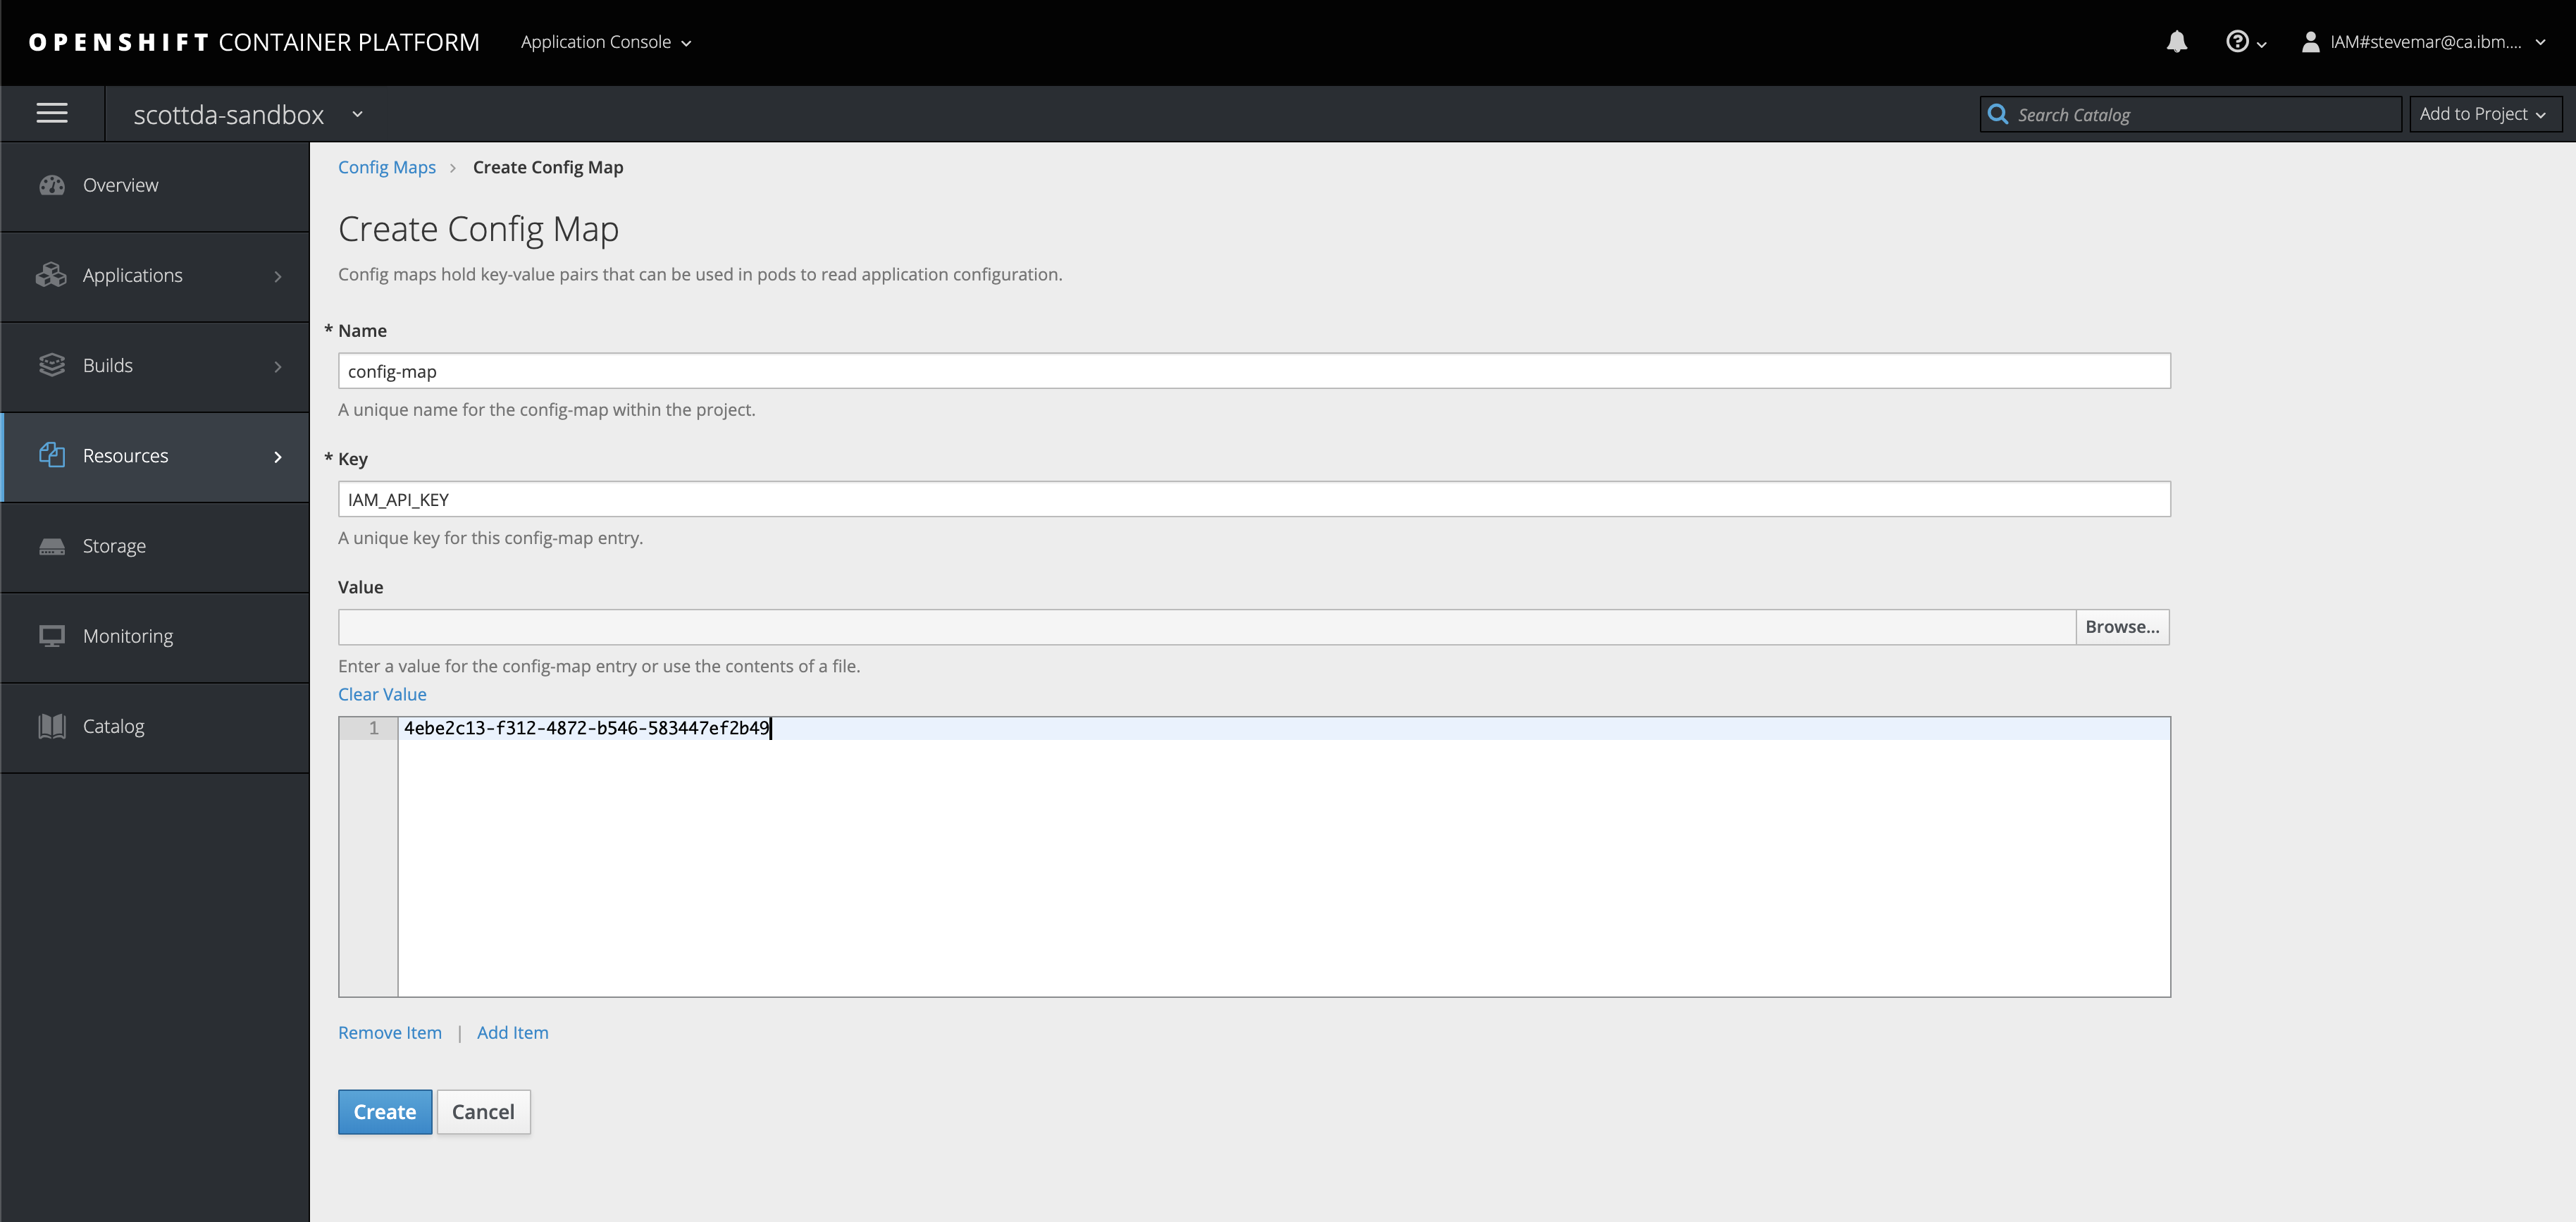
Use the Create Config Map panel to add our application parameters.
- Provide a
Namefor the config map. - Add a key named
DISCOVERY_APIKEYand paste in the API Key underEnter a value.... - Click
Add Itemand add a key namedDISCOVERY_URLand paste in the URL underEnter a value..... - Click
Add Itemand add a key namedPORT, enter 8080 underEnter a value.... - Click
Add Itemand add a key namedDISCOVERY_ENVIRONMENT_IDand paste in the value underEnter a value..... - Click
Add Itemand add a key namedDISCOVERY_COLLECTION_IDand paste in the value underEnter a value..... - Hit the
Createbutton. - Click on your new Config Map's name.
- Click the
Add to Applicationbutton. - Select your application from the pulldown.
- Click
Save.
Go to the Applications tab, choose Deployments to view the status of your application.
- From the OpenShift or OKD UI, under
Applications->Routesyou will see your app. Click on theHostnameto see your Watson Discovery UI app in action. - Save this URL.
