Welcome! 👋 We're happy to have you here. Thank you for your interest in contributing to the Cucumber Visual Studio Code extension.
This guide will provide you with the information you need to start making awesome contributions to this project. If you encounter a problem, please reach out for help through our Discord community or feel free to open an Issue.
We look forward to supporting your contributions! 💖
The following steps will help you to get the extension up and running locally - directly from the source code.
-
Open the repository in Visual Studio Code.
-
Ensure that the Cucumber extension is disabled in case you have installed it from the marketplace.
-
Run
npm installto install the required dependencies. -
Press
F5to build and run the extension in a new window. -
Open a
.featurefile - you should observe gherkin syntax highlighting. -
Finally, open the Output window to view logs from the extension under
Output -> Cucumber Language Server.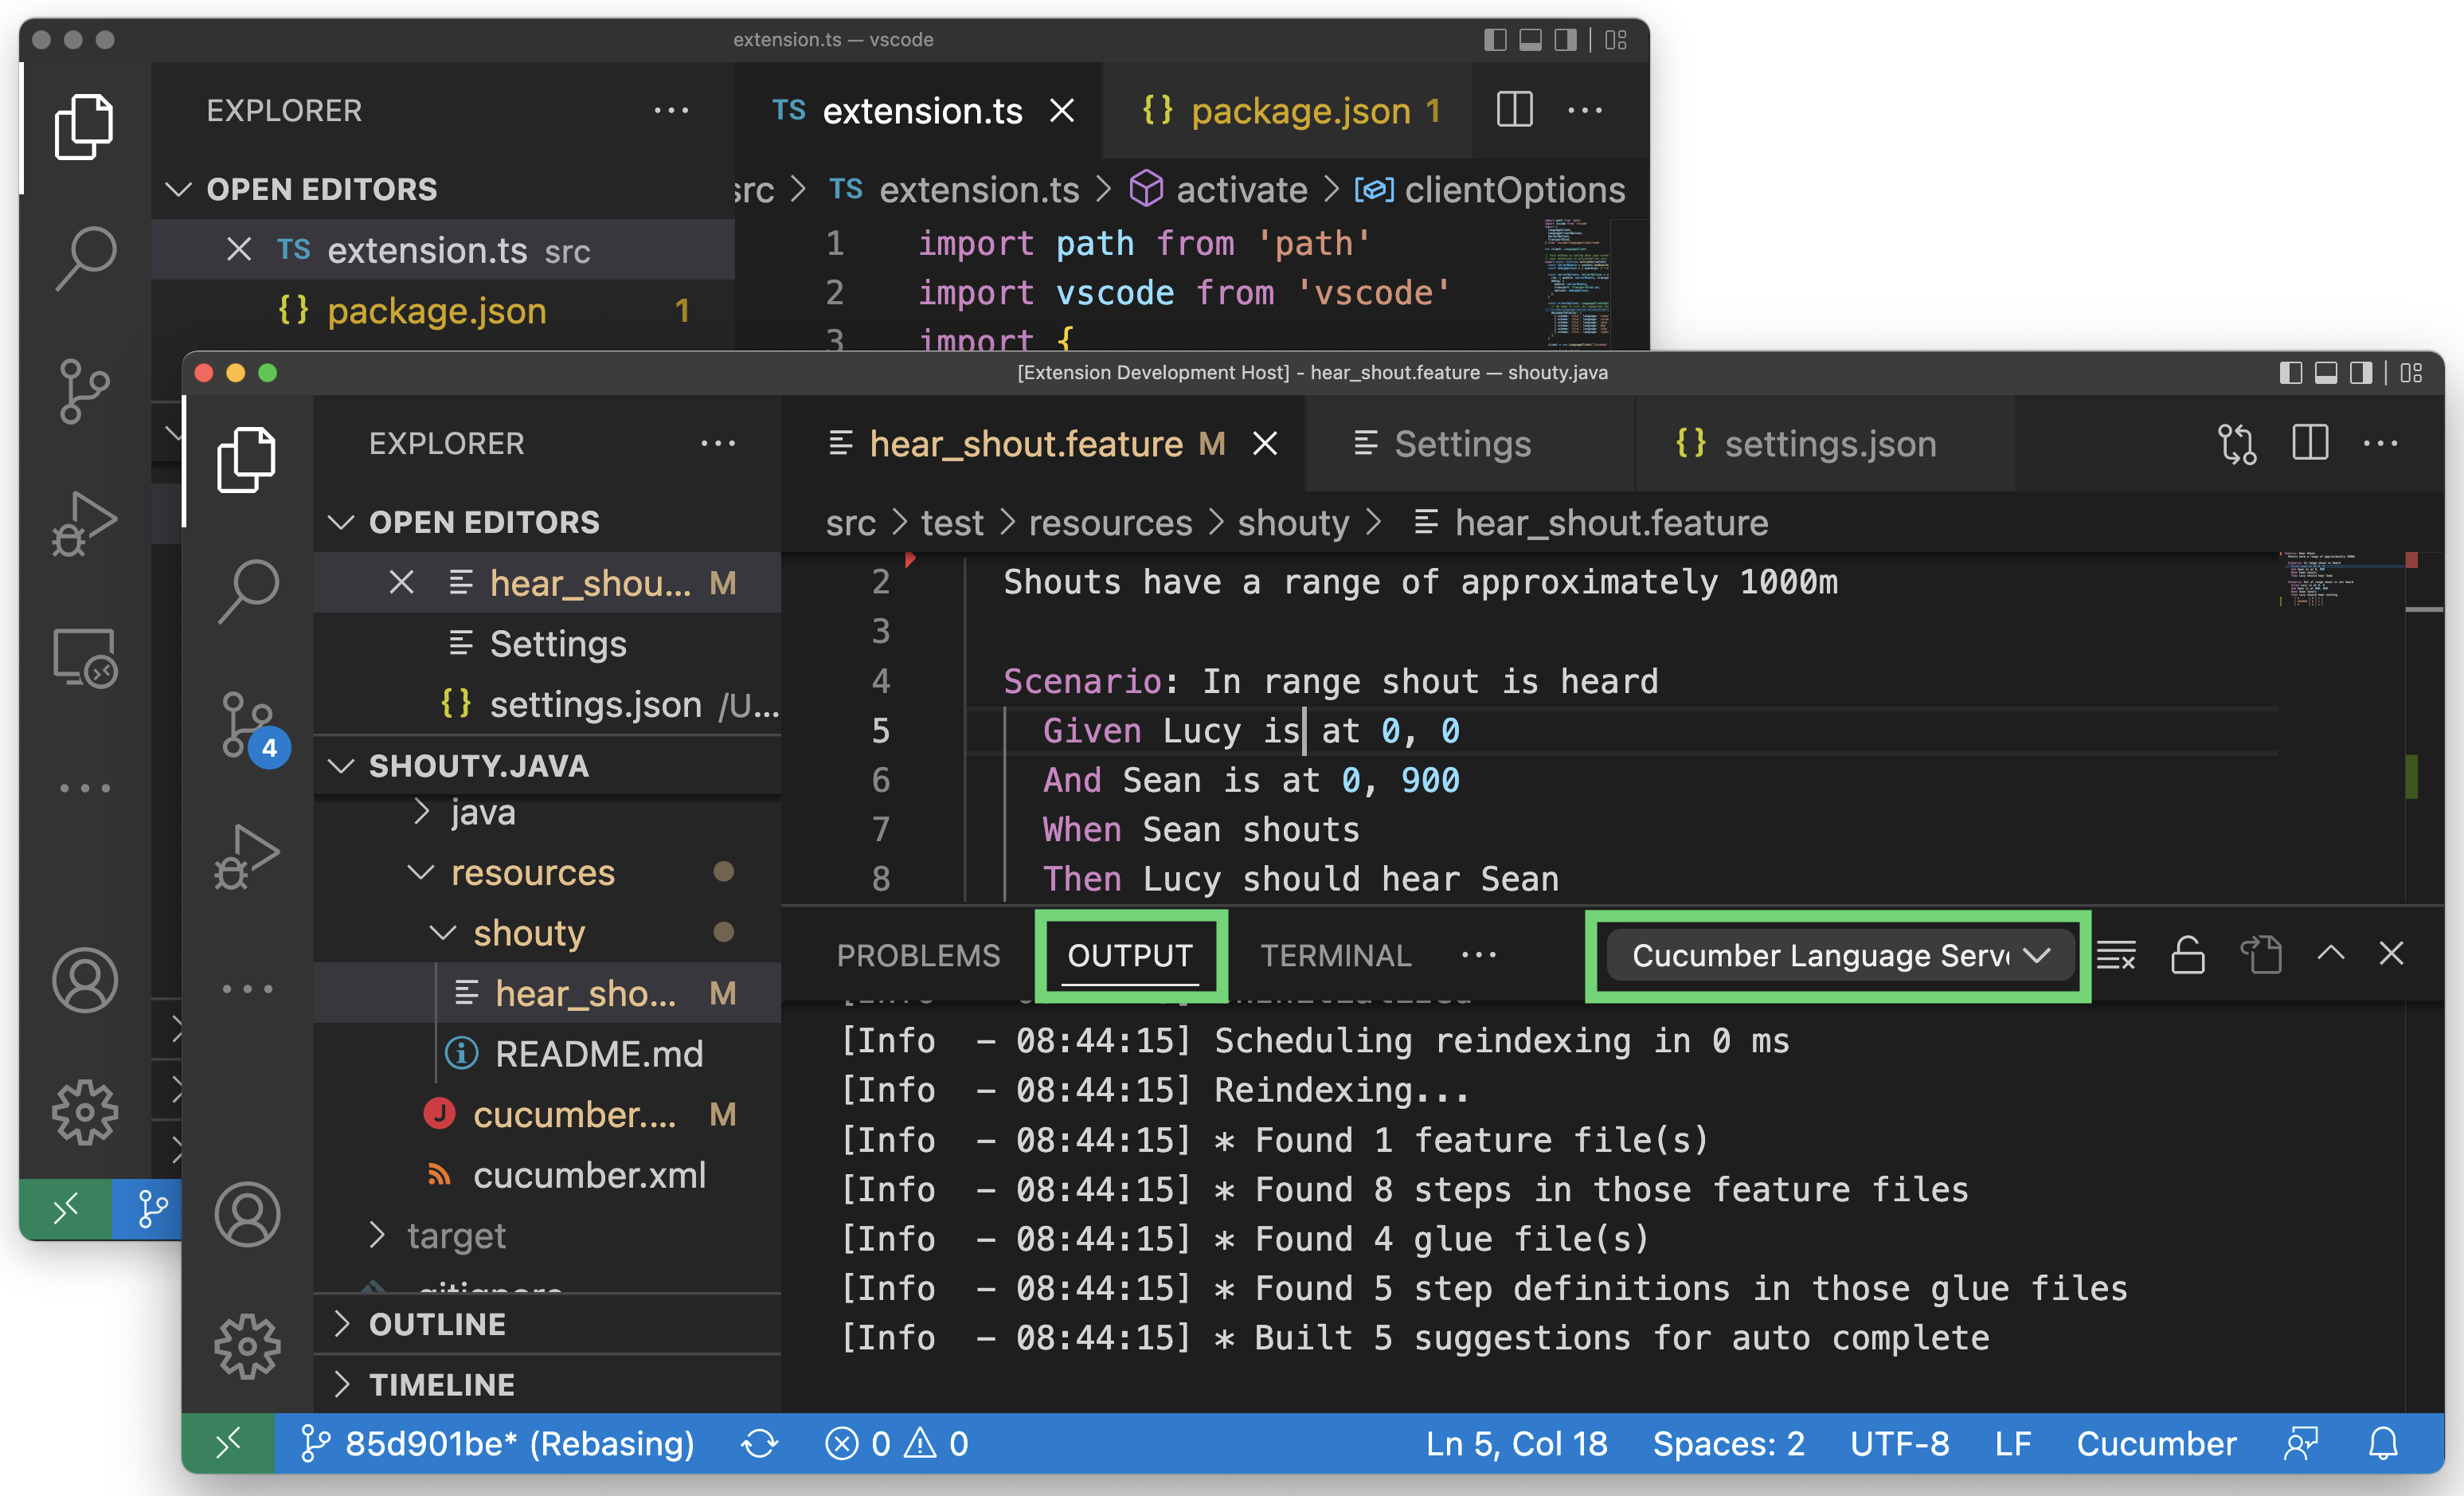
Achievement unlocked! You are now running the extension locally! 🏆
Once you have completed getting started, you may be wondering how you can begin modifying the implementation. 🤔
This extension uses the Language Server Protocol to communicate with Visual Studio Code, which is an open protocol that allows the development of a common implementation - called a language server - that can communicate with different IDEs. This implementation is stored in the Cucumber Language Server and the underlying Cucumber Language Service. Let's integrate local versions of each into our extension so we can modify them.
-
First, clone the Language Server and the Language Service to the same directory in which you cloned the extension. Your directory structure should appear as follows:
directory/
├── language-server/
├── language-service/
└── vscode/
-
At this point, please download and install docker if you have not already done so. A docker installation is required to build the Language Service.
-
Now for the tricky part - we need to build and link to the packages of the repositories we've just cloned.
a. Inside the Language Service repository, build and link the package to your global node modules.
When you run
npm linkin the package directory, npm creates a symlink in the global node modules directory that links to the package. This makes the package appear as if it's globally installed on your system.npm install npm link npm run build
b. Repeat the same inside the Language Server repository, this time linking back to the Language Service we just built - so the Language Server uses our local version.
npm install
npm link @cucumber/language-service
npm link
npm run build
c. Finally, within the extension repository, link back to the Language Server we just built.
npm install
npm link @cucumber/language-server
You can verify that links are correctly configured by executing the below command in each respective repository
la node_modules/@cucumber
lrwxr-xr-x    1 username  staff     24 Jan 22 09:32 language-server -> ../../../language-server
-
Now open the extension repository in Visual Studio Code.
-
As before, press
F5to build and run the extension in a new window.
Phew! That was tough - but all going well, you did it! 🙌 You can now start modifying the implementation and observe those changes running in Visual Studio Code - awesome! 😎
Note: If you require further guidance on these steps, watch a walkthrough on linking with the GitLab VSCode extension - which has a similar setup.
If you need to make further changes to these packages, you have to rebuild them but relinking is not necessary e.g. you only need to run npm run build in the Language Service. To load your changes, either reload the window running the extension (Ctrl+R or Cmd+R on Mac) or relaunch the extension from the debug toolbar in the window that you are developing the extension.
For debugging the extension, set breakpoints within the code. 🐞
A nice way to check you are using the local language server implementations is to modify the snippet templates that generate step definitions for undefined steps. You will find these templates assigned to defaultSnippetTemplate in each of the '<language>Language.ts' files of the Language Service, where each <language> is a programming language in which you can write compatible step definitions. Preferably, use a language you are comfortable with.
Make a small change to a selected snippet - such as adding a comment; rebuild the language service and reload the extension (see Rebuilding). Ensure you have an existing step definition matching extension settings (see generate step definition) and a feature file containing an undefined step. Finally, click the Quick Fix on the undefined step to generate the step definition. You should see your template changes reflected in the output.
If your changes are not reflected or something went wrong, we would love to know what happened. Please open an issue and provide as much detail as possible: versions, operating system, error messages, etc. We will help you resolve the issue. 🤝
Before submitting a pull request, there are a few actions that we must ensure to carry out.
-
Format all code to align with project coding standards. This is executed by the pre-commit hook by default.
npm run eslint-fix -
Run the update command for any modifications to extension settings in
README.md, to ensure they are reflected inpackage.json. This is executed by the pre-commit hook by default.npm run update-settings-docs -
Update
.vscodeignorewith the paths of any new or modified files or directories that should be included in the packaged version of the extension. -
Package the extension locally and ensure the command runs without error - see Packaging Extensions for more detail.
npm run package -
Perform manual testing and verify that the extension features are working as expected.
-
Update the CHANGELOG with any changes that users should be made aware of.
Your pull request should be good to go.
The following resources are useful in the development of this extension.
- Visual Studio Code Extension documentation - Comprehensive documentation covering capabilities, guides and guidelines for Visual Studio Code extensions.
- Contributing Guidelines for the Cucumber Language Service - Guidance for contributing to the Cucumber Language Service, the core component responsible for implementing the majority of features in this extension.
- Type definitions for the Visual Studio Code Extension API release used by this extension can be found within the file
node_modules/@types/vscode/index.d.ts.
We want to create a welcoming environment for everyone who is interested in contributing. Visit our Code of Conduct page to learn more about our commitment to an open and welcoming environment.
Making this extension easier to contribute to is truly important. If you feel the contributing guidelines or infrastructure could be improved, please create an issue or raise a pull request - your input is most welcome.