Turi Create simplifies the development of custom machine learning models. You don't have to be a machine learning expert to add recommendations, object detection, image classification, image similarity or activity classification to your app.
- Easy-to-use: Focus on tasks instead of algorithms
- Visual: Built-in, streaming visualizations to explore your data
- Flexible: Supports text, images, audio, video and sensor data
- Fast and Scalable: Work with large datasets on a single machine
- Ready To Deploy: Export models to Core ML for use in iOS, macOS, watchOS, and tvOS apps
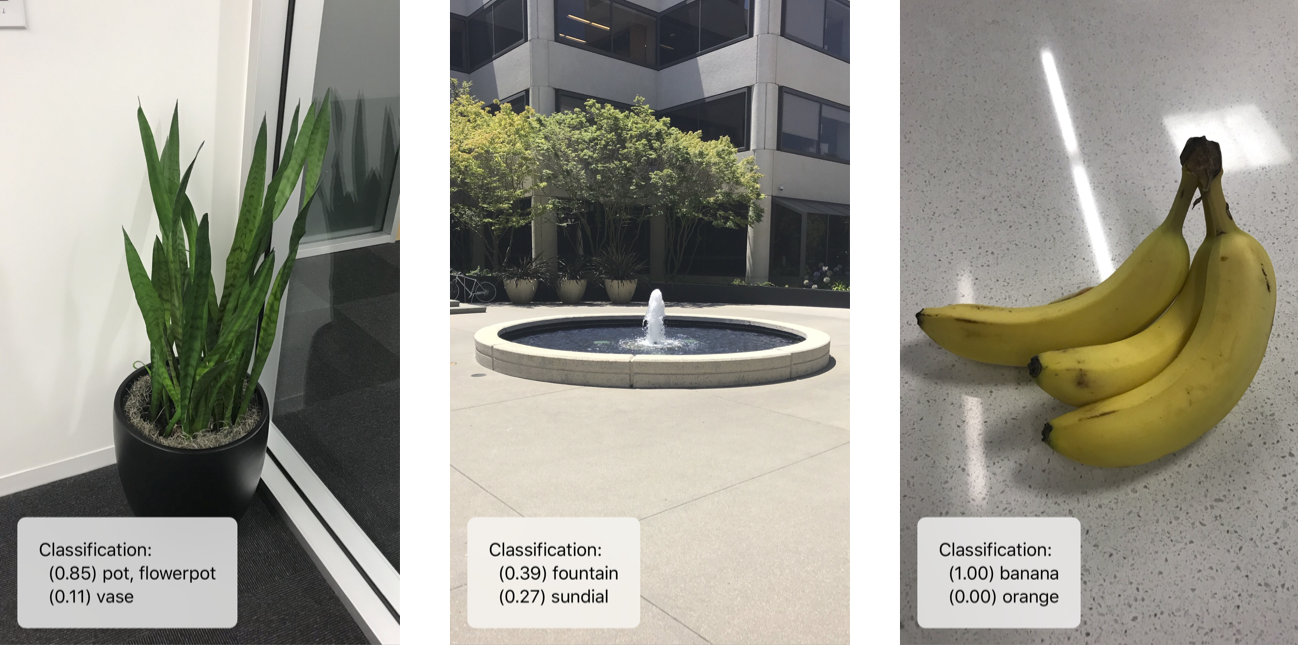
If you want your app to recognize specific objects in images, you can build your own model with just a few lines of code:
import turicreate as tc

# Load data
data = tc.SFrame('photoLabel.sframe')

# Create a model
model = tc.image_classifier.create(data, target='photoLabel')

# Make predictions
predictions = model.predict(data)

# Export to Core ML
model.export_coreml('MyClassifier.mlmodel')
It's easy to use the resulting model in an iOS application:
With Turi Create, you can can tackle a number of common scenarios:
- Recommender systems
- Image classification
- Image similarity
- Object detection
- Activity classifier
- Text classifier
You can also work with essential machine learning models, organized into algorithm-based toolkits:
- Python 2.7 (Python 3.5+ support coming soon)
- x86_64 architecture
- macOS 10.11+, Linux with glibc 2.12+ (including WSL on Windows 10)
For detailed instructions for different varieties of Linux see LINUX_INSTALL.md. For common installation issues see INSTALL_ISSUES.md.
We recommend using virtualenv to use, install, or build Turi Create. Be sure to install virtualenv using your system pip.
pip install virtualenvThe method for installing Turi Create follows the
standard python package installation steps.
To create a Python virtual environment called venv follow these steps:
# Create a Python virtual environment
cd ~
virtualenv venv
To activate your new virtual environment and install Turi Create in this environment, follow these steps:
# Active your virtual environment
source ~/venv/bin/activate

# Install Turi Create in the new virtual environment, pythonenv
(venv) pip install -U turicreateThe package User Guide and API Docs contain more details on how to use Turi Create.
By default, turicreate takes a dependency on the default installation of
mxnet. To enable GPU support after installation of the turicreate package,
please perform the following steps:
- Install CUDA 8.0 (instructions)
- Install cuDNN 5 for CUDA 8.0 (instructions)
Make sure to add the CUDA library path to your LD_LIBRARY_PATH environment
variable. In the typical case, this means adding the following line to your
~/.bashrc file:
export LD_LIBRARY_PATH=/usr/local/cuda/lib64:$LD_LIBRARY_PATHIf you installed the cuDNN files into a separate directory, make sure to
separately add it as well. Next step is to uninstall mxnet and install the
CUDA-enabled mxnet-cu80 package:
(venv) pip uninstall -y mxnet
(venv) pip install mxnet-cu80==0.11.0
Make sure you install the same version of MXNet as the one turicreate depends
on (currently 0.11.0). If you have trouble setting up the GPU, the MXNet
installation instructions may
offer additional help.
If you want to build Turi Create from source, See BUILD.md.
See CONTRIBUTING.md.
